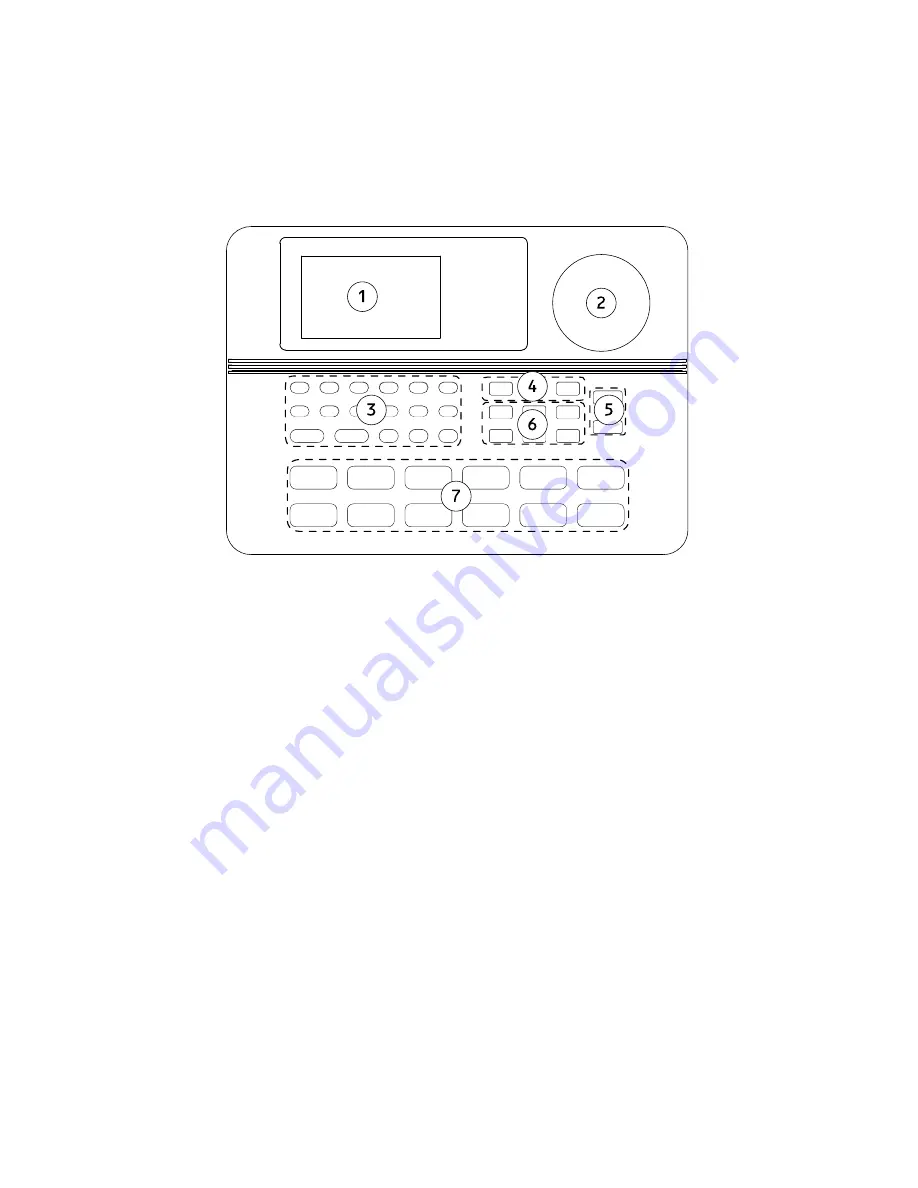
7
Getting Started
This section will cover how to begin using your electronic drum kit. Be sure that your electronic drum kit
setup matches the diagram shown in the Quick Setup Guide as previously shown.
•
Be sure that both the iET01 Trigger Box and the iDM01 Drum Machine are both powered on.
I.
While the unit is powered on, turn the volume up on the headphones half way. The volume
control is (2) on the diagram.
II.
Striking the electronic drum pads with the included sticks should produce sounds in the
headphones.
III.
To change the drum kit:
a.
Press “DRUM SET” in section (6) as shown on the diagram.
b.
The display (1) will show the current drumset number.
c.
To change the sounds, press the up and down arrows in section (3).
IV.
To play along to preset patterns:
a.
Press the “STOP” button in section (3) on the diagram.
b.
Press the button labeled “PRESET/USER” listed in section (4). The display
will then show the current preset (‘Rock 1’ by default).
c.
Use the up and down arrows in section (3) to shuffle through the 50
different patters.
d.
Press “PLAY” in section (3) to hear the preset pattern.
e.
Tempo can be adjusted by the tempo up and down buttons in section (5)
shown on the above diagram.
f.
You can play along with the preset samples on the drum kit. To add a fill
press the “FILL” button in section (3) while the sample is playing.
V.
To record a drum pattern:
a.
Press the “PERFORM/COMPOSE” button in section (4) of the diagram untili
the display says “COMPOSE”.
b.
Press “PLAY” to start recording. You will hear a click sound corresponding to
the tempo of the current pattern. The recording will continually loop through
the pattern so that you may add drum parts one at a time.
c.
You can enter drum beats by pressing the drum buttons in section (7) or by
hitting the drum pads with the sticks.
d.
Press “STOP” to stop the recording.
VI.
To reset the unit, erasing all stored values to return to the default modes, hold down
“ERASE” and “PLAY” while powering the unit on.


