background image

Fir  1, 2, 3  & 5000 

                                                                Ion Science Lt d 


Ion  Science L td 

Page 17 of 53 


Instrument Menu   


_____ 


General Instrument navigation 
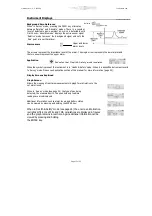
In the function menu use the UP and DOWN keys to find the function you require and press the ENTER key 
to access that functions option


Data Logging - Files 


2, 3, & 5 

Fir versions 2000, 3000 and 5000 automatically logs the instruments gas readings every second 

while the instrument displays real-time readings. Each reading is stored with a date and time stamp. A full 8 
Megabyte memory is set aside for data logging, however when the memory is full the instrument will 
overwrite previously stored data. Fir does contain a memory full alarm that prompts the user to 

download stored data (see page 23).   


Data Logging - Zones   


2, 3, & 5 

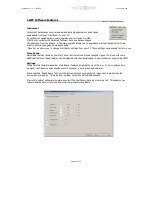
To help keep track of Data logged files, Fir allows an 8 digit identifier called 'Zones' that can be 

attached to each data file. A list of up to 199 Zones can be created on the IonPC software and then


downloaded to the Fir instrument. Once a Zone is selected on the instrument, all data files will 

include that Zone name in the files header detail. To avoid long download times Ion Science recommends 
downloading data on a daily basis. The Fir has a default Zone called Zone 0.  Unless specified, all 

readings will automatically be stored in this Zone. 
 
Zone Selection 

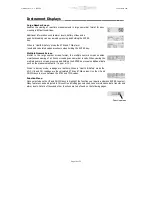
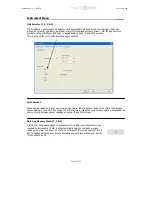
Enter the Fir's function menu and enter the ZONE SELECT icon. Use the UP & DOWN keys to 
change the pre-programmed Zone name, then press the ENTER key to select it.  A tick will appear to 

confirm the selection. Press the ESC key to return to the Main Menu.  Any logged data will now contain the 
selected Zone name.      

 
Viewing Data    


2, 3 & 5 

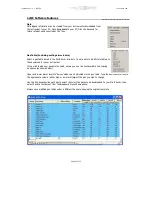
Data must be downloaded from Fir to a PC to be viewed. 
(page 27) 


Data Transfer  


1, 2, 3 & 5 

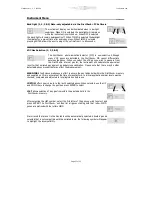
Fir can communicate to a PC using 1stPC software and an IRDA interface. IRDA is an 

infrared communications device that allows communication between Instrument and PC without 
the use of a cable.  


IMPORTANT: The IDRA device must be installed before 1stPC software.  

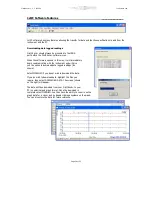
Open the 1stPC software via the link on the PC's desktop, the application program will then open. Select the 
Data transfer symbol on the Fir's function menu (as shown above) and press the ENTER key.  You 

will notice the symbol will the appear to lay on one side, this indicates the direction the instrument should be 
laid down in front of the IRDA device. While the Fir is communicating with the 1stPC program a tick 

'

P

' will appear, however if communication is broken an '

O

' will appear. 


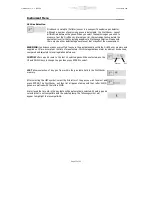
The instrument has 8Mb of memory, which is divided into 1Mb segments.  When a segment becomes full, 

data is then stored in the next segment. 
 

Each time the user starts data logging, a new file is created.  So, for example, six data logging sessions will 
create six data files. 

 
When a data logging session records data which spans across two or more 1Mb segments, a corresponding 

number of files will be created and stored within the instrument and will apply to that particular data logging 
session only.  So, for example, two 1Mb segments spanned will result in two files created. 


When the data is to be downloaded via the IonPC software, any files that have spanned two or more 1Mb 
segments (i.e. two or more files) will be recognised and downloaded as a single file. 


Summary of Contents for FirstCheck+ 1000

Page 1: ...FirstCheck 1000 2000 3000 5000 User Manual V1 6 Part Number 820256 www ionscience com...

Page 2: ...FirstCheck 1 2 3 5000 Ion Science Ltd Ion Science Ltd Page 1 of 53...

Page 3: ...ents BS EN 60079 1 2007 Explosive Atmospheres Equipment Protection by Flameproof Enclosures d BS EN 6079 11 2007 Explosive Atmospheres Equipment Protection by Intrinsic Safety i BS EN 61010 1 2001 Saf...

Page 4: ...ng List 8 Removing FirstCheck from its case 8 Setting alarm levels 9 Setting date and time 9 Selecting a gas 9 Rechargeable Batteries 9 Alkaline Batteries 9 Instrument Functions 10 Keypad Function Des...

Page 5: ...tion 26 Connection 27 Starting 27 1stPC Software Features 28 Download data logged readings 28 File 29 Calibration 29 Data 30 Gas Table and setting alarm levels 30 Instrument 31 Menu Set up 31 Settings...

Page 6: ...a SAFE area before carrying out any type of maintenance on the FirstCheck instrument 2 Substitution of components may impair intrinsic safety and result in unsafe conditions 3 For safety reasons the F...

Page 7: ...quipment directive Ion Science Ltd offers a take back service Please contact us for more information The FirstCheck field case material is recyclable polypropylene Calibration Facility Ion Science Ltd...

Page 8: ...ity of short term exposure levels STEL and time weighted averages TWA that are specific for particula r hazardous environments for example EH40 in the UK and OSHA in the USA In this mode of operation...

Page 9: ...on Kit accessory part number A 845213 WARNING when fitting the Cal adaptor onto the gas tube part of the Calibration kit ensure that the small breather hole of the Cal adaptor is not covered as this w...

Page 10: ...rnative gases from the internal gas table automatically selects alternative response factors allowing the correct concentration To change the selected gas please see pages 21 22 Both PID and LEL senso...

Page 11: ...ttings ESCAPE This key is used to return the display to the previous screen and to abort an adjustment Repeated pressing of this key will return the display to the DISPLAY FUNCTION selection screen UP...

Page 12: ...nd DOWN keys See Figure 2 Pressing ENTER will cause the selection to flash When flashing use the UP and DOWN keys to adjust it When you have adjusted the parameter to an acceptable level press the ENT...

Page 13: ...highlight the function menu icon then press ENTER Use the UP DOWN keys to view the available functions then press ENTER to select the function options Viewing Screens P 14 15 Data Transfer P 16 Sound...

Page 14: ...tion can be referenced to an application or area Data Transfer 1 2 3 5 Page 16 Allows communication between Instrument to PC software via an IRDA protocol Alarms 1 2 3 5 Page 17 Allows the adjustment...

Page 15: ...t Symbols Explained FirstCheck uses a variation of symbols that indicate the instrument s status Bump test FirstCheck can prompt the user to bump test the instrument on a weekly basis If selected via...

Page 16: ...ty mode When it is absent the instrument reverts to Survey mode Please see Application section of this manual for more information page 24 Display Screens Explained Graph Screen Allows the viewing of...

Page 17: ...he multiple numeric screen enables simultaneous viewing of all 5 sensor readings as numerical results When viewing the multiple numeric screen pressing and holding the ENTER key reveals additional dat...

Page 18: ...e selection Press the ESC key to return to the Main Menu Any logged data will now contain the selected Zone name Viewing Data 2 3 5 Data must be downloaded from FirstCheck to a PC to be viewed page 27...

Page 19: ...n on the display will flash These v alues cannot be changed either via the instrument or the FirstCheck software However additional entries can be entered into the gas table via the FirstCheck softwar...

Page 20: ...FirstCheck PID to an alternative gas other than Isobutylene Ion Science provide a Calibration Kit accessory Part number A 845213 which is recommended for use with FirstCheck however other gases speci...

Page 21: ...icon in the Calibration menu A tick will appear to confirm the selection NOTE Pressing the ENTER key allows the user to select which part of the calibration routine is carried out Ion Science also sug...

Page 22: ...ttle and a flashing highlighted number 11 Present the instrument with the calibration gas and press ENTER The number will begin to count down showing how long the instrument needs tobe presented with...

Page 23: ...selected gas against an isobutylene calibration Please note that there may be other detectable gases present that may effect the measurement WARNING Ion Science makes every effort to ensure the gas t...

Page 24: ...the FirstCheck memory and supplied on CD are accurate at the time of manufacture In critical applications alarm levels must be checked compared and adjusted to local legislation before use CUSTOM offe...

Page 25: ...reens When viewing readings in large numerical screen format the Firstcheck ca n be set to rotate through each sensor reading in turn This is set using the 1stPC software When the cycle screens option...

Page 26: ...lication Survey Mode SURVEY is the default mode of operation whenever the Health Safety mode isNOT selected All functions can be adjusted or selected in this mode unless the Security mode is set via t...

Page 27: ...with another device Installation of 1stPC Software 1 Insert Ion Science software CD into your CD rom drive 2 The CD will automatically start up 3 Click on the Download Software button 4 The FirstCheck...

Page 28: ...pressing the ENTER key When communicating with a computer the FirstCheck displays a within the data transfer symbol When not communicating an X will appear Place the FirstCheck on its side with the i...

Page 29: ...immediately begin communicating with the instrument and will give you the option to download data logged readings as shown Select FINISHED if you do not wish to download the data If you do wish to do...

Page 30: ...ised and downloaded as a single file File Allows the printing of files downloaded from your FirstCheck instrument Calibration Refers to the Custom calibration of FirstCheck Enables the download of cal...

Page 31: ...modify this table and then download it to your instrument If you wish to add new gases to the table ensure you use the next available line leaving no spaces as shown below Upper and lower alarm level...

Page 32: ...can be saved for future use Menu Set up Adjustable features found on your FirstCheck instrument can also be changed via your PC along with some additional features These features can be adjusted and t...

Page 33: ...de select security mode switch the instru ment OFF then ON you then have 2 minutes from switch on to connect your instrument to a PC and select INSTRUMENT MENU SET UP This will automatically place you...

Page 34: ...mer after every key press Clock Set the instruments clock and date for the purposes of data logging Either set it manually or if your PC clock is correct you can simply set your instrument to the same...

Page 35: ...the information straight to the instrument and leave the screen open or select OK and they will be transferred to the instrument and the screen will close automatically Zones Clear Delete existing Zo...

Page 36: ...ss for a particular purpose even if Ion Science Ltd have been advised of that purpose Furthermo re Ion Science Ltd does not warrant guarantee or make any representation regarding the use or the result...

Page 37: ...nt disk will be warranted for the remainder of the original warranty period or thirty 30 days whichever is longer This warranty gives you limited specific legal rights You may have other rights in som...

Page 38: ...s end Non rechargeable battery types to be used For Intrinsic Safety of T4 rating and reduced risk of explosion you must only use Duracell Standard Procell Alkaline Zinc Carbon R6 R6B R6PP or an ION S...

Page 39: ...eals a set of 4 x AA cells contained in a removable battery clip 3 Remove the battery clip 4 Replace the exhausted batteries using the guidelines stated above 5 Check all batteries have the correct po...

Page 40: ...If the error persists return the instrument to the manufacturer 2 3 Sample gas flow is low Check the probe filter and exha ust for signs of blockage If the error persists return the instrument to the...

Page 41: ...turer Gas Selection The gas being selected is not compatible with the selected lamp The lamp being selected is not compatible with the selected gas Press ESC and select a compatible gas and lamp Healt...

Page 42: ...on the change being made Bump test This symbol will appear on switch on if the Enable Bump Test setting has been selected via the PC software see page 30 The symbol is a prompt that will appear once a...

Page 43: ...f contamination appearing on the detector window that must be removed on a regular basis CAUTION The FirstCheck is a sensitive detector Internal components must be handled with clean hands and clean t...

Page 44: ...ation of respiratory tract and eyes Handling Do not breathe vapour dust Avoid contact with skin eyes and clothing Wear suitable protective clothing Follow industrial hygiene practices Wash face and ha...

Page 45: ...l When using the PID instrument in conditions of high ambient humidity the PID may show unexpected readings appearing to increase This occurs due to dust or other small particles within the detector b...

Page 46: ...probe attachment PK of 5 A 31063 PID Lamp Cleaning Kit 20 Cleans A 30555 5 m 16 ft flexible extension hose A 30556 10 m 33 ft flexible extension hose A 31153 Exhaust barb Tedlar bag connecto r A 3105...

Page 47: ...The cover being very low in cost has the advantage when used in HazMat applications including possible WMD exposure in that it is simply removed after use and replaced with a fresh one keeping both t...

Page 48: ...ection of double sided tape in the middle of the instrument 4 Gather the excess plastic on one side of the instrument and stick it on the midway point of the double sided tape 5 Gather the excess plas...

Page 49: ...lso possible to upgrade any PhoCheck instrument to a FirstCheck instrument to incorporate the multigas sensors for O2 H2S CO and LEL gas detection for the ultimate in gas detection This upgrade will r...

Page 50: ...and repairs will be carried out in 3 working days if not a replacement instrument will be sent out of equal or greater specification Instrument will be upgraded to the latest software versions upon re...

Page 51: ...ml min or 220 cc min Temperature Operating 20 to 60 C 4 to 140 F Storage 25 to 60 C 13 to 140 F Dimensions Instrument 340 x 60 x 50 mm Standard Carry Case 420 x 320 x 97 mm Weight Instrument 0 640 kg...

Page 52: ...genated compounds may accelerate window fouling cleaning may be required for every 20 hours of use Cleaning frequency will also depend upon alarm levels set and prevailing environmental conditions PID...

Page 53: ...l save as new manual V1 3 18 06 08 V15 V2 04 FirstCheck V1 3 Add new software installation routine Save as V1 4 24 10 08 V15 V2 04 FirstCheck V1 4 Declaration of conformity updated Include note regard...

Reviews: