background image

52

  E

ng

lis

h

User's Manual

Table of contents

1  Overview of components ................................................................................. 54

1.1  Display and control unit..................................................................... 54

1.2  Battery pack and charger.................................................................. 55

2  Battery pack .................................................................................................... 56

2.1  Charging instructions ........................................................................ 56

2.2  Charging the battery pack................................................................. 58

2.3  Installing the battery pack ................................................................. 59

2.4  Removing the battery pack  .............................................................. 59

2.5 Security ............................................................................................. 60

2.6  Connect module ................................................................................ 60

2.7  Diagnosis message........................................................................... 61

3  Display ION ..................................................................................................... 62

3.1  Removing and fixing

 ......................................................................... 62

3.2 Adjustment ........................................................................................ 62

3.3  Overview of buttons and indications ................................................. 63

3.3.1 Display ................................................................................... 63

3.3.2  Control unit ............................................................................ 63

3.4  Switching on and off the system ....................................................... 63

3.5  Setting power assistance .................................................................. 64

3.6  Display options .................................................................................. 64

3.6.1 Temperature .......................................................................... 64

3.6.2  Trip distance .......................................................................... 65

3.6.3  Trip time ................................................................................. 65

3.6.4  Average speed ...................................................................... 65

3.6.5  Maximum speed

 .................................................................... 66

3.6.6  Total distance ........................................................................ 66

3.6.7 Range .................................................................................... 66

3.6.8  Trip information ...................................................................... 67 

3.7  Menu overview .................................................................................. 68

3.8  Notes on menu overview .................................................................. 69

3.8.1  Time and language ................................................................ 69

3.8.2 Brightness ............................................................................. 69

3.8.3 View ....................................................................................... 70

3.8.4  Trip counter ........................................................................... 71

3.8.5 Sound .................................................................................... 71

3.8.6 Lighting .................................................................................. 72

   3.8.6.1   Charging a telephone via the front light ........................... 73

3.8.7  Automatic charging.................................................................74

3.8.8 Calibration ............................................................................. 75

Summary of Contents for PMU4

Page 1: ...verview of buttons and indications 63 3 3 1 Display 63 3 3 2 Control unit 63 3 4 Switching on and off the system 63 3 5 Setting power assistance 64 3 6 Display options 64 3 6 1 Temperature 64 3 6 2 Tr...

Page 2: ...n 84 4 8 View options 85 4 8 1 Time Temperature 85 4 8 2 Trip distance 85 4 8 3 Trip time 85 4 8 4 Average speed 85 4 8 5 Maximum speed 86 4 8 6 Total distance 86 4 8 7 Range 86 4 8 8 Trip 1 and Trip...

Page 3: ...54 English 1 Overview of components 1 1 Display and control unit C B A M A B C Display brand specific Display ION D D A Display B Display holder C Control unit D Throttle...

Page 4: ...lish 1 2 Battery pack and charger E F G I J C H D A F B A Battery pack F Lock B State of charge display G Key C Charging point H Plug D Docking station I Charger E Docking station contact point J Indi...

Page 5: ...ompletely empty before charging The battery pack will remain in good condition if you charge the bicycle after every use regardless of the trip distance Once the battery is fully charged charging stop...

Page 6: ...art cycling Make sure that the charger does not get wet Do not damage the charger Do not charge the battery pack in direct sunlight Do not drop the battery pack This can damage the battery pack Rememb...

Page 7: ...so be displayed The actual charging time can vary and will depend on the temperature charger type and battery type If the battery is charged separate from the bike the LED lights on the battery pack w...

Page 8: ...icks C 3 Make sure that the cover D of the charging plug is closed 4 Make sure the battery pack B is locked by pulling it backwards A correctly installed battery pack can no longer be removed without...

Page 9: ...r e bike Contact your dealer for more information 2 6 Connect module It is possible that your e bike is equipped with a connect module The e bike then has an Internet connection so that you can always...

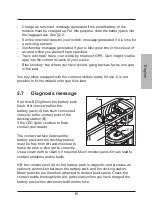
Page 10: ...the module onto your bike later 2 7 Diagnosis message If all the LED lights on the battery pack flash first check whether the battery pack A has been connected correctly to the contact point of the do...

Page 11: ...e bottom side of the display B in the display holder C and next press the display down so that the display holder clicks as shown in the adjacent figure right arrow The contact surface between the dis...

Page 12: ...t when the system is on This is not linked to the bike lights The control unit can be installed either on the left or right 3 4 Switching on and off the system The system can be switched on by pressin...

Page 13: ...u want a simple or extensive information to be displayed on your display See below at par 3 8 3 If you select Simple you will not be shown additional information If you select Extensive you will be sh...

Page 14: ...rent trip The trip distance is measured from the moment that you start cycling To reset the Trip distance see par 3 6 8 3 6 3 Trip time The Trip time indicates how long you have used your e bike durin...

Page 15: ...d with assistance This depends on the assistance setting The lower the setting the higher the range At range 0 a range will not be shown because the range without assistance is limitless If a range is...

Page 16: ...nce and time and the average and maximum speed are linked to each other The trip counter see par 3 8 4 will keep track of the information of the current trip for example the trip distance see par 3 6...

Page 17: ...ancais Temperature Avg speed Trip time Max speed Range Trip distance Total distance Trip information 2 sec Controlunit View Back 1sec Lighting see 3 8 1 see 3 6 2 see 3 6 3 see 3 6 4 see 3 6 5 see 3 6...

Page 18: ...a few times Language The language can be set by selecting the Language option on the Settings menu If you want to change the language press the Use the and to toggle between the available languages W...

Page 19: ...you select Extensive additional information will be shown on the display The options have already been explained above Temperature par 3 6 1 Trip distance par 3 6 2 Trip time par 3 6 3 Average speed p...

Page 20: ...u Use the to go to Trip counter Again press the Select the required option using the and Again press the to set the required option Press the several times to return to the basic display 3 8 5 Sound Y...

Page 21: ...battery pack and display has been installed in the e bike The motor will work as a dynamo when the battery pack is fully discharged The rear light is fixed to the battery pack Some bikes have a rear...

Page 22: ...ensures that your phone can charge while your are cycling When the bike is stationary the lights will go out automatically after 5 minutes Charging will also stop You can also opt to set the lighting...

Page 23: ...y setting will be active immediately and will continue to apply until it is again adjusted on the display menu If the automatic charging function has been activated and no pressure is applied to the p...

Page 24: ...tion yourself next to the bike 2 Do not apply pressure on the pedals 3 Hold the pressed for 3 seconds 4 Use the to go to the Maintenance menu 5 Use the to select Calibration 6 Again press the 7 Calibr...

Page 25: ...remove the display B from the display holder C Fixing in place Position the display B obliquely on the display holder C and click it in place in the lock 4 2 Adjust Loosen the handles A and twist the...

Page 26: ...lication N Down button variable application O Mode button variable application 4 4 Switching on the display If the up arrow on the lighting button is pressed the reading will be displayed When the E b...

Page 27: ...78 English 4 5 Set the support Press the up L or down N button to set the support B Ride programme 1 ECO 2 CRUISE 3 TOUR 4 SPORT 5 POWER km h 0 0 100 0 00km 21 C 1 B L N...

Page 28: ...Calibration Service info Francais Temperature Time Average speed Trip time Maximum speed Range Trip distance Total distance 3sec Controlunit Fahrenheit Celcius Temperature see 4 7 2 Indicator on Indic...

Page 29: ...will be displayed on the left at the bottom of the display as standard Time is then shown under display options The display will show a frost symbol when the outside temperature is 4 C or lower When...

Page 30: ...average speed of the ride Arrow downwards means current speed is below the average speed of the ride Block means current speed is almost the same as the average speed of the ride With the option Aver...

Page 31: ...gnal when you press the control unit buttons after calibrating and after resetting a ride If you select On alerts the display will emit five long beep signals when there is a message Your display will...

Page 32: ...activate the automatic charging when pedal assistance is engaged by pressing briefly on the set button The message Auto Charge on will appear temporarily The function will then remain active until the...

Page 33: ...ill appear in the battery icon depending on the type of display 51 14 35 km h 20 0 20 0km h Charging 1 51 16 11 km h 20 0 20 0km h Charging 1 4 7 6 Calibration If the peddling assistance is reduced in...

Page 34: ...e non selected option s will then be placed automatically under display options 4 8 2 Trip distance The trip distance measured from the moment that you start cycling For resetting the Trip distance se...

Page 35: ...al and historic consumption in combination with the charging level of the battery pack 4 8 8 Trip 1 and Trip 2 The Trip distance Trip time Average speed and Maximum speed are linked to each other and...

Page 36: ...87 English 2 hours Trip 1 can also be reset manually by keeping the set button pressed for a long time You can only reset Trip 2 manually by keeping the set button pressed for a long time...

Page 37: ...e result that the battery pack s charge will not last as long D Light front wheel motor 25 Nm Eco km Cruise km Tour km Sport km Power km Battery pack min max min max min max min max min max 317 Wh 40...

Page 38: ...in max min max min max min max min max 317 Wh 60 80 40 60 30 50 20 40 15 35 418 Wh 90 110 60 80 35 55 30 50 20 50 522 Wh 115 145 75 105 45 65 40 60 30 60 612 Wh 130 170 80 120 50 80 50 70 35 65 Double...

Page 39: ...stance mode or riding program ask your dealer about the possibilities Ambient temperature Wind force Tyre pressure at least 4 bar Cycling speed Weight of the cyclist and the load Cycling behaviour Roa...

Page 40: ...for the first time try the boost function carefully so as to become familiar with the power generated by the boost function The boost function is linked to the assistance levels The effect of the thr...

Page 41: ...wn button Before the first position you ll find position 0 off and before that you ll find position P Display ION The parking assistance can be used as soon as the e bike has been switched on By turni...

Page 42: ...3 3 3 5 3 5 Maximum power W 250 250 250 250 Charging time 80 hrs 3 5 5 6 6 5 Charging time 100 hrs 4 5 6 7 5 8 5 Voltage V 36V 36V 36V 36V Energy Wh 317 418 522 612 7 2 Temperature limits for battery...

Page 43: ...ack flat Charge the battery pack E03 Battery pack damaged Please contact your dealer E05 Bad motor connection Switch on the pedal assistance and check if the battery pack is placed correctly E06 Short...

Page 44: ...lease contact your dealer E30 No communication with torque sensor Turn on the pedal assistance and check if the battery pack is placed correctly E32 Battery electronics are too warm Let the battery pa...

Page 45: ...your dealer 8 2 Service The Maintenance advised message may be displayed on the display after a specific distance This message will be displayed when starting the system and briefly during cycling Yo...

Page 46: ...isplays on both bikes Your certified e bike dealer can perform this for you Both displays will then work on both bikes 8 4 Speed sensor The speed sensor only works on e bikes with a middle motor Your...

Page 47: ...r A allows for smooth gear shifting This provides more comfort and less wear to components like the chain The sensor which is assembled around the gear cable receives the shift information On most mod...

Page 48: ...rts of your e bike display drive system and battery pack For the guarantee period for the other parts refer to the guarantee provisions as specified in the instruction booklet of the manufacturer Exte...

Page 49: ...pack to your dealer in accordance with the environmental regulations for collecting and processing batteries drawn up by the Ministry of Housing Spatial Planning and the Environment The dealer is requ...

Page 50: ...101 English V3 10 2016...

Reviews: