background image


TIGER Select Instrument User Manual V3.2 


Unrivalled Gas Detect

ion.


Page 27 of 73 

ionscience.com


Basic Tube Mode 

The Basic Tube Mode consists of a single-point benzene reading only. The benzene test has a test 
time which varies with temperature. This test time is required to condition the tube which then 
offers a proportional output relating to the benzene being sampled. 

Basic Tube Mode Procedure 

1.


To enter Tube Mode, select TUBE 

 using the soft key 

A

. The pump will stop running and 

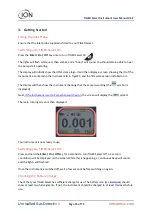
the calibration-selected tube type will briefly appear. The temperature screen is then 
displayed. 

2.


Use the 

Up

 and 

Down

 keys to adjust the temperature to reflect the ambient temperature. 

The default temperature units are °C. This can be 

changed to °F in TigerPC

. Select ‘NEXT’.


3.


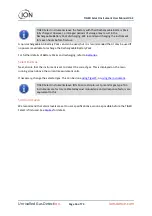
The display will prompt for the new tube to be inserted. The tube will need to be prepared 
prior to fitting into the instrument. See the 

Preparing the Pre-filter Tube

. 


If the Benzene Pre-filter Tube breaks up to the shoulder it must not be used as 
this will damage the Probe Seals within Tube Holder when inserted. 


4.


Unscrew the cap of the Tube Holder and insert the tube into the Tube 
Holder Cap, ensuring the black arrow on the tube is pointing towards the 
instrument. Screw the Tube Holder Cap and the tube on to the 
instrument. 

Select ‘NEXT’.


5.


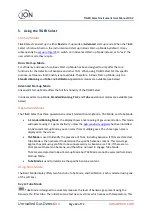
Press ‘START’ to commence the test cycle. A countdown will indicate the 

remaining test time, and a live tube reading will be displayed. 

Note that this live reading is for indication only. It is only the final 
reading at the end of the test cycle that should be used as reference. The 
final reading will automatically be data logged. 


6.


Once the countdown has completed, the instrument will display the final reading. Select 

‘OK’.


7.


Once the measurement has finished, the display will prompt you to remove the used tube. 
Remove the tube and refit the probe. 

Select ‘OK’ 

to return to the main running screen. The selected gas will be displayed briefly. 

Advanced Tube Mode 

The Advanced Tube Mode has two parts: an initial single point reading as described in Basic Tube 
Mode, followed by an optional 15-minute STEL calculation. Both tests use the same Benzene Pre-
filter Tube. 

STEL Calculation 

The second stage of Tube Mode is optional. 

The STEL for benzene will be automatically selected from the Gas Table. If a benzene STEL is not 
specified it can be 

added to the Gas Table in TigerPC

. 

Summary of Contents for Tiger Select

Page 1: ...TIGER Select Instrument User Manual V3 2 Unrivalled Gas Detection ionscience com...

Page 2: ...nty Thank you for purchasing your ION Science instrument The standard warranty of your instrument can be extended to five years To receive your extended warranty you must register your instrument onli...

Page 3: ...TIGER Select Instrument User Manual V3 2 Unrivalled Gas Detection Page 3 of 73 ionscience com Warning...

Page 4: ...TIGER Select Instrument User Manual V3 2 Unrivalled Gas Detection Page 4 of 73 ionscience com Avertissement...

Page 5: ...Battery Packs 14 Keypad Function Descriptions 14 3 Getting Started 15 Fitting the Inlet Probe 15 Switching your TIGER Select On 15 Switching your TIGER Select Off 15 Checking the Battery Charge 15 Se...

Page 6: ...t 32 Downloading Data Logged Readings and Instrument Settings 32 Taking Snapshots 33 Instrument Summary Screen 34 Features Screen 35 Configuration Screen 36 Gas Table Screen 44 Firmware Screen 45 Data...

Page 7: ...e the Electrode Stack 62 Removing the MiniPID 2 Sensor 63 Lamp Removal and Examination 64 Lamp Cleaning 64 Replacing a Lamp 65 Replacing the MiniPID Electrode Stack 66 9 Troubleshooting 67 Diagnostics...

Page 8: ...manual We reserve the right at any time and without any notice to remove amend or vary any of the content which appears in this manual Symbols WARNING USED TO INDICATE DANGER WARNINGS WHERE THERE IS A...

Page 9: ...nents may impair intrinsic safety Do not service the instrument live Remove the Battery Pack before servicing Ingress Protection Continuous exposure to wet weather conditions should be limited to less...

Page 10: ...TIGER Select Instrument User Manual V3 2 Unrivalled Gas Detection Page 10 of 73 ionscience com Ion Science Ltd offer a take back service Please contact us for more information...

Page 11: ...ght source many gases associated with benzene are ignored due to their higher eV Throughout the measurement process TIGER Select continues to display real time data ensuring the final reading represen...

Page 12: ...lled Gas Detection Page 12 of 73 ionscience com 1 Charge Cradle 2 Instrument Boot 3 Alarm LEDs Torch 4 Probe Assembly 5 Display Screen 6 Keypad 7 Instrument Body 8 Battery Pack 9 Charging Contacts 10...

Page 13: ...ty readings We recommend you install the software and set up your TIGER Select as described in TigerPC Software TIGER Select Kit ION Science provides a range of TIGER Select kits and accessories The c...

Page 14: ...See Batteries for further details Keypad Function Descriptions The functionality of the A and B keys varies Prompts on the display indicate their functionality at a given time The Up and Down keys ar...

Page 15: ...display will then show the instrument checking that the Lamp is working the symbol is displayed Next if the instrument is set to Zero when switched on the screen will display the symbol The main runni...

Page 16: ...chargeable Battery Pack For further details of Battery Packs and recharging refer to Batteries Select the Gas Next ensure that the instrument is set to detect the correct gas This is displayed on the...

Page 17: ...rticular functions are currently tied to the A and B keys 4 The area between the two soft key indicators displays the measurement units and the gas that the instrument is currently set to detect The T...

Page 18: ...ro to three sound projection lines are displayed to indicate the volume level there are four sound levels no line is displayed for the quietest Alarm Bell When a Low alarm is triggered the bell symbol...

Page 19: ...Operational Modes The TIGER Select has three operational modes Standard Running Mode TAC Mode and Tube Mode In Standard Running Mode the display shows a live reading of gas concentration This mode wil...

Page 20: ...u can set your instrument to operate using the factory calibrated values These are set by ION Science Ltd or authorised service centres Custom You can carry out a Custom Calibration with the 10 0eV Mi...

Page 21: ...fer to the TigerPC Configuration Screen topic for details of these options Select the preferred option with the Up and Down keys and confirm with Enter For percentage volume press Enter again to confi...

Page 22: ...updating as the current peak reading changes Press the Reset soft key to reset the peak value Press Esc to cancel Information Pressing the Information soft key provides access to a list of screens wh...

Page 23: ...s no response factor or is incompatible with the units selected a warning symbol will appear The message can be cleared by pressing the Enter key The gas will still be selected Average Press the Avera...

Page 24: ...ill be temporarily displayed before TAC Mode is exited Health Safety Only available if the relevant upgrade has been installed Press the Health Safety soft key to display the Health Safety symbol with...

Page 25: ...setup A tick briefly appears beside the question mark to confirm that Data Logging has started The memory status icon flashes once per second while continuous Data Logging is in progress To stop Data...

Page 26: ...ter capacity reaches its limit the tube will change colour from bright orange to a green brown If the colour changes beyond the marking the benzene concentration may not be accurate If the colour chan...

Page 27: ...e cap of the Tube Holder and insert the tube into the Tube Holder Cap ensuring the black arrow on the tube is pointing towards the instrument Screw the Tube Holder Cap and the tube on to the instrumen...

Page 28: ...the remaining test time and a live STEL reading will be displayed Note that this live reading is for indication only It is only the final reading at the end of the test cycle that should be used as r...

Page 29: ...ulty please contact your local distributor or contact ION Science directly http ionscience com contact Connecting a TIGER Select to a PC The TIGER Select must be functionally checked prior to entering...

Page 30: ...tection Page 30 of 73 ionscience com Double click the Tiger icon on your desktop or in the Start menu to open TigerPC or run Tiger exe in the installation folder The Home page will be displayed The me...

Page 31: ...een This screen will inform you if a new version of PC software is available You can then install the upgrade if required We recommend that TigerPC is kept up to date to ensure that the latest functio...

Page 32: ...d logged Your instrument will be added to this list once TigerPC has read it as described next Downloading Data Logged Readings and Instrument Settings Click Instrument s The page that is then display...

Page 33: ...nlogged instrument by TigerPC If not already listed the instrument IRN will be added to the list of instruments Taking Snapshots The first time you read an instrument a snapshot is taken automatically...

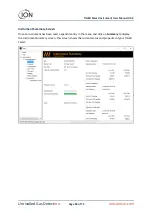
Page 34: ...ection Page 34 of 73 ionscience com Instrument Summary Screen Once an instrument has been read expand its entry in the menu and click on Summary to display the Instrument Summary screen This screen sh...

Page 35: ...eatures Screen This screen indicates which of the available feature upgrades have been added to your TIGER Select To purchase additional features contact ION Science Ltd or your distributor Once the t...

Page 36: ...ser Manual V3 2 Unrivalled Gas Detection Page 36 of 73 ionscience com Configuration Screen Use this screen to configure your TIGER Select Click these buttons highlighted above and below to display or...

Page 37: ...e 37 of 73 ionscience com Note that the images in this topic display the default TigerPC settings Backlight Choose from Permanently off Permanently on On in low ambient light On for limited time Enter...

Page 38: ...rms continue to sound even if the gas level falls below the threshold until the Esc key is pressed Volume is adjusted using the slider Vibrate Use to set your TIGER Select to vibrate under alarm condi...

Page 39: ...f operation the TIGER Select starts in o Basic Always start in Basic Start up Mode o Adv Always start in Advanced Start up Mode o Ask Instrument asks the user during start up Calibration Select the ca...

Page 40: ...save these settings to your TIGER Select The calibration procedure is detailed in Calibration Datalog Select one of the following min and sec set the interval between readings Users can select to reco...

Page 41: ...he instrument s soft key B When connected to a PC unless it is in TAC Mode the instrument will go into Sleep Mode The instrument will awaken when disconnected from the PC Zeroing The following options...

Page 42: ...lowing The instrument will alarm when the memory log is full Logging will stop Logging will continue New data will overwrite the oldest data in the log Clock Select 24 or 12 hour format If required se...

Page 43: ...controls the order in which they are listed in the soft key menus TWA STEL Select the regulatory code to which you are working and specify TWA and STEL periods Instrument ID Enter the text to be disp...

Page 44: ...ionscience com Gas Table Screen Select Gas Table from the menu to display the Gas Table screen You can modify this table and download it to your instrument To add new gases to the table or delete the...

Page 45: ...ment select Send to Instrument from the drop down menu shown above Firmware Screen This screen displays the current firmware version installed on your TIGER Select and provides facilities to install n...

Page 46: ...ta during the process take a snapshot of the instrument before upgrading This can be reloaded after the update is complete Select Send to Instrument to install them on your instrument The following me...

Page 47: ...ct the TIGER Select at this point Follow the instructions below before disconnecting After the upgrade been sent to the TIGER Select the instrument will install it The TIGER Select will flash the two...

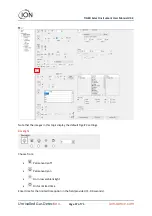
Page 48: ...instrument is read The Datalog sub menu displays a list of the Datalog sessions Click on a session Details of the data collected during that session are presented in numerical and graphical form on t...

Page 49: ...e latest Health and Safety readings held on your TIGER Select if the relevant feature upgrade has been installed New readings are downloaded from the TIGER Select when the instrument is read Click Men...

Page 50: ...your TIGER Select at a point in time If required your TIGER Select can be reset to a snapshot s settings The Snapshots screen lists those stored on the PC Details of a snapshot can be viewed by expan...

Page 51: ...t Be aware that this process will replace all setup and calibration files Click Restore against the relevant snapshot On the restore pop up that is then displayed Click Yes to load the snapshot When t...

Page 52: ...TIGER Select Instrument User Manual V3 2 Unrivalled Gas Detection Page 52 of 73 ionscience com Click Delete to remove a selected snapshot...

Page 53: ...Sensor are brought back to factory specifications and new Factory Calibration data is loaded PID Custom Calibration is performed by the instrument user and should be carried out as part of regular ins...

Page 54: ...he Calibration Kit are available and ready for use Never calibrate the Zero with the Span gas connected PID Custom Calibration Procedure 1 From the main running screen select the CAL icon on key B 2 H...

Page 55: ...hat the SPAN 1 has been accepted Press Enter For a two point calibration the calibration procedure is complete 7 SPAN 2 calibration For a three point calibration the gas and concentration for SPAN 2 a...

Page 56: ...not use abrasive or chemical detergents to clean the instrument as this may reduce the antistatic properties of the materials used clean it using a damp cloth only TIGER Select Parts Diagram 1 Instru...

Page 57: ...wo types of battery packs are available for use with the TIGER Select instrument a lithium ion Rechargeable Battery Pack and non rechargeable AA Battery Pack to be fitted with 3 AA Alkaline batteries...

Page 58: ...at if the instrument is left for one year unused it needs to be charged fully before it can continue to be kept in storage Please repeat annually Ensure the TIGER Select is charged for at least 7 hour...

Page 59: ...e the instrument shuts down Battery fully charged Only use the Charge Cradle supplied with your TIGER Select ION Science Ltd recommends keeping your TIGER Select on charge at all times when not in use...

Page 60: ...Body and secure it using the clip 5 Replace the Instrument Boot ensuring that it is snug around the front of the Instrument Body and the lights are not obscured 6 Charge the TIGER Select for 7 hours...

Page 61: ...hts are not obscured WEEE REGULATIONS Dispose of used batteries in accordance with all local and national safety and environmental requirements Inlet Probe Assembly All parts of the probe assembly can...

Page 62: ...r Internal components must be handled with clean hands and clean tools The Lamp is fragile Handle with great care Never touch the window and do not drop When to Clean or Replace the Lamp The TIGER Sel...

Page 63: ...clean environment so that the sensor parts will not be contaminated by dust oil or grease On the Sensor Cover loosen the centre screw turning it with a small coin or a suitable flat bladed screwdrive...

Page 64: ...tamination on the detection window This appears as a blue hue To check for this hold the Lamp in front of a light source and look across the window surface at an angle If necessary clean the Lamp Lamp...

Page 65: ...conds 4 Remove the residual powder with a short blast of air from the can of clean dry oil free air 5 Refit the Lamp into the Electrode Stack as described previously Replacing a Lamp Never refit a dam...

Page 66: ...rside of the Electrode Stack The Lamp window should now sit flush within the Electrode Stack This procedure ensures that the Lamp is firmly held in the Electrode Stack with the detection window level...

Page 67: ...connections are sound and the indicator lights on the charger are in order If the battery fails to charge fit another battery pack if available If using alkaline batteries replace them If the fault pe...

Page 68: ...o 61010 1 Standards BS EN 60079 0 2012 Electrical apparatus for explosive gas atmospheres General requirements BS EN 60079 11 2012 Explosive atmospheres Equipment protection by intrinsic safety i BS E...

Page 69: ...sibility on the date this product accompanied by this declaration is placed on the market the product conforms to all technical and regulatory requirements of the above listed directives Name Graham D...

Page 70: ...indication of benzene breakthrough is displayed in real time Accuracy 10 display reading one digit benzene Linearity 5 display reading one digit Intrinsically Safe Approvals II 1G Ex ia IIC T4 Ga Tamb...

Page 71: ...06 CFR 47 2008 Class A Weight and Dimensions probe fitted no tube attached Instrument weight 0 75 kg Packed weight 5 kg 176 oz Size 465 mm 18 3 H x 89 mm 3 5 W x 61 mm 2 4 D Warranty Standard Warranty...

Page 72: ...4 14480 Fax 49 2104 144825 Web www ism d de Email info ism d de Italian Office ION Science Italia Via delle Querce 1 g 40011 Anzola dell Emilia Bologna ITALY Tel 39 051 0561850 Fax 39 051 0561851 Web...

Page 73: ...ion Updated Contact Information p51 Text changes pp 11 12 18 peak hold 30 help screen 32 features screen 43 electrode stack 49 instrument body 52 Accuracy Linearity 24 08 2018 V0 8 11 V1 0 11 3 2 Upda...

Reviews: