background image

11

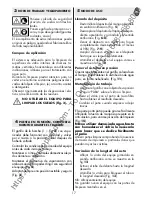
Wear safety shoes with non-slip 

soles.

Wear safety goggles or a visor, 

insulating gloves and a hard hat.

Failure to follow these rules may cause a hazard 

and will relieve the manufacturer of all liability.

Application

This tool is designed for cleaning indoor glass 

surfaces of any size, vertical, horizontal or incli-

ned, that is suitable for treatment with pure water. 
When using the tool, take care not to disperse 

hazardous substances from the object being 

cleaned (e.g. asbestos, oil or detergent). 
Follow the waste disposal regulations rigorously. 

DO NOT USE THE TOOL TO CLEAN 

THE FLOOR (Fig. 2)

The pump trigger (1 – Fig. 

3

) must operate 

smoothly and return to the home position when 

released. 
Check the tool works properly before each cle-

aning session.
Never use in the vicinity of children or pets.
Hold the spray device with both hands so that 

you can control the position accurately (Fig. 

4

).

Always work from a safe, stable position (Fig. 

2

).

 4

  GENERAL RECOMMENDATIONS

 3 

PERSONAL PROTECTION EQUIPMENT

Filling the tank

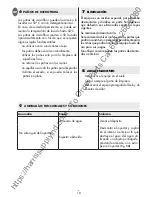
-   Unscrew the tank from the handgrip by 

turning anticlockwise (Fig. 

5

).

-   Remove the cap from the tank by turning 

anticlockwise (Fig. 

6-8

).

-   Fill the tank with pure water (at least 98% 

demineralised water) (Fig. 

7-9

).

-   Screw the cap back on.
-   Screw the tank onto the pole (Fig. 

10

Pressurising the system

Operate the trigger on the handgrip repeatedly 

until a fine spray is delivered (Fig. 

11

). 

Using the tool

-   Operate the trigger to spray water onto the 

surface to be cleaned.

-   Dry the surface with a microfibre pad.
-  Change the pad when it starts to leave a mark.
The pad support can be rotated for enhanced 

cleaning by loosening the wing-nut on the swivel 

(Fig. 

15

).

N.B. Do not use too much water, just 

enough to allow the pad to slide across 

the surface.

Always use a clean pad. Check for impurities 

or hard particles that would scratch the surface. 

Changing the length of the pole 

-    Loosen the ring nut by turning anticlockwise 

(Fig. 

12

).

-    Extend the pole to the desired length.
-    Tighten the locking sleeve to lock in position 

(Fig. 

13

).


N.B. Do not put the tool away with the cleaning 

pad mounted.

 5

 HOW TO USE THE TOOL

https://harrissupplyind.com - To Order Parts Call 608-268-8080

Summary of Contents for CLEANO

Page 1: ...les instructions d utilisation avant de mettre l appareil en marche pour la premi re fois Lean atentamente las instrucciones para el uso antes de poner en funcionamiento por primera vez el equipo Lese...

Page 2: ...h t t p s h a r r i s s u p p l y i n d c o m T o O r d e r P a r t s C a l l 6 0 8 2 6 8 8 0 8 0...

Page 3: ...1 Fig 2 PRINCIPALI COMPONENTI MAIN COMPONENTS PRINCIPAUX COMPOSANTS PRINCIPALES COMPONENTES HAUPTBAUTEILE h t t p s h a r r i s s u p p l y i n d c o m T o O r d e r P a r t s C a l l 6 0 8 2 6 8 8 0...

Page 4: ...4 Fig 5 Fig 6 Fig 3 Fig 4 Fig 7 Fig 8 h t t p s h a r r i s s u p p l y i n d c o m T o O r d e r P a r t s C a l l 6 0 8 2 6 8 8 0 8 0...

Page 5: ...5 Fig 11 Fig 12 Fig 13 Fig 14 Fig 9 Fig 10 h t t p s h a r r i s s u p p l y i n d c o m T o O r d e r P a r t s C a l l 6 0 8 2 6 8 8 0 8 0...

Page 6: ...6 Fig 15 h t t p s h a r r i s s u p p l y i n d c o m T o O r d e r P a r t s C a l l 6 0 8 2 6 8 8 0 8 0...

Page 7: ...e tutti i componenti sono privi di difetti Non lavorare mai con componentistica difettosa ma sostituirla subito con un ricambio originale Questo attrezzo stato progettato per essere utilizzato con acq...

Page 8: ...ura ruotan dolo in senso antiorario Fig 5 Disinnestare il serbatoio dal relativo tappo premendo e ruotando in senso antiorario Fig 6 8 Riempire il serbatoio con acqua pura acqua completamente deminera...

Page 9: ...gelo e da fonti di calore 6 PANNI IN MICROFIBRA 7 ROTTAMAZIONE L attrezzatura un rifiuto speciale va quindi smontata e divisa in parti omogenee che do vranno essere smaltite secondo le leggi vigenti S...

Page 10: ...iately with original spare parts This tool is designed for use with pure water The use of non purified water detergents or chemical products may affect operation and safe use of the tool The manufactu...

Page 11: ...Filling the tank Unscrew the tank from the handgrip by turning anticlockwise Fig 5 Remove the cap from the tank by turning anticlockwise Fig 6 8 Fill the tank with pure water at least 98 demineralised...

Page 12: ...DISPOSAL This tool is classified as special waste which me ans at the end of its working life it must be taken apart and separated into similar components which must be disposed of in accordance with...

Page 13: ...osants sont exempts de d fauts Ne travaillez jamais avec des l ments d fec tueux le cas ch ant les remplacer imm dia tement par une pi ce d tach e d origine Cet instrument a t con u pour tre utilis av...

Page 14: ...ihoraire Fig 5 D crochez le r servoir du bouchon en appu yant et en tournant ce dernier dans le sens antihoraire Fig 6 8 Remplissez le r servoir d eau pure eau com pl tement d min ralis e au moins 98...

Page 15: ...gez l instrument l abri du gel et des sources de chaleur 6 FRANGES MICROFIBRE 7 LIMINATION L instrument est un d chet sp cial il doit tre d mont et s par en parties homog nes liminer dans le respect d...

Page 16: ...ificaciones que puedan perjudicar su seguridad Poner en servicio el equipo solo si todos su componentes esten libres de defectos No trabajar nunca con componentes defectuo sos en su caso sustituirlos...

Page 17: ...ntido antihorario Fig 5 Desacoplar el dep sito del tap n correspon diente apretando y gir ndolo en sentido antihorario Fig 6 8 Llenar el dep sito con agua pura agua completamente desmineralizada al me...

Page 18: ...a del hielo y de fuentes de calor 6 PA OS DE MICROFIBRA 7 ELIMINACI N El equipo es un residuo especial por ello debe desmontarse y dividirse en parte homog neas que deber n ser eliminadas seg n las le...

Page 19: ...nicht reinem Wasser sonstigen Reinigungsmitteln oder chemischen Produkten kann den Betrieb und die Sicherheit des Ger tes gef hrden Der Hersteller haftet nicht f r eventuelle Sch den an Personen Tiere...

Page 20: ...sinn abschrauben Abb 5 Den Beh lterdeckel durch Drehung entgegen dem Uhrzeigersinn abdrehen Abb 6 8 Den Beh lter mit reinem Wasser vollst ndig zu mindestens 98 demineralisiertes Was ser f llen Abb 7 9...

Page 21: ...llen gesch tzt lagern 6 MIKROFASERT CHER 7 LAGERUNG Das Ger t geh rt zur Spezialversorgung und muss dementsprechend in homogenen Teilen demontiert und unterteilt sowie entsprechend den gesetzlichen Ve...

Reviews: