10
emu3/emu3ACO Operation Guide
Version 2.1
Installation Instructions
Install the units and make earth connections
To install the units:
1.
If required, slide the units into your 19" rack and secure with standard rack-mount bolts.
2.
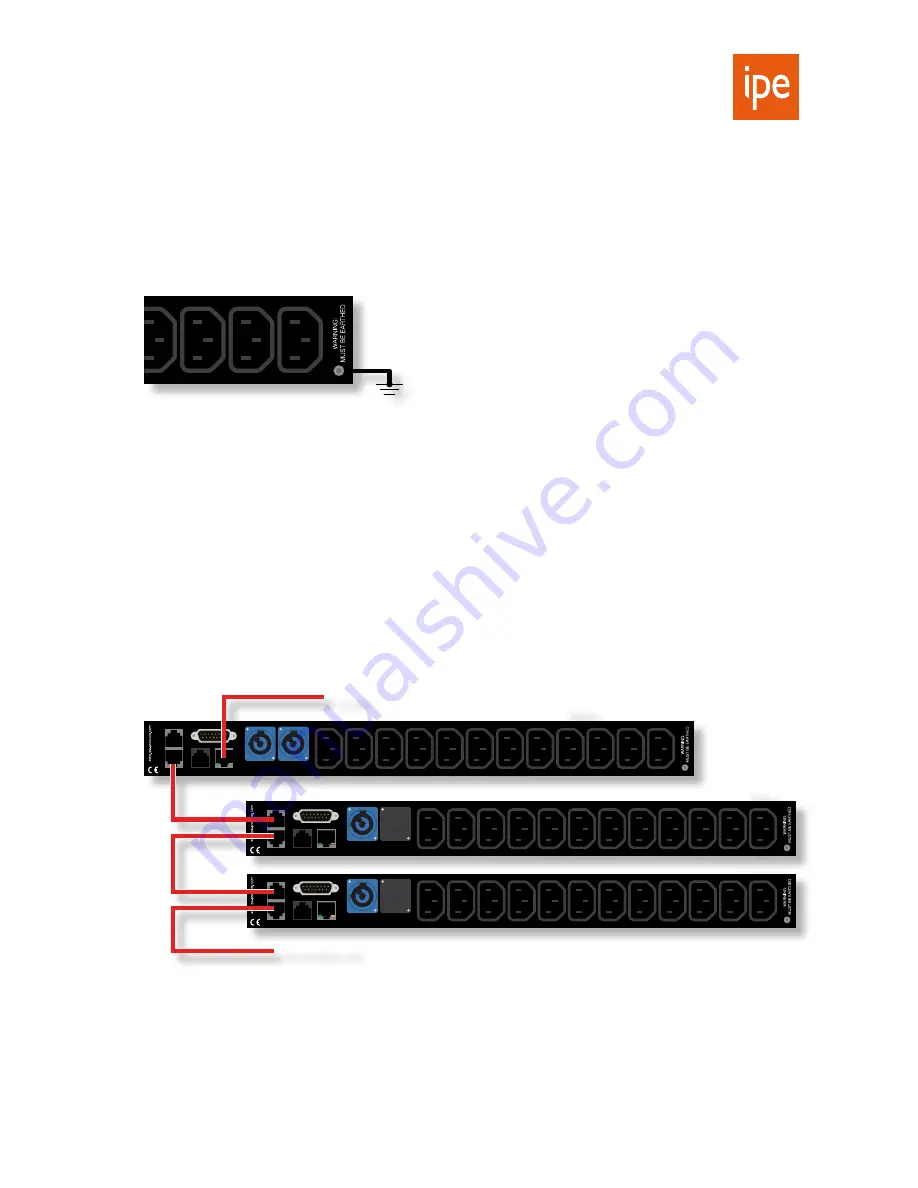
Make earth connections to all the units.
Make the LAN and LINK connections
The Master unit is the only unit directly connected to your LAN. Slave units do not have a direct network connection
to your LAN, but are controlled from the Master unit’s
LINK OUT
port.
IMPORTANT!!:
Do
NOT
plug a network cable into a Slave unit’s LAN port if it is already connected to a Master unit.
Note:
Master and Slave units can be either emu3 or emu3ACO. In the picture below, we show the Master as an
emu3ACO, connected to two emu3 Slave units.
To make the LAN connection:
1.
Connect a CAT5e cable from your network hub to the
LAN
connector on the rear panel of your Master unit.
2.
Connect a CAT5e cable from the
LINK OUT
connector on the rear panel of the Master unit to the
LINK IN
connector on the first Slave unit in your chain.
3.
Connect any additional Slave units using CAT5e cables, going from the
LINK OUT
connector of the previous unit
to the
IN
connector of the next unit.
4
3
2
1
LINK
GPI 1-6
12
11
10
9
8
7
6
5
4
3
2
1
SENSOR
LAN
220-240VAC ~ 16A 50Hz
MAINS A
MAINS B
IN
OUT
LINK
GPI 1-6
12
11
10
9
8
7
6
5
4
3
2
1
SENSOR
LAN
220-240VAC ~ 16A 50Hz
MAINS A
MAINS B
IN
OUT
LINK
GPI 1-6
12
11
10
9
8
7
6
5
4
3
2
1
SENSOR
LAN
220-240VAC ~ 16A 50Hz
MAINS A
MAINS B
IN
OUT
To next Slave unit
Master
Slave 1
Slave 2
To LAN


