2-16
Using Your Device
Using the YLR-Series
Using the YLR-Series
CAUTION: Refer to the SPECIFICATION YTTERBIUM FIBER LASER
document included with this product for proper electrical power requirements.
Before switching the power on, ensure that the incoming AC voltage is equal to
the level noted in the specification.
Operate only in an environment with sufficient airflow capacity that allows for
the specified heat load developed during operation.
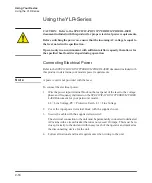
Connecting Electrical Power
Refer to the
SPECIFICATION YTTERBIUM FIBER LASER
document included with
this product to determine your models power requirements.
N o t e
A power cord is not provided with the laser.
To connect the electrical power:
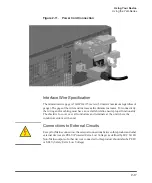
1. Wire the power input terminal block on the rear panel of the laser to the voltage,
phase and frequency indicated on the
SPECIFICATION YTTERBIUM FIBER
LASER
document for your particular model.
L2 = Line Voltage, PE = Protective Earth, L1 = Line Voltage
2. Cover the input power terminal block with the supplied cover.
3. Secure the cable with the supplied strain relief.
The electrical connection to the unit must be permanently connected to dedicated
AC mains with a circuit breaker that does not exceed 20 Amps. This must be in
close proximity to the unit and within easy reach of the operator and marked as
the disconnecting device for the unit.
4. Follow all national and local requirements when wiring to the unit.
Summary of Contents for QCW YLR-150
Page 4: ...ii Preface Audience...
Page 10: ...viii...
Page 30: ...1 20 Overview of the YLR Series Fiber Lasers Additional Safety Resources...
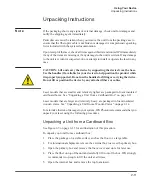
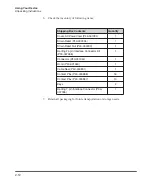
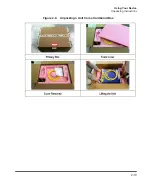
Page 43: ...2 13 Using Your Device Unpacking Instructions Figure 2 9 Unpacking a Unit from a Cardboard Box...
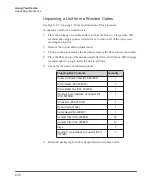
Page 45: ...2 15 Using Your Device Unpacking Instructions Figure 2 10 Unpacking a Unit from a Wooden Crate...
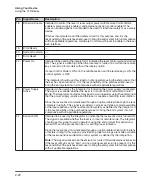
Page 57: ...2 27 Using Your Device Using the YLR Series Figure 2 13 24 Pin Connector Interfaces...
Page 64: ...2 34 Using Your Device Using the YLR Series Figure 2 16 Main Menu Screen...
Page 66: ...2 36 Using Your Device Using the YLR Series Figure 2 17 Sub Menus Screen...
Page 68: ...2 38 Using Your Device Using the YLR Series Figure 2 18 Sub Menus Screen...
Page 70: ...2 40 Using Your Device Using the YLR Series Figure 2 19 Sub Menus Screen...
Page 72: ...2 42 Using Your Device Using the YLR Series Figure 2 20 Sub Menus Screen...
Page 74: ...2 44 Using Your Device Using the YLR Series Figure 2 21 Sub Menus Screen...
Page 76: ...2 46 Using Your Device Using the YLR Series...
Page 138: ...4 48 Pulse Shaping Using the Pulse Shaper Program...
Page 153: ...A 9 Web User Utility Configuring a LAN Connection for Ethernet...
Page 154: ...A 10 Web User Utility Configuring a LAN Connection for Ethernet...
Page 164: ...C 8 Optical Fiber Connector Inspection and Cleaning Overview...
Page 187: ......


