3-11
Computer Interface/Commands
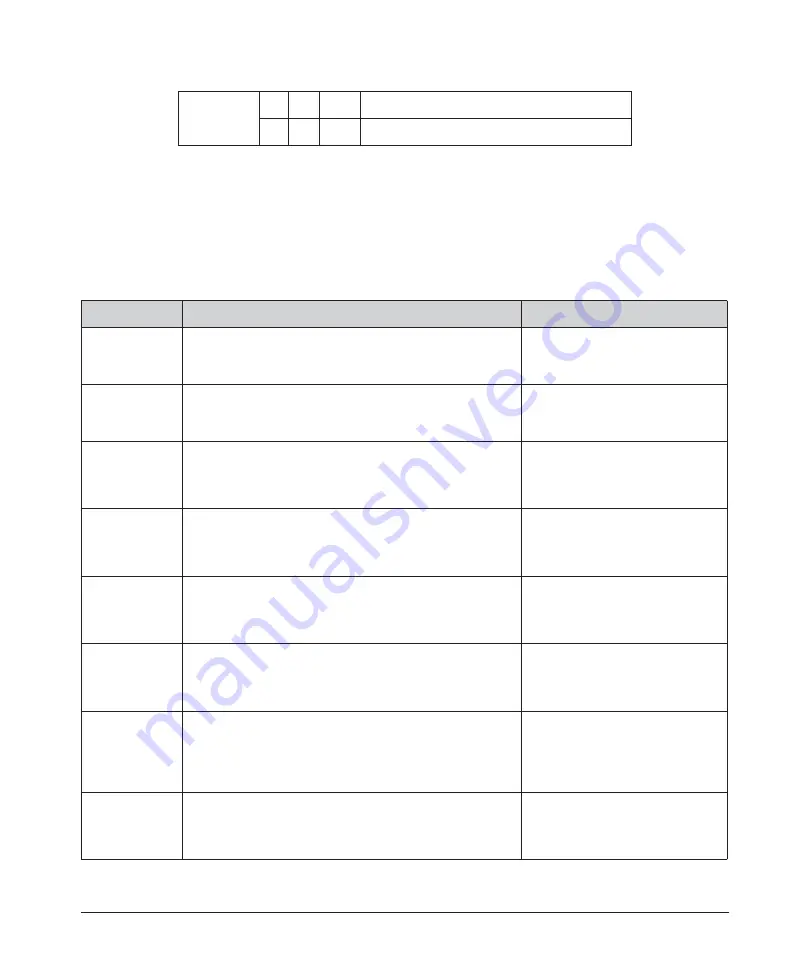
Table 3-5. TCP-IP Configuration Commands
Bit 31
a
-
0
=
Normal Operation
-
1
=
High Average Power
a.
QCW Models only.
b.
Lasers with Touch-Screen Display only.
c.
Lasers with Pulse Shaping Option only.
Code
Description
Example
DDHCP
Disable DHCP - Disables DHCP client
Sent: “DDHCP”
Response: “DDHCP” or
“ERR: Emission is ON!”
EDHCP
Enable DHCP - Enables DHCP client.
Sent: “EDHCP”
Response: “EDHCP” or
“ERR: Emission is ON!”
RDGW
Read Default Gateway — Reads the current default
gateway of the device. The response is the command
echoed back, followed by a delimiter of “: “ and then the
default gateway in dot-decimal notation.
Sent: “RDGW”
Response: “RDGW: 192.168.1.1”
RDHCP
Read DHCP — Reads the current status of DHCP client
function. The response is the command echoed back,
followed by a delimiter of “: “and then either “ON” or
“OFF.”
Sent: “RDHCP”
Response: “RDHCP: OFF”
RIP
Read IP —Reads the current IP address of the device.
The response is the command echoed back, followed by
a delimiter of “:” and then the IP address in dot-decimal
notation.
Sent: "RIP"
Response: "RIP: 192.168.1.230"
RLHN
Read Local Host Name — Reads the current local host
name of the device. The response is the command
echoed back, followed by a delimiter of “:” and then the
name.
Sent: “RLHN”
Response: “RLHN: IPG-
12004020”
RMAC
Read MAC Address — Reads the current MAC address
of the laser. The response is the command echoed back,
followed by a delimiter of “:” and then the MAC address
in a form of six groups of two hexadecimal digits,
separated by hyphens (-).
Sent: “RMAC”
Response: “RMAC: A1-B2-C3-
D4-E5-F6”
RMASK
Read Subnet Mask — Reads the current subnet mask of
the device. The response is the command echoed back,
followed by a delimiter of “:” and then the subnet mask in
dot-decimal notation.
Sent: “RMASK”
Response: “RMASK:
255.255.240.0”
Summary of Contents for QCW YLR-150
Page 4: ...ii Preface Audience...
Page 10: ...viii...
Page 30: ...1 20 Overview of the YLR Series Fiber Lasers Additional Safety Resources...
Page 43: ...2 13 Using Your Device Unpacking Instructions Figure 2 9 Unpacking a Unit from a Cardboard Box...
Page 45: ...2 15 Using Your Device Unpacking Instructions Figure 2 10 Unpacking a Unit from a Wooden Crate...
Page 57: ...2 27 Using Your Device Using the YLR Series Figure 2 13 24 Pin Connector Interfaces...
Page 64: ...2 34 Using Your Device Using the YLR Series Figure 2 16 Main Menu Screen...
Page 66: ...2 36 Using Your Device Using the YLR Series Figure 2 17 Sub Menus Screen...
Page 68: ...2 38 Using Your Device Using the YLR Series Figure 2 18 Sub Menus Screen...
Page 70: ...2 40 Using Your Device Using the YLR Series Figure 2 19 Sub Menus Screen...
Page 72: ...2 42 Using Your Device Using the YLR Series Figure 2 20 Sub Menus Screen...
Page 74: ...2 44 Using Your Device Using the YLR Series Figure 2 21 Sub Menus Screen...
Page 76: ...2 46 Using Your Device Using the YLR Series...
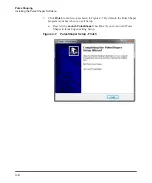
Page 138: ...4 48 Pulse Shaping Using the Pulse Shaper Program...
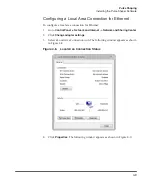
Page 153: ...A 9 Web User Utility Configuring a LAN Connection for Ethernet...
Page 154: ...A 10 Web User Utility Configuring a LAN Connection for Ethernet...
Page 164: ...C 8 Optical Fiber Connector Inspection and Cleaning Overview...
Page 187: ......


