background image

Better Packages 


Section 4 


Maintenance 

24 

There is very little maintenance required to keep your tape dispenser working in top condition. However, 
the maintenance that is required is important to perform. 
 
Maintenance is basically: 
• Cleaning the water tank, bottle, and brushes 
• Keeping the shear blade clean 
• Keeping the machine clear of tape jams 
• Keeping the blade oiler moist 
These are outlined in the following pages. 
 

WASHING THE TANK, BRUSHES, AND BOTTLE 


Water Brushes: Glue from the tape may accumulate and reduce the effectiveness of the moistening 
system. Wash brushes weekly with mild soap. 
 
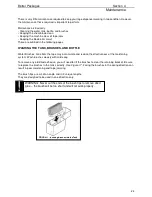
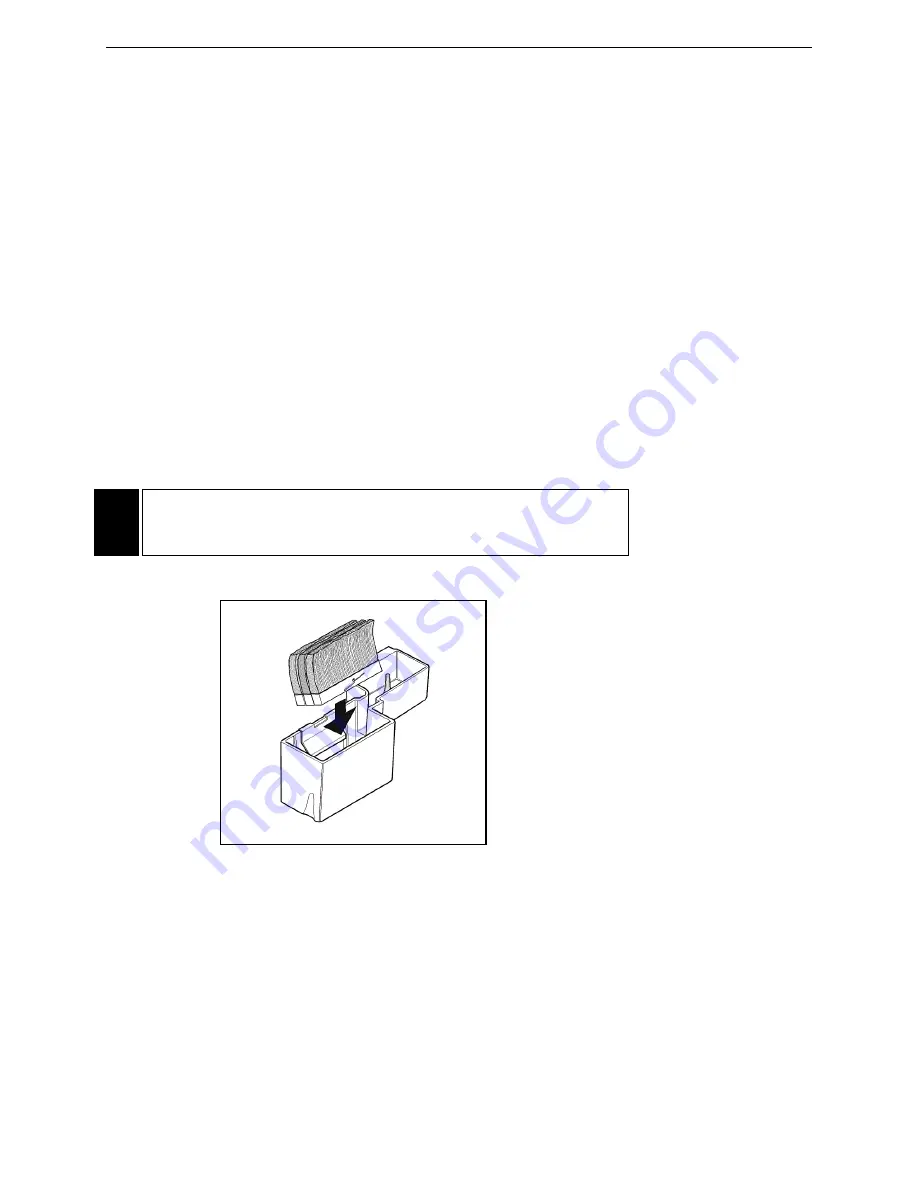
To remove any old dried adhesive, you will need to tilt the brushes to clear the retaining bracket. Be sure 
to replace the brushes in the tank correctly. 

See Figure 17

. Facing the brushes in the wrong direction can 

result in poor moistening and tape jamming.  
 
The brush tips are cut at an angle and in 3 unique lengths.  
They are designed to be used in one direction only. 


 FIGURE 17 - Inserting Brushes into the Tank 


WARNING:  Never cut the ends of the brush tips to remove dried 
glue ... the brush will be too short and will not work properly.


!


Summary of Contents for 555ES

Page 1: ...Better Pack 555e Series Model 555eS 555eSA Electronic Tape Dispenser BP555e Series OPERATING MANUAL BP P N MAN 555e OPR File Name BP555e OPERATING MANUAL 26May15 doc ...

Page 2: ...urfaces of the heater may attain temperatures up to 74 degrees Celsius 165 degrees Fahrenheit CAUTION This equipment generates uses and can radiate radio energy and if not installed and used in accordance with the instruction manual may cause interference to radio communications It has been tested and found to comply with the limits for Class A computing device pursuant to Subpart J of Part 15 of ...

Page 3: ...15 To Dispense Tape Shorter Than the Amount on a Number Button 15 To Dispense a Length of Tape Twice the Length of a Number Button 16 To Adjust the Length of a Number Button and Then Double It 16 To Repeat the Length Previously Dispensed Standard Model 17 To Repeat the Length Previously Dispensed Automatic Model 17 To Activate Automatic Mode 18 To Repeat One Tape Length Automatically 18 To Repeat ...

Page 4: ...ication 28 Cleaning 29 Section 5 Specifications Model Descriptions 30 Technical Specifications 30 Port Connectivity 30 Connector Configurations 30 Model Types 31 Section 6 Service and Warranty This section provides warranty information and how to obtain service Limited Warranty Statement Error Bookmark not defined Error Reference source not found Error Reference source not found Error Bookmark not...

Page 5: ...er Tape Plate Power Cord Operating Guide Warranty Card inside the Operating Guide 2 Tape Roll Guides not pictured see page 6 FIGURE 1 Checking Package Contents FILL OUT THE WARRANTY CARD Filling out the warranty card and returning it to us protects your warranty and allows us to keep you informed of product upgrades Visit www betterpackages com to fill out the warranty card online Preparing the Un...

Page 6: ...so into the second slot from the outside edge LOADING THE TAPE 1 Cut the end of the tape so that it has a clean square end to feed under the drive wheel 2 Load the tape roll into the basket so that The adhesive side is down The roll is upright between the roll guides See Figure 4 The end of the tape goes over the Top of the tape roll from back to front Lift Roller then rubber Roller The end of the...

Page 7: ...tape plate by its rear edge See Figure 7 and guide it forward so that the front slot centers around the drive wheel 2 When the cutouts in the sides of the plate are above the retaining buttons drop the plate down and slide it forward as far as it will go NOTE There is a round guide bar just before the cutting blade The front of the upper tape plate should be under that guide bar Drive Wheel FIGURE...

Page 8: ...ter tank The edge of the base of the brush should be under the retaining bracket 2 Lift the front of the heater assembly and slide the water tank into position at the front of the dispenser At first tilt the brush toward the dispenser so that the head of the cotter pin clears the retaining bracket as you push the brushes into the tank Then tilt the brush back so that it seals flatly on the bottom ...

Page 9: ...rating conditions the bottom of the heater assembly may be HOT Handle the assembly ONLY by the tabs sticking out from the sides See Figure 9 FIGURE 9 Handling the Heater Assembly The tank will drop slightly into this shelf when it is correctly positioned Use these tabs to raise and lower the heater assembly FIGURE 10 Attaching the Bottle to the Dispenser Bottle normally fits in this area Center of...

Page 10: ... the bench so that their mounting holes are lined up IMPORTANT Keep the feet between the dispenser and the bench top This will protect both the dispenser and the bench from vibration from the dispenser s normal operation 5 Insert the 10 24 screws through the bottom of the bench through the rubber feet into the threaded holes in the bottom panel See Figure 11 Use Loctite or a similar thread locking...

Page 11: ...ntly measure dispense the exact length as tape needed A user replaceable fuse See the Maintenance Section 3 Plug the male end of the power cord into a 110 120v 60hz receptacle If you are not sure if the electrical system in your building is properly grounded contact a licensed electrician FIGURE 13 The Electrical Panel Use this port for optional pedal control or AMD 1 Fuse Holder Attach the A C Po...

Page 12: ... then back off slightly to the lowest temperature setting that best meets your needs See Figure 15 Refer to Section 3 Sealing with Gummed Tape When the heat is properly adjusted the tape will adhere quickly to the parcel Too low a setting may result in the tape taking slightly longer to properly adhere FIGURE 14 On Off Switch Location FIGURE 15 Handling the Heater Assembly Temperature Adjustment C...

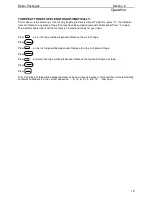
Page 13: ...27 33 21 15 9 6 12 18 REPEAT START 555 eS Better Pack FIGURE 16a Keypad for Tape Length Selection PLUS Button Adds 1 cm to selected length MINUS Button Subtracts 1 cm from selected length REPEAT START Button Repeats length selected before this button was pressed X2 Button Doubles selected length Manual Feed Button Dispenses tape while pressed Length 4 to 120 is determined by how long the button is...

Page 14: ...10 cm to a maximum of 120 305 cm depending upon how long the button is held down FIGURE 16b Keypad for Tape Length Selection PLUS Button Adds 1 cm to selected length MINUS Button Subtracts 1 cm from selected length REPEAT START Button Repeats length selected before this button was pressed A Button Press to place the unit in Automatic mode light will be on when unit is in automatic mode Number Butt...

Page 15: ... of keys to produce the length or lengths that you require TO DISPENSE TAPE LONGER THAN THE AMOUNT ON A NUMBER BUTTON Press To dispense 42 one is added for each press of the button In this case it is 1 x Press To dispense 43 one is added for each press of the button In this case it is 1 2 x Press the button once for each you want to add to a number button You can press the button as many times as ...

Page 16: ...THE LENGTH OF A NUMBER BUTTON Press To dispense 84 2 times 42 84 Press To dispense 54 2 times 27 54 First press the button and then press the number button For example Pressing and then pressing the button will dispense 84 of tape Pressing and then pressing the button will dispense 54 of tape TO ADJUST THE LENGTH OF A NUMBER BUTTON AND THEN DOUBLE IT Press To dispense 63 30 plus 1 for the three bu...

Page 17: ...on lengths Each time you dispense a different length of tape by pressing a different button or combination of buttons that new figure Is stored in the REPEAT button memory Becomes the length dispensed the next time you press the REPEAT button The REPEAT Button Lower left on the keyboard TO REPEAT THE LENGTH PREVIOUSLY DISPENSED AUTOMATIC MODEL The dispenser remembers the last two length of tape di...

Page 18: ...ensed Remove the six inch tape Press Press A six inch piece of tape will be dispensed Remove it and another six inch piece of tape will be dispensed automatically TO REPEAT TWO TAPE LENGTHS AUTOMATICALLY First make sure the memory is clear of any lengths previously stored To do this press A the indicator turns off Remove any piece of tape that may have been dispensed but not removed Press A again ...

Page 19: ... cleared and ready for your input Press a six inch tape will be dispensed Remove the six inch tape Press Press a nine inch tape will be dispensed Remove the nine inch piece of tape Press Press a twelve inch tape will be dispensed Remove the twelve inch piece of tape Press Press A 6 inch piece of tape will be dispensed and as each successive piece is removed the unit automatically continues to disp...

Page 20: ...eal is compromised Environmentally friendly and recyclable Eliminates repetitive wrist motions of hand held guns Discourages theft tape won t pop off Economical never need more than one strip of tape per seal IDENTIFYING THE TYPES OF TAPE The following table lists the types of tape and their identifying characteristics TYPE CHARACTERISTIC Water Activated or Gummed Tape Gummed adhesive on the back ...

Page 21: ...ess on the carton seal as in the case of an over stuffed carton then it is desirable to have a shorter quicker open time If the carton is large then it is desirable to have a longer open time THE DIFFERENT GRADES WEIGHTS OF SEALING TAPE LISTED IN ORDER OF INCREASING STRENGTH Paper tape Economy grade reinforced tape Light weight reinforced tape Medium weight reinforced tape Heavy weight reinforced ...

Page 22: ... APPLIED TO THE TAPE Adjust the height of the water bottle Higher to apply more water Lower to apply less water Never use any dispenser for water activated tape without a water bottle Do not add water to the water bottle whenever it looks low This will always Cause overwetting when the tank is first filled Cause underwetting when it needs to be refilled SETTING HEATER CONTROLS In most situations t...

Page 23: ...ing 2 Fold the flap without the tape down to its closed position 3 Fold the other carton flap the one with the overhanging tape down into its proper closed position so that the overhanging portion of the tape is now in contact with the other flap on the opposite side of the carton 4 Starting from the middle of the carton apply a light downward pressure and wipe your hands over the tape on top of t...

Page 24: ...ushes Glue from the tape may accumulate and reduce the effectiveness of the moistening system Wash brushes weekly with mild soap To remove any old dried adhesive you will need to tilt the brushes to clear the retaining bracket Be sure to replace the brushes in the tank correctly See Figure 17 Facing the brushes in the wrong direction can result in poor moistening and tape jamming The brush tips ar...

Page 25: ...ekly Wash water brushed with mild soap rinse well Clean any accumulated tape dust with a dry brush or blower Wash water tank with mild soap rinse well Monthly Clean accumulated glue from blades using a scraper Don t scrape the cutting edge the blade may dull and need replacement Caution The blade is sharp and can cut easily be careful working around it Apply light coating of light machine oil to b...

Page 26: ... Turn the dispenser OFF and UNPLUG it See Figure 18 2 Cut the tape roll just behind the upper tape plate to get it out of your way 3 Remove the upper tape plate 4 Raise the shear blade by moving the lever located to the right of the feed wheel forward See Figure 19 FIGURE 18 On Off Switch Location FIGURE 19 Moving Shear Blade into View ...

Page 27: ...the switch is activated when the cover is closed If the top cover is properly closed and the on off switch doesn t light in the ON position it may indicate a blown fuse Proceed as follows 1 Unplug the dispenser s power cord from the wall 2 Determine if the outlet is OK Test the outlet with a light or other device 3 If the outlet is OK remove the fuse holder from the electrical panel at the rear of...

Page 28: ... 1 Turn the dispenser off and unplug it 2 Pull back gently on the blade oiler to move it away from the shear blade 3 Keep the felt pad slightly moist by adding several drops of light machine oil at regular weekly or monthly intervals depending on use Do not over oil The oil will keep your shear blade lubricated for clean fast cutting 4 Gently push the oiler back into position next to the shear bla...

Page 29: ...ngs clogs them up and makes them wear prematurely CLEANING Inside the dispenser Brush out paper dust Do Not use spray cleaners Exterior surface of the dispenser Use a mild soap and water No ammonia based cleaning agents or solvents CAUTION Do not oil the feed roller shaft WARNING DO NOT USE SPRAY LUBRICANTS SPRAY CLEANER OR OTHER FLAMMABLE LIQUIDS ON OR INSIDE THIS TAPE DISPENSER ...

Page 30: ...NT Tape Width 1 5 3 0 3 8 cm 7 7 cm Maximum Tape Roll Diameter 10 25 cm Tape Lengths Dispensed Short Models auto std 6 to 45 15 cm 114 cm Long Models auto and std 12 to 90 30 cm 228cm Dispensing Speed 45 inches per second 114 cm per second Number of Brushes 3 Water Bottle Capacity 34 oz 1 liter Shipping Weight 32 lbs 15 kgs Dimensions L x W x H 20 x 12 5 x 12 51cm x 32cm x 30cm Power Requirements ...

Page 31: ...115V 60Hz US Canada 1 BP555e L Long Inch 115V 60Hz US Canada 1 BP555e LA Long Inch 115V 60Hz US Canada 1 BP555e M Metric 230V 50Hz Europe 2 BP555e MA Metric 230V 50Hz Europe 2 BP555e J Metric 100V 50 60 HZ Japan 1 BP555e JA Metric 100V 50 60 HZ Japan 1 BP555e F Short Inch 230V 50 Hz Far East 1 BP555e FA Short Inch 230V 50Hz Far East 1 1 Tape gummed side in 2 Tape gummed side out ...

Page 32: ...cure carton that will properly protect the unit during transit Units received improperly packed are subject to costs associated with damage caused during transit These costs will be the responsibility of the customer All associated shipping or freight costs related to items shipped for service are the sole responsibility of the customer For service under this warranty call or write your nearest Be...

Page 33: ...27 Checking the Contents 5 Checking Upper Tape Plate 7 Choosing the Best Tape for Your Application 20 Choosing the Correct Tape Length 23 Cleaning the Shear Blades 25 Clearing Jams 26 D Different Grades of Sealing Tape 21 F Fill Out the Warranty Card 5 I Identifying the Types of Tape 20 Installing the Bottle and Water Tank 8 L Loading the Tape 6 Lubrication 28 M Model Descriptions 30 Mounting to a...

Page 34: ...ecific Length of Tape Not on a Number Button 15 To Dispense Tape Longer than the Amount on a Number Button 15 To Dispense Tape Shorter than the Amount on a Number Button 15 To Repeat One Tape Length Automatically 18 To Repeat the Length Previously Dispensed Standard Model 17 To Repeat the Length Previously Dispensed Automatic Model 17 To Repeat Three Tape Lengths Automatically 19 To Repeat Two Tap...

Page 35: ...________________________________________________________________________ ___________________________________________________________________________________ ___________________________________________________________________________________ Better Packages Service Dates _________________________________________ _______________________________________ _________________________________________ _____...

Reviews: