© 2013 iPulse Systems
Page
11
5 Angle of barcode while scanning
If the barcode is covered with a transparent layer like the SADL, it helps if the card is positioned at a
slight angle to minimize reflections back to the scanner.
6 Ambient light
If scanning outdoors, best practice is the block direct sun from the scanner and barcode. Strong light
is reflected back to the scanner so it struggles to decode a barcode image. The operator must try and
shadow the scanner and barcode using his hand or body.
Procedure
1 Placement
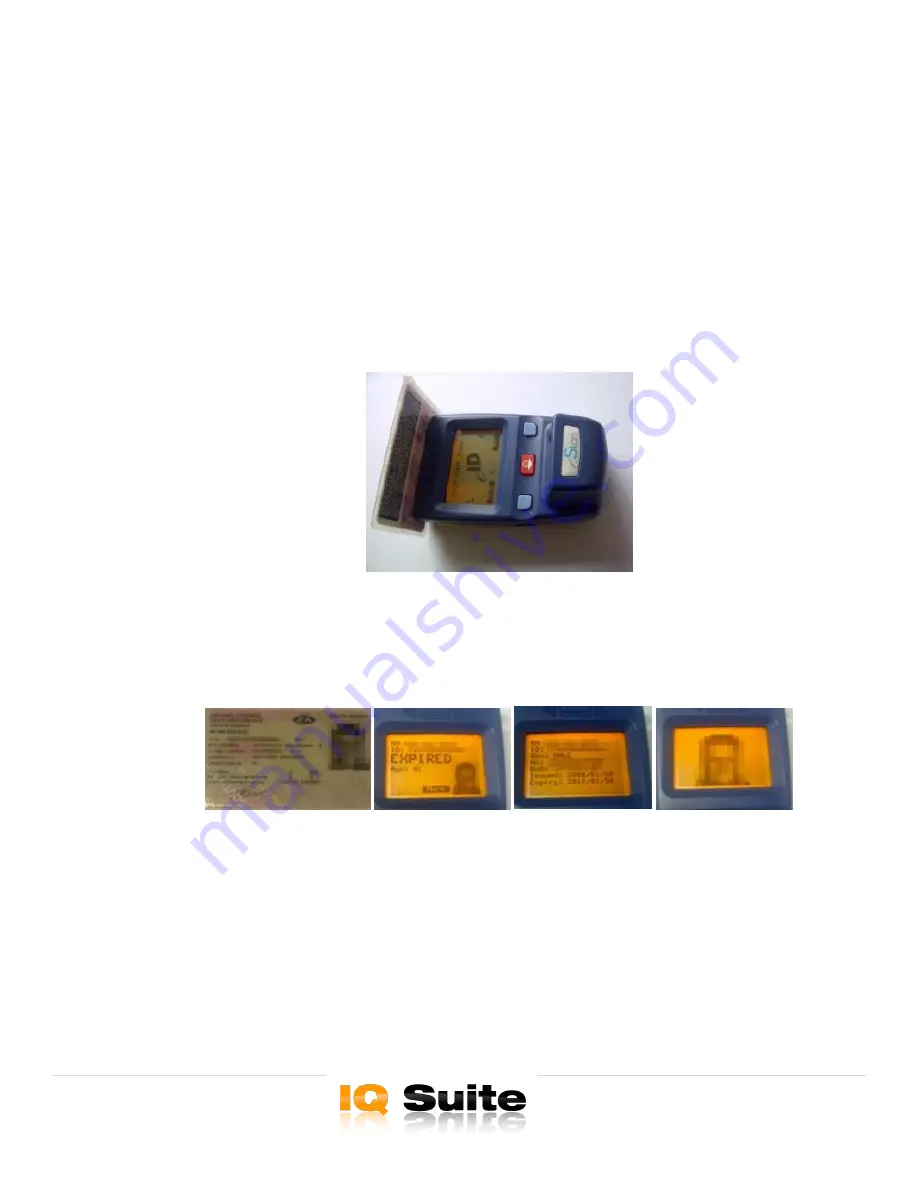
Place the barcode in front of the scanner with the barcode facing towards the scanner
2 Scan
To activate the scan process, momentarily press one of the two yellow side buttons
3 Processing and save
After a successful barcode scan, the results will be displayed on screen. Use the red button to scroll
down for more info. The scan data is saved in memory.
4 Next scan
At any time press the yellow button to continue scanning, no need to be in the main menu.
5 Data uploading
With an eSkan250, as soon as data is stored in memory the WIFI will start uploading files to the
server in the back ground. No user intervention required to start the upload process. The eSkan250
will also upload data via USB if it is connected to a PC.
With an eSkan150, data will be uploaded once scanner is connected to a PC.
6 Finish
The eSkan will automatically group transactions together until the Finish button (left blue key) is
pressed. Once all the barcodes that are part of the same transaction has been scanned press the
finish button before proceeding to the next transaction. Typically this would be a vehicle license disk