IQCCTV IQR4D
– 4 Camera DVR
3.7.3 Motion detection
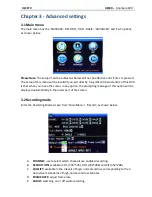
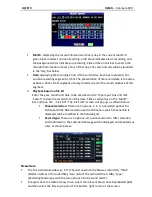
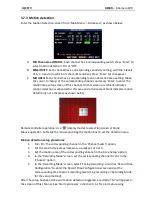
Enter the Motion Detection screen from ‘Main Menu’ > ’Advanced ‘, as shown below:
A.
MD Channel and STATUS
: Each channel has a corresponding switch. Press ‘Enter’ to
select motion detection ‘On’ or ‘Off’.
B.
SENSITIVITY
: Each channel has a corresponding sensitivity setting, with the 4 levels
of 1, 2, 3 and 4 (In which 4 is the most sensitive). Press ‘Enter’ for changeover.
C.
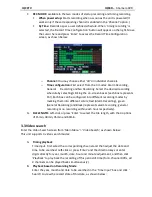
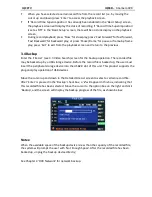
MD AREA:
Each channel has a corresponding motion detection area setting. Move
the cursor to ‘Setup’ of the corresponding channel, and press ‘Enter’ to enter the
motion area setup screen of this channel. On this screen a red block indicates
motion detection is activated for this area and a transparent block indicates motion
detection is not activated, as shown below:
Remote controller operation: Use ‘
’ (display mode) to select full screen or blank;
Mouse operation: Left-click the mouse and drag the motion box to set the detection area.
Motion detection setup procedures:
1.
Turn ‘On’ the corresponding channel in the ‘Channel Switch’ option;
2.
Set the sensitivity level as necessary, usually set at 3 or 4;
3.
Set the motion area of the corresponding channel in the ‘Area Setup’ option;
4.
In the ‘Recording Mode’ screen, set the corresponding channel to ‘On’ in the
‘Channel’ option;
5.
In the ‘Recording Mode’ screen, select ‘Timing Recording’. Also click ‘Record Time
Configuration’ to enter the Record Time Configuration screen and set the
corresponding time to alarm recording (see timing recording in ‘Recording Mode’
for the setup method).
After the setup has been done and motion detection triggered, a red letter ‘M’ will appear in
the screen of this channel. See ‘Alarm processes’ in Section 3.6.1 for alarm processing.

