background image


IQCCTV                                                                                                  IQR4D

 – 4 Camera DVR 

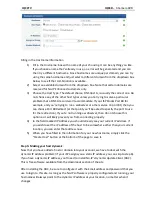
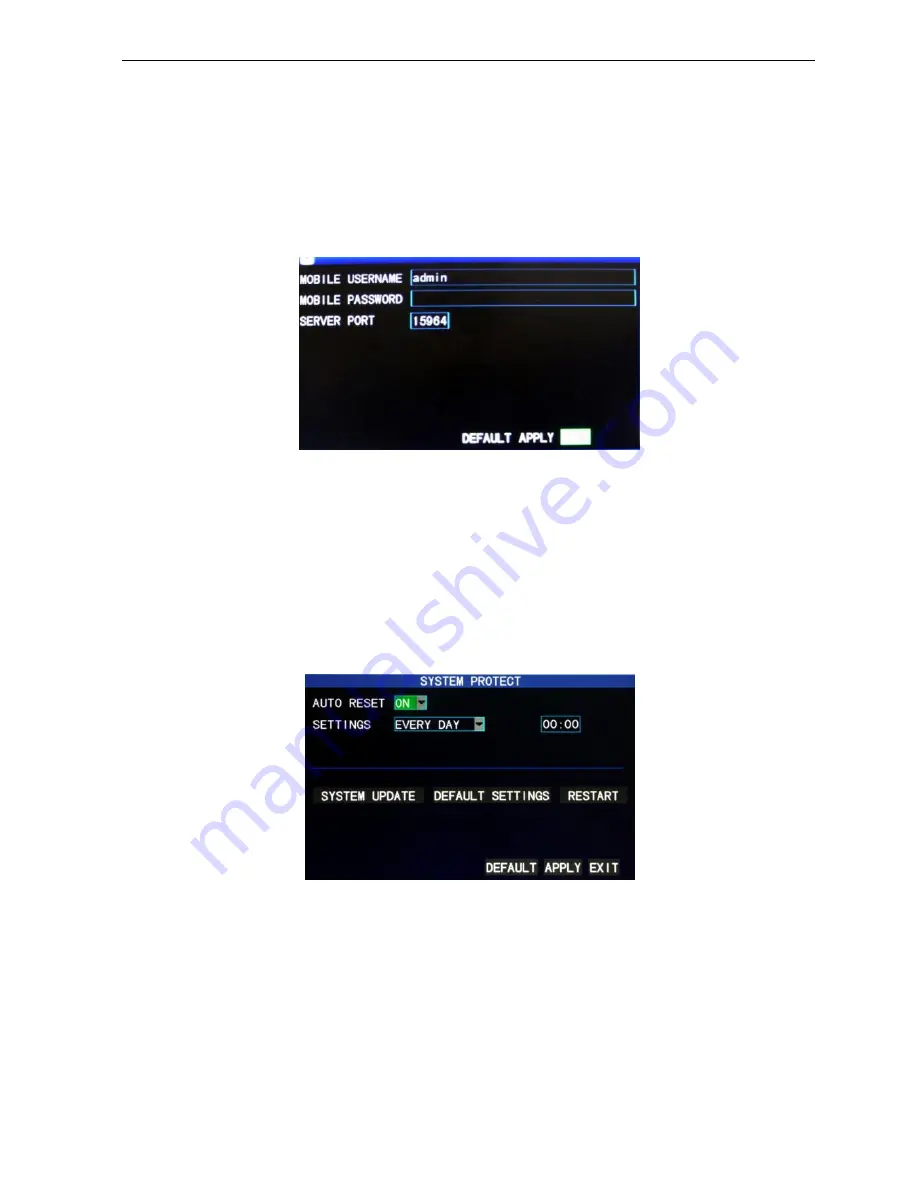
3.7.4 Mobile phone monitoring 

The mobile phone monitoring function allows users to access the DVR from their smartphones 
and is compatible with Android, Blackberry, iPhone, Nokia (Symbian) and Windows Mobile. 
 

The procedure is as follows: 

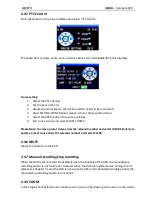
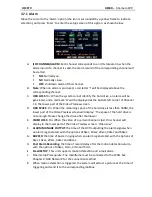
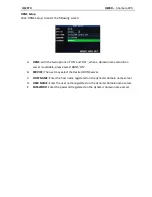
Enter the following screen from ‘Main Menu’ > ’Advanced Functions’ > ’Mobile Phone 
Monitoring’: 


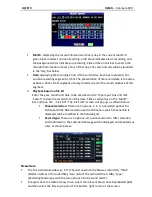
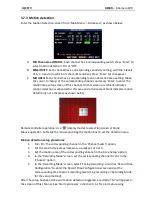
Service port

: with a setting range of 1,024—65,535; this port has to be mapped on the router, 

and its setup method is the same as the mapping method of the port in network setup. 
 

Please Note:

 For more detailed mobile phone installation, please refer to the Mobile Phone 

User Manual in the CD 


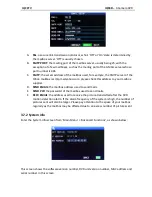
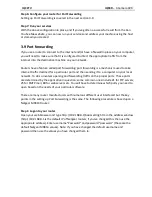
3.7.5 System maintenance 

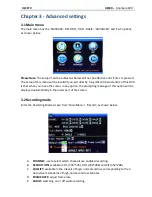
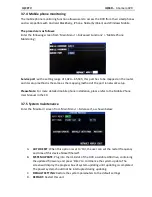
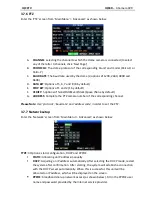
Enter the ‘Maintain’ screen from ‘Main Menu’ > ’Advanced’, as shown below: 


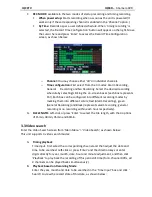
A.


AUTO RESET

: When this option is set to ‘On’, the user can set the restart frequency 

and time of this device himself/herself. 

B.


SYSTEM UPDATE

: Plug into the USB slot of the DVR a suitable USB drive, containing 

the updated firmware, and press ‘Enter’ to commence the system update. The 
screen will display the progress box of system updating until updating is completed. 
The power system should not be interrupted during updating. 

C.


DEFAULT SETTING

: Restore the system parameters to the default settings. 

D.


RESTART: 

Restart this unit. 


Summary of Contents for IQR4D

Page 1: ...contact your local distributor LIMITED WARRANTY This product is supplied with a 1 Year warranty The Warranty excludes products that have been misused including accidental damage and damage caused by normal wear and tear In the unlikely event that you encounter a problem with this product it should be returned to the place of purchase ...

Page 2: ...and high temperature environment The back panel shall be 15cm or more away from other objects or wall to facilitate fan cooling The DVR shall work under temperature humidity and voltage according to its technical specifications The DVR should not be stored with corrosive chemicals that may produce volatile gases The DVR shall be installed in a space without much dust and the environment should be ...

Page 3: ...stallation 10 2 2 Boot 10 2 3 System login 10 2 4 Shortcut menu 11 Chapter 3 Advanced settings 14 3 1 Main menu 14 3 2 Recording mode 14 3 3 Video search 15 3 4 Backup 17 3 5 Hard drive management 18 3 6 Basic setup 19 3 7 Advanced 22 3 8 Domain name application 30 3 9 Port forwarding 32 Chapter 4 DVR network 34 4 1 Functional characteristics 36 4 2 Installation and download of controls 36 4 3 IE ...

Page 4: ... 40 4 9 Network setup 40 4 10 System setup 41 4 11 Host info 41 Chapter 5 Client software Player 42 5 1 Client software 42 5 2 Video Player 43 Appendix 1 Frequently Asked Questions 47 Appendix 2 Hard Drive Space Calculation Table 49 Appendix 3 DVR Connections 49 ...

Page 5: ...3 Main features Standard H 264 video compression format 16 bit true color semi transparent graphical menu interface menu options tip A variety of recording modes manual timing motion and alarm recording Optimized 4 Channel simultaneous playback A variety of backup USB drives mobile hard drives or via networks X2 USB ports x1 USB2 0 for data backup x1 USB1 1 for the mouse operations Multi functiona...

Page 6: ... network backup HDD Support 1 SATA HDD capacity to 2T Network transmission 4 Channels real time network transmission with CIF resolution Capture function Support Email alarm Send pictures to the designated Email box PTZ control Support PTZ protocol PELCO D PELCO P PIP Support Zoom Support Network and protocol 1 RJ 45 10 100M via Ethernet support TCP IP SMTP DHCP DNS DDNS NTP etc IE browser Support...

Page 7: ...nector 2 Video output CVBS output and connect the monitor 3 1 4 Audio input Connect active audio signals such as pickup 4 Audio output Connect the audio output 5 VGA Connect VGA monitor such as computer monitor 6 NETWORK Connect the Ethernet 7 RS485 Connect the RS485 interfaces in equipments like PTZ 8 DC12V Power interface DC 12V 3A 9 ALARM Connect alarm switch output 10 G Grounding To eliminate ...

Page 8: ...nel selection number keys PTZ PTZ Control Single and multi split screen Quit shortcut menu Shortcut menu Direction buttons OK ESC Exit Return MENU Enter the main menu STARTREC Manual recording STOPREC Stop recording Video Search Stop playing Fast backward Fast forward Frame movement F1 F2 Spare key ...

Page 9: ...nly one channel at a time Please select corresponding screen if multi screen mode is on prior to setting Volume adjustment and PTZ control PTZ control is available if clicking direction or and icon There is a volume bar in volume control interface Move mouse to a position and click right button the corresponding volume will be shown in the right side of the volume bar click to exit Colour adjustme...

Page 10: ... a 4 channel monitoring image If a hard drive has not been formatted formatting information will be shown instead If the automatic recording function is chosen then the REC LED will also be visible on booting the DVR Please Note If hard drive is faulty or has not formatted correctly the red H logo will be shown in the video pre view picture The newly installed hard drive must not be used until it ...

Page 11: ...ions and video recording search 2 4 1 Main menu Click Main Menu to enter the main menu interface please see 3 1 2 4 2 Lock When the password function is on please see 2 3 a right click in the monitoring interface and selecting the Lock option in the pop up menu allows the system interface to be locked A password is required to log back into the unit 2 4 3 Channel switching 4 channel DVRs can choos...

Page 12: ... select START CRUISE Please Note To view a preset cruise enter the relevant number and select JUMP Similarly to delete a preset cruise enter the relevant number and select CLEAR 2 4 6 MUTE Mutes the audio from the DVR 2 4 7 Manual recording stop recording When the DVR is set to record immediately upon the booting of the DVR the manual stop recording button is not functional However when the DVR is...

Page 13: ...IQCCTV IQR4D 4 Camera DVR using the mouse and thus zooming into that corresponding area 2 4 10 PIP Picture in Picture In the single channel full screen mode you can see floating images of other channels ...

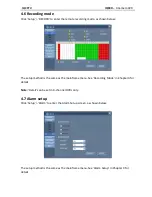
Page 14: ...en you move the cursor to any option the prompting message of this option will be displayed automatically in the lower part of the screen 3 2 Recording mode Enter the Recording Mode screen from Main Menu Record as shown below A CHANNEL use to select which channels are enabled recording B RESOLUTION available in D1 704 576 HD1 704 288 and CIF 352 288 C QUALITY available in the 3 levels of high norm...

Page 15: ...nt recording modes by marking them into different colors Red Alarm Recording green General Recording and Black represents alarm recording general recording or no recording within each hour respectively G FILE LENGTH Left click or press Enter to select the File length with the 4 options of 15min 30min 45min and 60min 3 3 Video search Enter the Video Search screen from Main Menu Video Search as show...

Page 16: ... Time Input box and click Search to view the record state of this date Click a certain day on the Month bar and then the FILE LIST The FILE LIST screen will pop up as shown below Channel selection There are 5 options 1 2 3 4 and all 9 options for 8 channel DVR After selection and confirmation which channel file is displayed can be modified in the following list Record type There are 3 options all ...

Page 17: ...eo Search screen for the backup operation The recorded file may be backed up by a USB storage device Before the record file is backed up the user must insert the peripheral storage device into the USB2 0 slot of this unit This product supports the plug and play operation of USB devices Move the cursor up and down in the Detailed File List screen to select a certain record file After Enter is press...

Page 18: ...ting that this HDD has been selected E OVERWRITE ENABLE The hard drive will overwrite the earliest record when its memory is full DISABLE Recording will stop when the memory of the hard drive is full F HDD FORMAT If the hard drive is used for the first time it is often necessary to format the hard drive Click the Format HDD button and then click Enter for formatting in the pop up prompt message di...

Page 19: ...GUAGE option the icon is enlarged and highlighted to indicate selection and press Enter to enter the setup screen of this option as shown below The system offers optional multiple languages After choosing the language click Apply button to save and it will go into effect after system restart 3 6 2 Time setup Move the cursor to the DATE TIME option the icon is surrounded by a yellow frame to indica...

Page 20: ...SSWORD This option is operated with keys or the mouse Enter digits directly to set the user password D ADMIN PASSWORD This option is operated with keys or the mouse Enter digits directly to set the administrator password Please Note This unit has no initial password When you re setting up passwords it is recommended that the two passwords are set up together If any set password is forgotten please...

Page 21: ...t bottom right and off C COLOR Move the cursor to Setup of the corresponding channel and press Enter or left click to enter the color setup screen as shown below Press Enter or drag the cursor directly to set the picture color including the 4 options of chromaticity brightness contrast and saturation Press Enter to exit and save the settings Preview A On The picture of this channel can be seen in ...

Page 22: ...ss Enter to change over between the two camera systems of PAL and NTSC C VOLUME SETUP Move the cursor to Volume Setup left click or press Enter to enter the Volume Setup screen and press Left Right or drag the cursor with the mouse directly to adjust the volume Please Note The system will restart when the VGA resolution or the camera resolution is modified 3 7 Advanced Enter the following screen f...

Page 23: ...s less than 500M the lower part of the Video Preview screen will display The space of the hard drive is not enough Please change the drive after shutdown E VIDEO LOSS On When the video of a certain channel is lost this channel will display in the lower part of the Video Preview screen Video Loss F ALARM MANAGE OUTPUT the time of the DVR outputting the alarm signal when an alarm is generated with t...

Page 24: ...o your mailbox supplier D SEND EMAIL the mailbox address used to send mails E SEND PW the password of the mailbox used to send mails F RECV EMAIL the address used to receive the picture transmitted after the DVR motion detection alarm If the alarm frequency of the system is high the number of pictures sent will also be larger Please pay attention to the space of your mailbox regularly as the mailb...

Page 25: ...ivated as shown below Remote controller operation Use display mode to select full screen or blank Mouse operation Left click the mouse and drag the motion box to set the detection area Motion detection setup procedures 1 Turn On the corresponding channel in the Channel Switch option 2 Set the sensitivity level as necessary usually set at 3 or 4 3 Set the motion area of the corresponding channel in...

Page 26: ...Please Note For more detailed mobile phone installation please refer to the Mobile Phone User Manual in the CD 3 7 5 System maintenance Enter the Maintain screen from Main Menu Advanced as shown below A AUTO RESET When this option is set to On the user can set the restart frequency and time of this device himself herself B SYSTEM UPDATE Plug into the USB slot of the DVR a suitable USB drive contai...

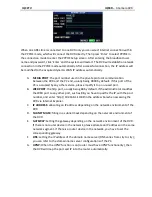
Page 27: ...omplete the PTZ camera number of the corresponding channel Please Note Use protocol baud rate and address code in order to set the PTZ 3 7 7 Network setup Enter the Network screen from Main Menu Advanced as shown below TYPE 3 Options static configuration DHCP and PPPOE STATIC Allocating an IP address manually DHCP Acquiring an IP address automatically After selecting the DHCP mode restart the syst...

Page 28: ...ttp port usually being 80 by default If the administrator modifies the WEB port to any other port such as 88 you have to postfix the IP with the port number and enter http 192 168 1 19 88 in the address bar when accessing the DVR via Internet Explorer C IP ADDRESS allocating an IP address depending on the network environment of the DVR D SUBNET MASK filling in a subnet mask depending on the networ...

Page 29: ... name resolution server is available please select DDNS ON B SERVICE The user may select the desired DDNS server C HOST NAME Enter the host name registered on the dynamic domain name server D USER NAME Enter the user name registered on the dynamic domain name server E PASSWORD Enter the password registered on the dynamic domain name server ...

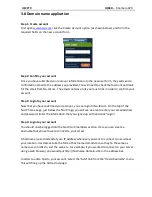
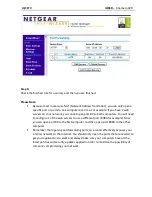
Page 30: ...the top of the No IP home page just below the No IP logo you will see an area to enter your email address and password Enter the information that you signed up with and click Login Step 4 Login to your account You should now be logged into the No IP com members section Here you can create a hostname that you will use to connect to your server A hostname is used instead of your IP address whenever ...

Page 31: ...he port to use for the redirection If you re not running a webserver then do not choose this option as it will likely prevent you from connecting properly 4 In the field marked IP Address you should already see your current IP address If you wish to set the IP address of the host to be somewhere other than your current location you can enter that address now 5 When you have filled in the informati...

Page 32: ...nding it to a computer on your local network To do so involves opening and forwarding traffic on the proper ports These ports are determined by the application in question some common ones include 21 for FTP servers 25 for SMTP mail 80 for web servers etc You will have to determine which ports you need to open based on the needs of your particular software There are many router manufacturers with ...

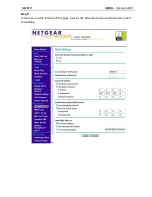
Page 33: ...IQCCTV IQR4D 4 Camera DVR Step 2 In the menu on the left side of the page look for the Advanced menu and then click on Port Forwarding ...

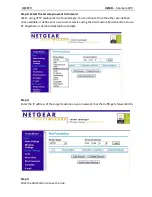
Page 34: ...u can choose from the other pre defined ones available or define your own custom service using the Add Custom Service button to use PC Anywhere or Remote Desktop for example Step 4 Enter the IP address of the target machine on your network that the traffic gets forwarded to Step 5 Click the Add button to save the rule ...

Page 35: ...ill need to configure 1 of the web servers to use a different port 8080 for example Now you can open port 80 to the first computer and then open port 8080 to the other computer Remember that opening and forwarding ports on a router effectively exposes your internal network to the Internet You should only open the ports that are needed to get your applications to work and always make sure your comp...

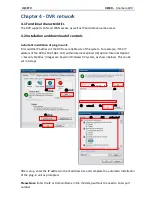
Page 36: ... For example if the IP address of the DVR is 192 168 1 100 within Internet Explorer IE option Internet Options Security Options images are based in Windows XP system as shown below This can be set in 9 steps After setup enter the IP address in the IE address bar and complete the automatic installation of the plug in unit as prompted Please Note Enter the IP or Domain Name in the third step without...

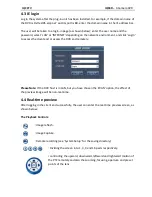
Page 37: ...ient end or access the DVR end remotely Please Note If the DVR host is in LAN but you have chosen the WAN option the effect of the preview image will be non real time 4 4 Real time preview After logging in the client end successfully the user can enter the real time preview screen as shown below The Playback Controls Image refresh Image Capture Remote recording see System Setup for the saving dire...

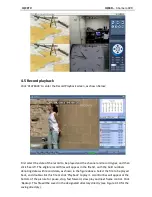
Page 38: ...files will appear in the file list with the bold numbers denoting dates with record data as shown in the figure above Select the file to be played back and double click this file or click Playback to play it A control bar will appear at the bottom of the picture for pause stop fast forward slow play and next frame control Click Backup This file will be saved in the designated directory directly se...

Page 39: ... The setup method is the same as the mainframe menu See Recording Mode in Chapter 3 for details Note Detail can be set in 4 channel DVRs only 4 7 Alarm setup Click Setup Alarm to enter the Alarm Setup screen as shown below The setup method is the same as the mainframe menu See Alarm Setup in Chapter 3 for details ...

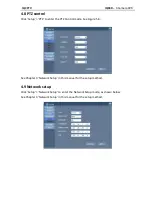
Page 40: ... enter the PTZ Control mode See Figure 5 6 See Chapter 3 Network Setup in this manual for the setup method 4 9 Network setup Click Setup Network Setup to enter the Network Setup mode as shown below See Chapter 3 Network Setup in this manual for the setup method ...

Page 41: ...t be high otherwise the image may have a delay B FILE SAVE PATH setting the record saving directory during remote recording and remote backup C IE PASSWORD setting the IE login password Note This password may be cleared in the main menu of the DVR 4 11 Host info Click DVR HOST to enter the Host Info screen as shown below View the operating state of the hard drive the time remaining and the softwar...

Page 42: ...nd the user will be prompted with a Login interface as detailed below A IP ADDRESS Enter IP address or Domain Name B MEDIA PORT Enter the port number the default is 9000 C PASSWORD Enter IE password D NETWORK Select relevant option LAN is the local area network INTERNET is the wide area network Please Note After the successful login the interface is the same as that of IE Please refer to the instr...

Page 43: ...ckSetup exe in the CD Drive After the successful installation double click the program icon Playback software on the desktop Click File F as shown in the following image select open the local files F When opening the root of the record file please select the format as 264 as shown below ...

Page 44: ...IQCCTV IQR4D 4 Camera DVR There will be 264 files in the file list select one of the files to be played Click OPEN as shown in the following image Then click PLAY option as shown in the following image ...

Page 45: ... All video Play Forward Play backward Increase video Pause STOP ST Start Operation Backward forward frame File Cut Slow Normal Fast File Deletion Next Hour avi AVI Format transmission Capture bitmap OSD Decrease video Volume Control Please Note Double click the image to enlarge the image When converting the AVI format you should click ST button Then click AVI to select the time periods ...

Page 46: ...IQCCTV IQR4D 4 Camera DVR Audio Setup Click SETTING AUDIO CHANNEL SETUP Normal video Bar as shown below Select the channel audio to be played and then click OK ...

Page 47: ... DVR s remote controller does not work If the controller is pointing to the IR signal on the DVR s front panel but is still not working please check the batteries in the remote controller If it is still not working please check the status of the remote controller 7 The manual recording and stop recording button on the front panel and shortcut menu does not work This function can only work when the...

Page 48: ... have forgotten the password please enter User Password interface within the system and click Clear IE Password and login again Additionally please check settings on the DVR s local network and remote access network Low network speeds can cause failed login 16 After logging into the remote access the message shows user is configuring Please ensure that the user has exited out of all the relevant m...

Page 49: ...nits are in Megabytes MB per Channel per Hour Bit rate Resolution Excellent Good Ordinary D1 400 300 200 Half D1 350 250 150 CIF 300 200 100 Please Note These are only estimated figures and are only to be used as reference Data from different environments signal sources and bit rate will be different and affect the storage capacity Appendix 3 Connection Guide ...

Reviews: