background image

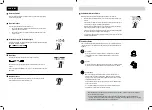
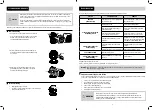
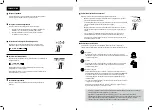
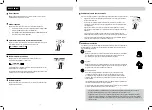
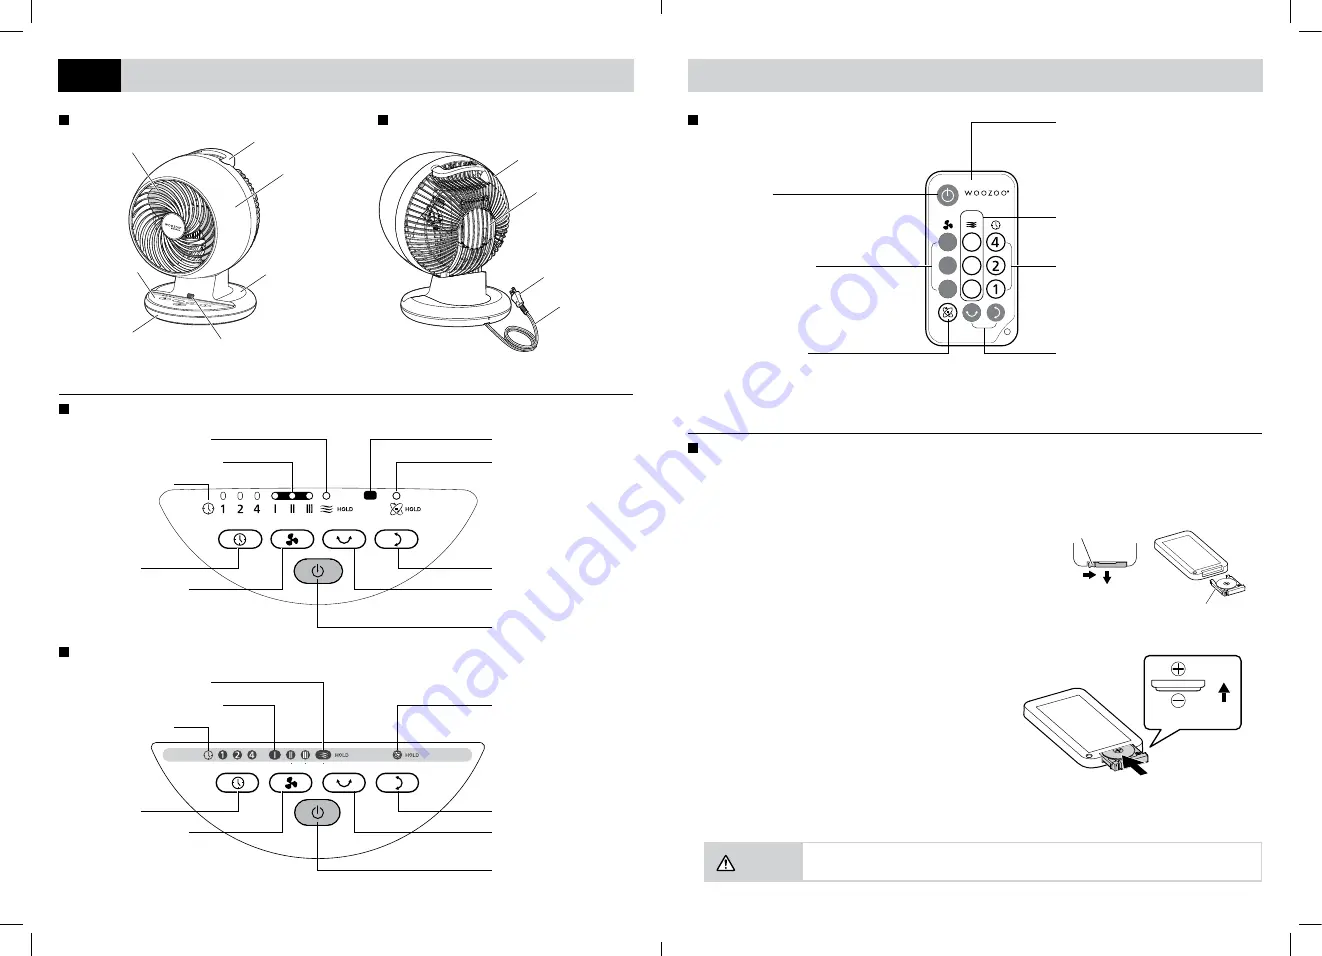
Timer button.
Press the button to choose the desired 
run time. To clear off the timer, press 
the button again. 

Oscillation buttons: 
• Horizontal - Press the button to turn the 
   left and right oscillation on or off.
• Vertical - Press the button to turn the 
   up and down oscillation on or off.

Air flow strength button.
Press the button to select 
desired air flow during operation.

Power button.
Product will begin operating on 
the last setting used. Press the button 
during operation to turn the product off.

Breeze setting button.
Press the button to select the desired 
natural breeze setting.

Remote control.
To use the remote, please point the infrared 
sensor at the remote receiver on the front 
of the main body.

III

II

I

III

II

I

Full oscillation button.
Press the button to turn the 
full oscillation on or off. 

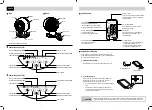
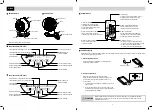
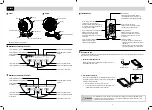
PARTS

Front

Back

Breeze setting indicator light

Full oscillation indicator light

Power button

Timer button

Air flow strength button

Vertical oscillation button

Horizontal oscillation button

Timer indicator light

Air flow strength indicator light

Remote receiver

Control Panel (PCF-C15T)

Remote Control

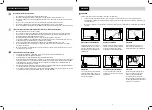
Changing Out The Battery

Please replace the battery with a CR2025 battery when the 

product takes a long time to respond or stops responding when 

the operation buttons are pressed.

1.  Pull out the battery holder.

  Hold the claw in to close the gap and pull the holder out.

Claw

Hold and pull it out

Battery holder

Back

2.  Insert a new battery.

  Insert a new battery into the battery holder. Make sure  

  the battery is facing the correct direction. Insert the  

  battery holder back into the remote control.

•    Please pay attention to which side is front and which is  

 back.

•    Please dispose battery according to the disposal  

  recommendation on the battery packaging or proper  

  governmental regulations.

Up

(Positive side is up)

Improper handling of the battery can lead to battery rupture, leaking battery liquid, and damage  

to the surroundings. Please read the ‘Remote use’ section of the safety precautions before use.

CAUTION

Front guard

Main body

Handle

Vane

Control panel

Remote receiver

Base

Motor

Rear guard

Power plug

Power cord

Breeze setting indicator light

Full oscillation indicator light

Power button

Timer button

Air flow strength button

Vertical oscillation button

Horizontal oscillation button

Timer indicator light

Air flow strength indicator light

Control Panel (PCF-C18T)

*Demonstrated model is PCF-C18T

5

6

Summary of Contents for WOOZOO PCF-C15T Series

Page 1: ...ty precautions prior to use Please store this instruction manual in a safe place for future reference READ AND SAVE THESE INSTRUCTIONS WOOZOO Remote Fan CONTENT PAGE Safety Precautions 1 Placement 4 Parts 5 Usage Instructions How to Use 7 Cleaning and Maintenance 9 Other Troubleshooting 10 Specifications 11 Warranty 12 Demonstrated model is PCF C18T ...

Page 2: ...he battery liquid gets onto the skin please wash thoroughly Do not disassemble repair or modify Doing so may cause damage to skin and clothes Do not carry or store the remote alongside small metal objects Doing so may cause fire or injury from the battery rupturing and leaking Please use only the manufacturer recommended battery Use of any other battery may cause risk of fire or injury or damage t...

Page 3: ...ve the old fuse and snap the replacement fuse into place To reduce the risk of fire only replace the fuse with another fuse of the proper rating 2 5Amp 125Volt Slide the fuse door back into place to close Discard the blown fuse The plug should now be ready for normal use Risk of fire Do not replace the attachment plug Product contains a safety device fuse that should not be removed Discard the pro...

Page 4: ... Changing Out The Battery Please replace the battery with a CR2025 battery when the product takes a long time to respond or stops responding when the operation buttons are pressed 1 Pull out the battery holder Hold the claw in to close the gap and pull the holder out Claw Hold and pull it out Battery holder Back 2 Insert a new battery Insert a new battery into the battery holder Make sure the batt...

Page 5: ...reset time as follows The timer can also be changed using the timer buttons on the remote control To turn the product off with the remote press the button for the selected time again 2 4 Timer off 1 h Hold for 3 seconds Horizontal Press the horizontal oscillation button to start product oscillation left and right Press the oscillation button again to stop product oscillation When running vertical ...

Page 6: ...nd quality Caution Using the product in dusty condition can cause it to malfunction Check and clean the product regularly CLAWS Internal Cleaning 1 Unscrew the screws from the back cover of the fan Press in and disengage the 4 claws on the top and bottom of the front guard and then remove the front guard by pulling it toward you External Cleaning Wipe lightly using a soft cloth For hard to remove ...

Page 7: ...amage in transit with postage prepaid along with name address telephone number model number and proof of date of purchase a copy of the receipt and a detailed description of the claimed defect This warranty shall not cover any damage incurred to the products during transit to Customer Service You shall have the obligation and responsibility to pay for all services and parts not covered by the warr...

Page 8: ...ones 25 Garantía 26 El modelo demonstrado es el PCF C18T de IRIS USA Inc Series PCF C15T PCF C18T Gracias por su compra Lea este manual de instrucciones para garantizar un uso adecuado Lea todas las precauciones de seguridad antes de usar Guarde este manual de instrucciones en un lugar seguro para consultas futuras LEA Y GUARDE ESTAS INSTRUCCIONES WOOZOO Ventilador remote 13 14 ...

Page 9: ...esconecte el enchufe del tomacorriente cuando realice mantenimientos inspecciones o mueva el producto Este aparato posee un enchufe polarizado una clavija es más ancha que la otra Para reducir el riesgo de descarga eléctrica este enchufe entra en un tomacorriente polarizado en un solo sentido Si el enchufe no entra por completo en el tomacorriente gire el enchufe Si aun así no encaja contacte a un...

Page 10: ... Para reducir el riesgo de incendio reemplace el fusible sólo con un fusible del mismo tamaño y las mismas características eléctricas 2 5Amp 125Volt Vuelva a colocar la puerta del fusible en su lugar para cerrarla Deseche el fusible fundido El enchufe debe estar listo para uso normal Riesgo de incendio No reemplace el enchufe El producto contiene un dispositivo de seguridad fusible que no se debe ...

Page 11: ... control PCF C15T Control remoto Protector delantero Cuerpo principal Asa Aspas Panel de control Receptor del control remoto Base Motor Protector trasero Enchufe Cable de alimentación Luz indicadora de establecimiento de la brisa Indicador luminoso de oscilación completa Botón de encendido Botón del temporizador Botón de fuerza del flujo de aire y luz indicadora Botón de oscilación vertical Botón ...

Page 12: ...zador también se puede cambiar usando los botones del temporizador en el control remoto Para apagar el producto con el control remoto presione nuevamente el botón para la hora seleccionada 2 4 Temporizador Apagado 1 h Sostener durante 3 segundos Horizontal Presione el botón de oscilación para que el producto comience a oscilar de izquierda a derecha Presione el botón de oscilación nuevamente para ...

Page 13: ...Revise si el producto está sucio y límpielo regularmente Uña Parte Interior 1 Desenrosque el tornillo de la tapa posterior del ventilador Presione y desenganche las 4 pinzas de la parte superior e inferior del protector delantero y quítelo tirando hacia usted Parte Exterior Frotar suavemente con un paño suave Para la suciedad difícil de quitar use un paño con un detergente neutro diluido y luego l...

Page 14: ...a de compra una copia del recibo y una descripción detallada de la avería reclamada Esta garantía no cubrirá los daños causados a los productos durante el envío al Servicio al cliente Usted tiene la obligación y responsabilidad de pagar todos los servicios y piezas que no cubra la garantía OBLIGACIÓN DEL FABRICANTE La Garantía no se puede alterar expandir extender revisar o variar excepto bajo ins...

Page 15: ...ntie 40 Modèle démonstré est PCF C18T de IRIS USA Inc Series PCF C15T PCF C18T Merci de votre achat Veuillez lire attentivement ce guide d utilisation afin d assurer sa bonne utilisation Lire les précautions de sécurité à prendre avant utilisation Veuillez conserver ces instructions pour référence future LIRE ET CONSERVER CES INSTRUCTIONS WOOZOO Ventilateur télécommandé 27 28 ...

Page 16: ...rait provoquer un incendie ou causer des blessures du fait d une rupture ou d une fuite de la pile Utiliser uniquement la batterie recommandée par le fabricant L utilisation de toute autre batterie peut entraîner un risque d incendie ou des blessures ou l endommager aux les alentours d une rupture ou d une fuite de la pile Débrancher Débrancher la fiche d alimentation de la prise de courant pendan...

Page 17: ...ble de votre ventilateur ait sauté saisissez la fiche et retirez la de la prise Ne tirez pas sur le cordon pour le débrancher Pour ouvrir glissez le couvercle du fusible vers les broches de la fiche Retirez soigneusement l ancien fusible et insérez le nouveau fusible Pour réduire le risque d incendie ne remplacez le fusible que par un autre fusible du calibre approprié 2 5Amp 125Volt Glissez la po...

Page 18: ... la circulation d air Récepteur de la télécommande Boutons de commande PCF C15T Télécommande Protection avant Boîtier principal Poignée Hélice Boutons de commande Récepteur de la télécommande Pied Moteur Protection arrière Fiche Cordon d alimentation Voyant lumineux de la brise Voyant lumineux d oscillation intégrale Touche de mise en marche Touche de minuterie Touche d intensité de la circulation...

Page 19: ... utilisant les touches de minuterie de la télécommande Pour éteindre l appareil avec la télécommande appuyer de nouveau sur la touche de durée de fonctionnement programmée Arrêt de la Minuterie 2 4 1 h Maintenir pendant 3 secondes Horizontal Appuyer sur la touche d oscillation horizontale pour activer le mode d oscillation de l appareil vers la droite et la gauche Appuyer de nouveau sur la touche ...

Page 20: ...entraîner son mauvais fonctionnement Vérifier que le produit est propre et le nettoyer régulièrement GRIFFES Interne 1 Dévisser la vis du couvercle arrière du ventilateur Appuyer sur les 4 griffes en haut et en bas de la protection avant pour les libérer puis retirer la protection avant en la tirant vers vous Externe Essuyer légèrement à l aide d un chiffon doux Pour les saletés incrustées essuyer...

Page 21: ... date d achat copie du reçu et une description détaillée du défaut signalé Cette garantie ne couvre pas les dommages causés aux produits pendant leur transport jusqu au service à la clientèle Vous avez l obligation et la responsabilité de payer pour tous les services et toutes les pièces qui ne sont pas couverts par la garantie OBLIGATION DU FABRICANT La garantie ne peut être modifiée prorogée éte...

Page 22: ...41 42 ...
Reviews: