background image

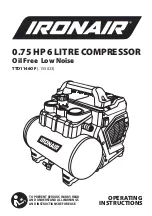
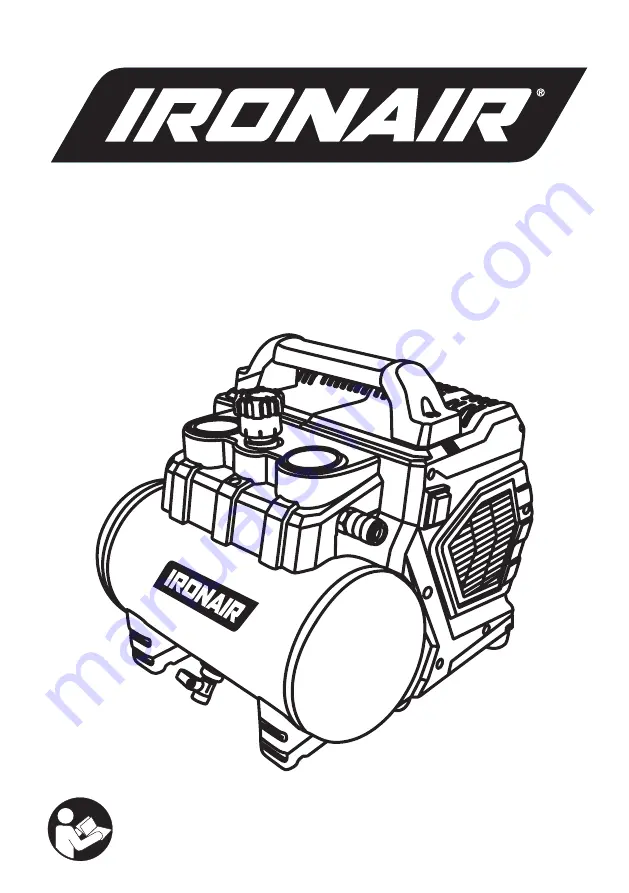
0.75 HP 6 LITRE COMPRESSOR

Oil Free  Low Noise

TTD1146OF 

(..155023)

OPERATING

INSTRUCTIONS

TO PREVENT SERIOUS INJURY, READ 

AND UNDERSTAND ALL WARNINGS


AND INSTRUCTIONS BEFORE USE.

Summary of Contents for TTD1146OF

Page 1: ...0 75 HP 6 LITRE COMPRESSOR Oil Free Low Noise TTD1146OF 155023 OPERATING INSTRUCTIONS TOPREVENT SERIOUS INJURY READ AND UNDERSTAND ALLWARNINGS AND INSTRUCTIONS BEFORE USE ...

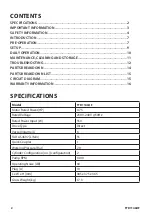
Page 2: ...14 PARTS BREAKDOWN LIST 15 CIRCUIT DIAGRAM 15 WARRANTY INFORMATION 16 SPECIFICATIONS Model TTD1146OF Motor Rated Power HP 0 75 Rated Voltage 230V 240V 50Hz Rated Power Input W 550 Drive Type Direct Vessel Volume L 6 FAD AS4637 L Min 55 Quick Coupler 1 Working Pressure Bar 7 9 Cylinder Configuration no configuration 2 Pump RPM 1400 Operating Noise dB 60 Plug A 10 L x W x H mm 385 x 375 x 365 Gross ...

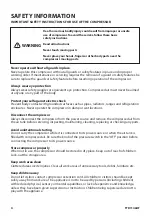
Page 3: ...es Basic safety precautions are outlined in the SAFETY section of this Instruction Manual and in the sections which contain the operation and maintenance instructions Hazards that must be avoided to prevent bodily injury or machine damage are identified by WARNINGS on the compressor and in this Instruction Manual Never use this compressor in a manner that has not been specifically recommended by m...

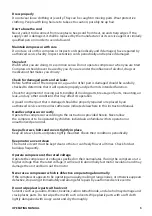
Page 4: ...Never operate the compressor in damp or wet locations Disconnect the compressor Always disconnect the compressor from the power source and remove the compressed air from the air tank before servicing inspecting maintaining cleaning replacing or checking any parts Avoid unintentional starting Do not carry the compressor while it is connected to its power source or when the air tank is filled with c...

Page 5: ...d or other part that is damaged should be properly repaired or replaced by an authorized service centre unless otherwise indicated elsewhere in this Instruction Manual Handle compressor correctly Operate the compressor according to the instructions provided herein Never allow the compressor to be operated by children individuals unfamiliar with its operation or unauthorized personnel Keep all scre...

Page 6: ...bes heads cylinder and motors Do not direct air stream at body Risk of injury do not direct air stream at persons or animals Drain tank Drain tank daily or after 4 hours of use Open drain fitting and tilt compressor to empty accumulated water Do not stop compressor by pulling out the plug Use the AUTO OFF lever of the pressure switch Use only recommended air handling parts acceptable for pressure ...

Page 7: ...ssor Owners Manual ASSEMBLY 1 Attach the air filter hoses to the air filter and attach to the pump 2 Attach the handle and secure with the bolts supplied 3 Install the wheels and rubber feet INSPECT FOR DAMAGE Make sure the air tank is not damaged inspect all parts for damage and check that all pipes are firmly connected Do not use the air compressor if any damage is found If damaged immediately c...

Page 8: ...f you feel ill from breathing while operating your air compressor stop and seek medical attention immediately CLEAN AIR For proper operation and to maximise the longevity of the air compressor it is very important that the air drawn into the air compressor is clean The air compressor should not be used in areas where dust or particulates are in the air This will damage the motor and impair proper ...

Page 9: ...e switch will automatically turn the power off This indicates the compressor is working normally 3 If when the air compressor is first turned on the pressure gauge reading does not increase check for air leaks Air leaks can usually be found in the regulator cup drain valve and connection points 4 Turn the pressure switch to the OFF position unplug the power supply cord and release the air in the t...

Page 10: ...cord into power supply socket 6 Move the pressure switch to ON position 7 Let the motor run and tank fill until the motor automatically turns off 8 Adjust the airflow to suit the tool being used While the air compressor is running turn the air tool on and turn the regulator knob to increase the pressure until the desired pressure is reached 9 Once the air tool is setup use normally SHUTTING DOWN T...

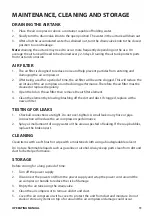
Page 11: ...he air filter then remove the air filter element 4 Clean the element by blowing brushing off the dirt and dust If clogged replace with a new air filter TESTING FOR LEAKS 1 Check all connections are tight Do not over tighten A small leak in any hose or pipe connection will reduce the air compressors performance 2 Spray a small amount of soapy water on the area suspected of leaking If the soap bubbl...

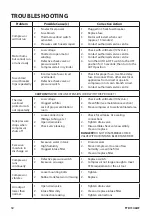
Page 12: ...AN EXTENSION CORD WITH THIS PRODUCT Thermal overload protector cuts out repeatedly 1 Low voltage 2 Clogged air filter 3 Lack of proper ventilation room 1 Check with voltmeter 105v min 2 Clean filter see maintenance section 3 Move compressor to well ventilated area Tank pressure drops when compressor shuts off 1 Loose connections fittings tubing etc 2 Open drain valve 3 Check valve leaking 1 Check ...

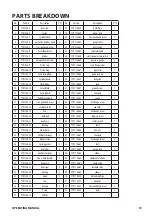
Page 13: ...D1146 16 Valve block clamp 2 53 TTD1146 53 cusion 2 17 TTD1146 17 cross pan head screw 2 54 TTD1146 54 hex flange screw 2 18 TTD1146 18 circlip for shaft 2 55 TTD1146 55 capacitor 1 19 TTD1146 19 fan 2 56 TTD1146 56 hex flange screw 3 20 TTD1146 20 shock pad 4 57 TTD1146 57 tapping screw 4 21 TTD1146 21 crank case 1 58 TTD1146 58 rocker switch 1 22 TTD1146 22 Bearing 2 59 TTD1146 59 shell 1 23 TTD...

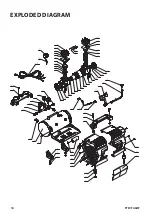
Page 14: ...14 TTD1146OF EXPLODED DIAGRAM ...

Page 15: ...15 OPERATING MANUAL CIRCUIT DIAGRAM ...

Page 16: ...at cannot be excluded under the Australian Consumer Law You are entitled to a replacement or refund for a major failure and for compensation for any other reasonably foreseeable loss or damage You are also entitled to have the goods repaired or replaced if the goods fail to be of acceptable quality and the failure does not amount to a major failure Warranty claims To make a claim under this warran...

Reviews: