Page of 17
5
unless they have been given supervision or instruction concerning use of the appliance by a
person responsible for their safety.
•
Always use an approved extension cord suitable for the power input of this tool. Before use,
inspect the extension cord for signs of damage, wear and ageing. Replace the extension cord if
damaged or defective.
•
When using an extension cord on a reel, always unwind the cord completely. Use of an
extension cord not suitable for the power input of the tool or which is damaged or defective may
result in a risk of fire and electric shock.
•
It is recommended that the extension cord is a maximum of 82 feet in length. Do not use multiple
extension cords.
•
Before drilling into walls, ceilings etc, ensure there are no concealed power cables or pipes in the
cavity.
•
Keep the cord clear of the accessory being used. Do not wrap the cord around your arm or wrist.
•
Hold the tool by the insulated gripping surfaces when performing an operation where the
accessory may contact hidden wiring or its own cord.
•
Use thick cushioned gloves and limit the exposure time by taking frequent breaks.
•
Vibration caused by the hammer action may be harmful to your hands and arms.
•
When removing an accessory from the tool avoid contact with skin and use proper protective
gloves when grasping the bit or accessory. Accessories may be hot after prolonged use.
ASSEMBLY
Assembly of Demolition Breaker
Chisels come with or without collars. Figure 1 shows installation of a chisel without a collar (the two
included chisels are without a collar). Figure 2 shows installation of a chisel with a collar.
Without a Collar:
1. Pull the retaining ring to the side just far enough to allow the bit to be inserted, as shown in
Figure 1.
2. Insert the bit. Slide the chisel in as far as it will go.
3. Pull the retaining ring down approximately 120º until it contacts the housing. Physically check
that the chisel is secure before operating.
Note: If the Chisel Bit doesn’t slide in easily, apply some grease on the loading end of the Chisel Bit.
Summary of Contents for 45998
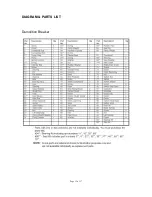
Page 13: ...Page of 17 13 DIAGRAM PARTS LIST Demolition Breaker...
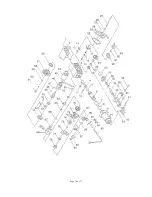
Page 14: ...Page of 17 14...
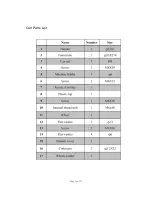
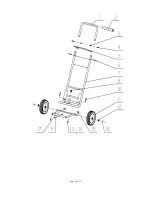
Page 15: ...Page of 17 15 Cart Parts List...
Page 16: ...Page of 17 16...


