Ironwood DBR50 | User Manual
17
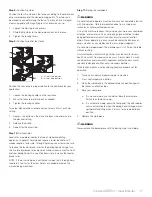
Step 8:
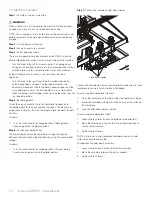
Position flip stops
Position the four flip stops on the fence according to the dimensions
of your workpiece and the desired boring points. The stops can
be moved to any point along the fence. The fence has an integral
measuring guide with magnifying lens for precision set-up.
1. Loosen the flip stop locking levers.
2. Slide the flip stops to the desired positions on the fence.
3. Tighten the locking levers.
Step 9:
Position QuickSet rear fence
A: 37mm stop position
B: 44mm stop position
A
A
B
B
Position the rear fence in proper relation to the drill block for your
application.
1. Loosen the locking handles on the rear fence.
2. Move the fence forward or back as needed.
3. Tighten the locking handles.
Two stop-block positions enable quick and easy 37mm or 44mm
setting:
1. Depress the button on the manual release stop and move to
the desired setting.
2. Release the button.
3. Repeat for the other stop.
Step 10:
Set feed rates
Feed rates are determined by the type of wood and drilling
operation. In general, hard woods require a lower feed rate; soft
woods require a faster rate. Through-holes require a slower rise rate.
To reduce the feed or brake rates for the boring head carriage, turn
the rise rate and brake rate adjustment knobs clockwise for the front
and rear boring head. Turn counterclockwise to increase the feed or
brake rates.
NOTE: If there is burning on a drill hole or chipout on a through-hole,
feed rate is too fast or too slow. Adjust as needed based on the
material being machined.
Step 11:
Boring the workpiece
WaRninG
Do not attempt to operate machine if you are not completely familiar
with its operation. Obtain immediate advice from a supervisor,
instructor, or other qualified personnel.
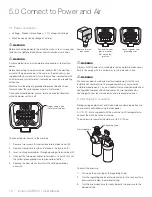
Use of this machine requires that you give your work your undivided
attention, and careless acts or not paying close attention to work
being performed may result in serious injury to yourself and/or
others. Never operate this or any machine under the influence of
drugs, alcohol, or any medication that may impair judgment.
Do not bore warped wood. The workpiece must sit flat on the table
without rocking.
Dust created by manufacturing activities may be harmful to your
health. Your risks from exposure may vary. Always work in a well-
ventilated area and wear safety approved, protective dust masks
specifically designed to filter out microscopic particles.
Once fences, depths, and rear boring head are properly set for
operation:
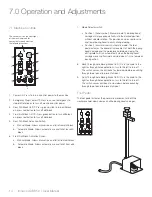
1. Turn on air supply and power supply to machine.
2. Press control power on button.
3. Place the workpiece in the desired reference position against
the fences and/or flip stops.
4. Bore your workpiece:
a. If in manual mode, you should not bore the workpiece.
Switch to automatic mode.
b. If in automatic mode, press the foot pedal; the drill spindles
will run automatically when the boring head carriage moves
up/forward and stop when it returns to the lowered/back
position.
5. Remove the workpiece.
WaRninG
Never remove the bored piece until the boring cycle is complete.
Summary of Contents for DBR50
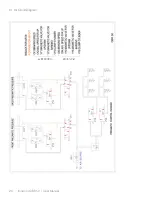
Page 20: ...Ironwood DBR50 User Manual 20 9 1 Air Circuit Diagram...
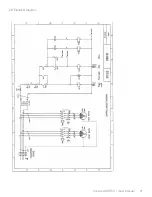
Page 21: ...Ironwood DBR50 User Manual 21 9 2 Electrical Diagram...
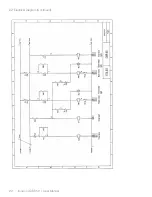
Page 22: ...Ironwood DBR50 User Manual 22 9 2 Electrical Diagram Continued...
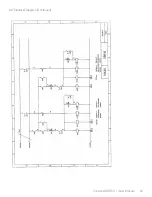
Page 23: ...Ironwood DBR50 User Manual 23 9 2 Electrical Diagram Continued...
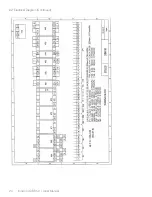
Page 24: ...Ironwood DBR50 User Manual 24 9 2 Electrical Diagram Continued...
Page 25: ......

