background image

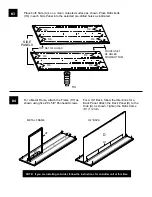
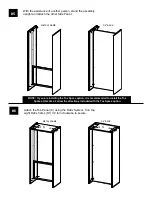
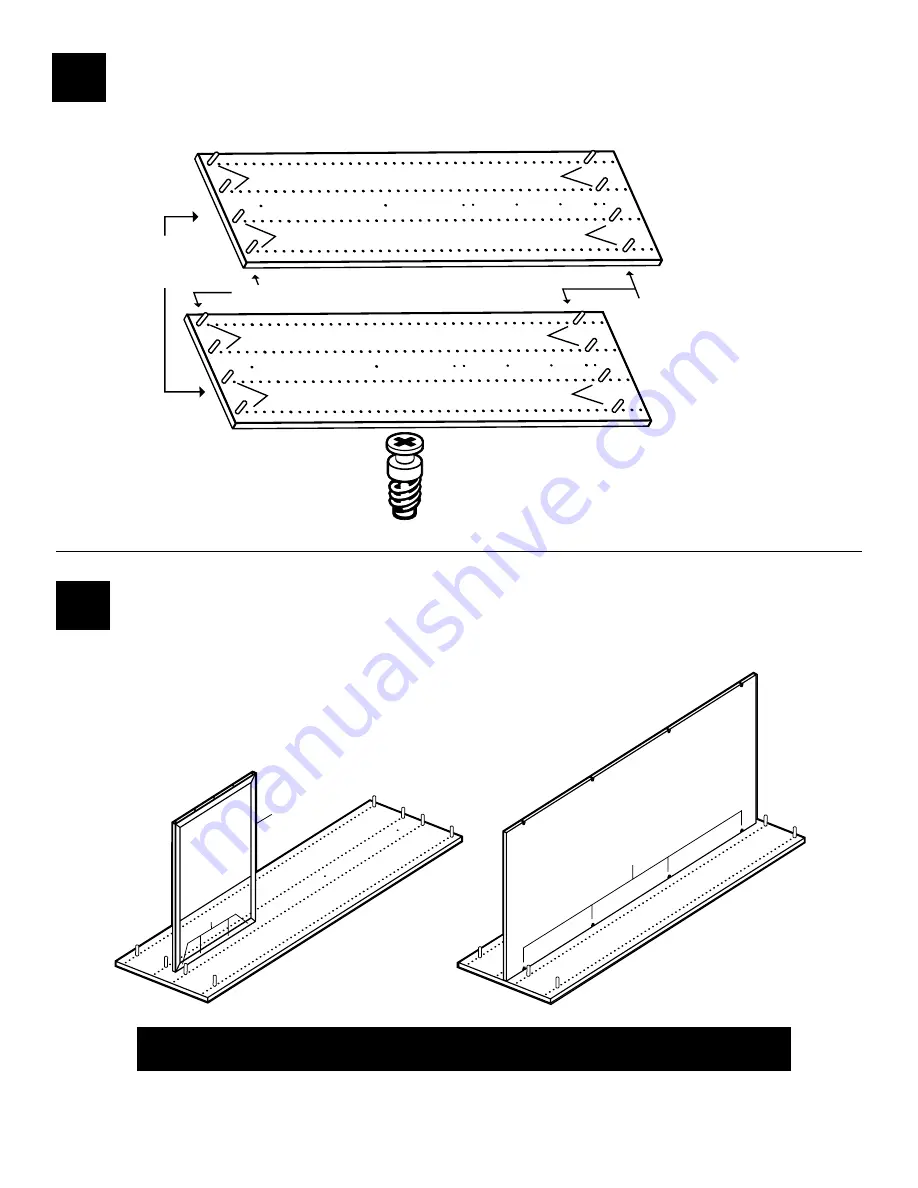
#3

Place both Side (A)’s on a clean, carpeted surface as shown. Place Rafix bolts 

(H4) in each S ide Panel into the selected pre-drilled holes as indicated.

SIDE

PANELS

FOURTH SET 

OF HOLES 

FROM BOTTOM

TOP SET OF HOLES

H4

H4

H4

H4

H4

H4

H4

H4

H4

For a 3/4" Back, follow the directions for a 

Back Panel. Attach the Back Panel (D) to the 

Side (A) as shown. Tighten the Rafix Cams 

(H1) 1/2 turn.

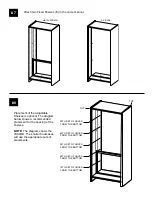
#4

H3

H1

H7

D

METAL FRAME

3/4" BACK

For a Metal Frame, attach the Frame (H7) as 

shown using five #8 x 5/8" Panhead Screws.

NOTE:  If you are installing an Adder, follow the instructions for an Adder unit at this time.

Summary of Contents for GLACIER 14911910

Page 1: ...quiring glue make sure the unit is assembled correctly before gluing Once this unit is assembled with glue the manufacturer will not be responsible for damaged parts Keep a damp cloth or sponge handy...

Page 2: ...x 5 8 Panhead Screw H7 Metal Frame 412026 1 ea Top 01300101 1 ea Fixed Adjustable Shelf 01200124 6 ea 6 ea 8 ea 10 ea 12 ea A 14911910 16 ea 14939470 16 ea 14912040 16 ea 14912060 16 ea 14912170 16 e...

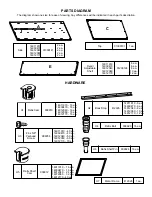
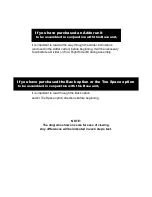
Page 3: ...The diagrams show one size for ease of viewing Any differences will be indicated in each step s text If you have purchased an Adder unit to be assembled in conjunction with this Base unit it is import...

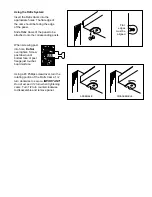
Page 4: ...onto the corresponding posts Using a 3 Phillips screwdriver turn the rotating portion of the Rafix Cam a 1 2 turn clockwise to secure IMPORTANT Do not exceed 1 2 turn when tightening cams Turn 1 2 tur...

Page 5: ...H2 H3 E H5 H5 1 2 Install eight Rafix Cams H1 into the Top Panel C as shown H1 C H1 H1 H1 H1 H1 H1 H1 H1 E H1 H1 H5 H1...

Page 6: ...TOM TOP SET OF HOLES H4 H4 H4 H4 H4 H4 H4 H4 H4 For a 3 4 Back follow the directions for a Back Panel Attach the Back Panel D to the Side A as shown Tighten the Rafix Cams H1 1 2 turn 4 H3 H1 H7 D MET...

Page 7: ...ce at this time Follow the directions included with the Toe Space option With the assistance of another person stand the assembly upright and attach the other Side Panel METAL FRAME 3 4 BACK C H1 H1 C...

Page 8: ...w shows a recommended placement for the spacing of the shelves NOTE The diagram shows the LS84DB The shorter bookcases will use the appropriate sets of placements 8 TOP TOP 55TH SET OF HOLES FROM THE...

Page 9: ...f Pin H6 into both Sides at the preferred heights for the Adjustable Shelves H6 Place the Adjustable Shelves E into each side of the unit by sliding the Rafix Shelf Cams H5 in to Rafix Shelf Pin H6 10...

Page 10: ...11 Your Glacier Library Shelving unit is now assembled and ready for use Find Ironwood Glacier Shelving demco com searchglacier shelving Call 800 962 4463 or email custserv demco com...

Reviews: