background image

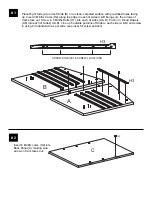
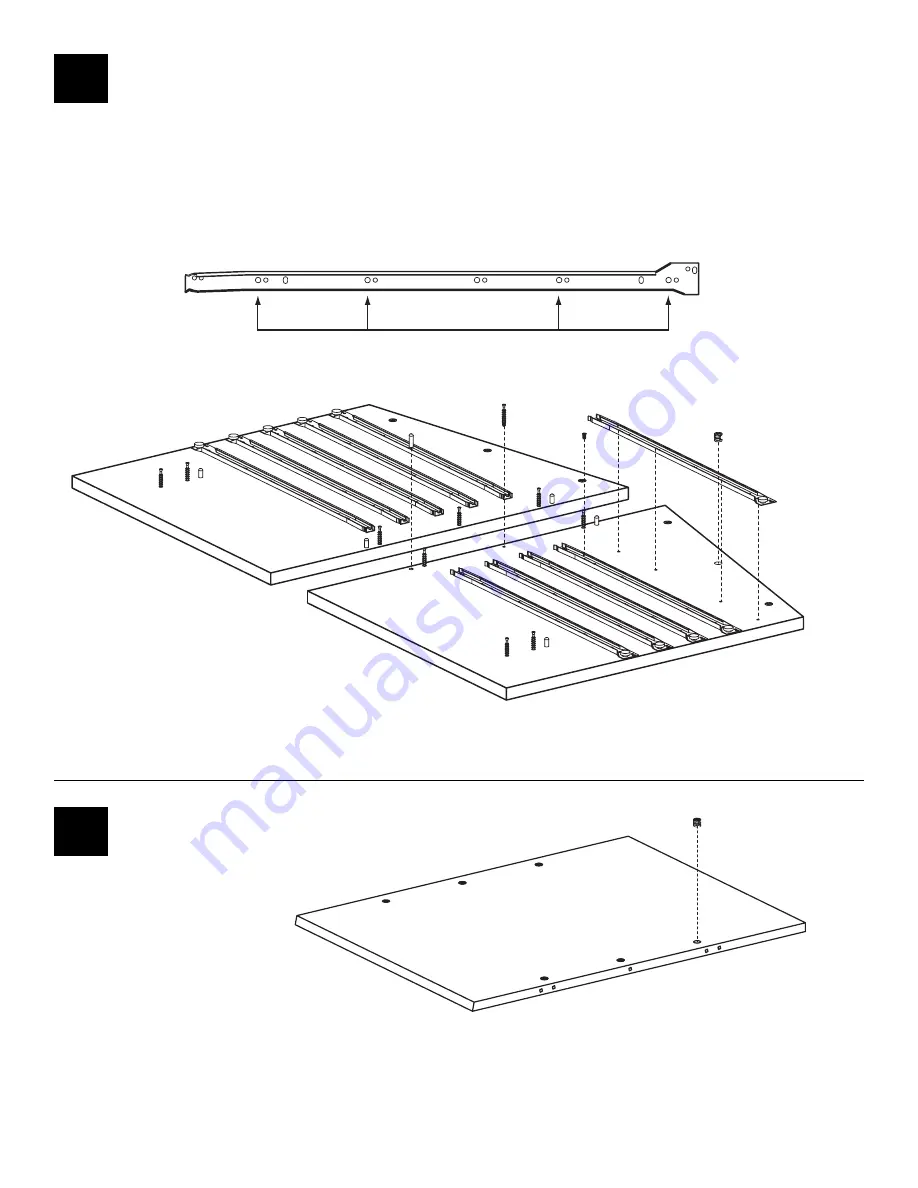
#1

B

A

H3

H3

ARROWS INDICATE SCREW LOCATIONS

Place Right Side (A) and Left Side (B) on a clean, carpeted surface with pre-drilled holes facing

up. Insert 3 Minifix Cams (H2) along top edge in each of sides A & B being sure the arrows of

Cams face out. Screw in 5 Minifix Bolts (H1) into each of sides (A & B). Push in 3 Wood Dowels

(H8) into each of Sides( A & B). Line up 5 outside portions of Slide to each side (A & B) and screw

in using 4 Varianta Screws per slide. (see inset for screw position)

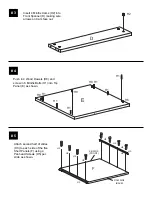
#2

C

H2

Insert 6 Minifix cams (H2) into

Back Panel (C) making sure

arrow on Cam faces out.

Summary of Contents for GLACIER ATLAS LFAS 32

Page 1: ...age during assembly it is recommended to work on a carpeted surface CAUTION On assemblies requiring glue make sure the unit is assembled correctly before gluing Once this unit is assembled with glue t...

Page 2: ...010442 1 ea 1 ea Front Spanner 07010480 1 ea Top Panel 07010401 1 ea Shelf Panel 07010428 5 ea A B C E D F LFAS32 LFAS39 Left Panel Left Panel 07010443 07010442 1 ea 1 ea LFAS32 LFAS39 Back Panel Back...

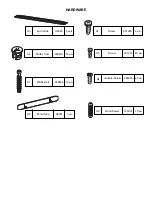
Page 3: ...Cam 909810 16 ea H3 Euro Slide H0280 5 sets H1 Minifix Bolt 909834 16 ea H8 Wood Dowel 195001 10 ea H5 Screw 901216 40 ea H7 Screw 901220 2 ea H6 Pencil Stop H6931 1 ea H4 Varianta Screw 988060 40 ea...

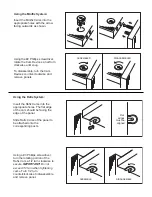
Page 4: ...ve panels ASSEMBLE DISASSEMBLE Using the Rafix System Insert the Rafix Cams into the appropriate holes The flat edge of the cam should be facing the edge of the panel Slide Rafix Cams of the panel to...

Page 5: ...dge in each of sides A B being sure the arrows of Cams face out Screw in 5 Minifix Bolts H1 into each of sides A B Push in 3 Wood Dowels H8 into each of Sides A B Line up 5 outside portions of Slide t...

Page 6: ...5 H5 H5 H3 H3 H5 H5 H5 RAW SIDE BACK EB SIDE FRONT 4 E H8 H8 H8 H8 H1 H1 H1 H1 H1 H1 Push in 4 Wood Dowels H8 and screw in 6 Minifix Bolts H1 into Top Panel E as shown 5 Attach second half of slides H...

Page 7: ...se to secure 6 C A ANGLE CUT TOP H2 H2 H2 7 Position the Cams of the Front Spanner D with the bolts and Dowels on the Right Side Panel A as shown Turn the arrows of the Cams H2 clockwise to secure D C...

Page 8: ...ht Position Top Panel E over unit lining up bolts with Cams Secure Cams by turning clockwise 9 E C B A D H2 H2 10 Slide each of the 5 Shelf Panels F into the unit E B A D F 11 Attach Pencil Stop H6 to...

Reviews: