background image

2


| ENGLISH

ENGLISH |


3

1.   Ready to start in just 3 steps!

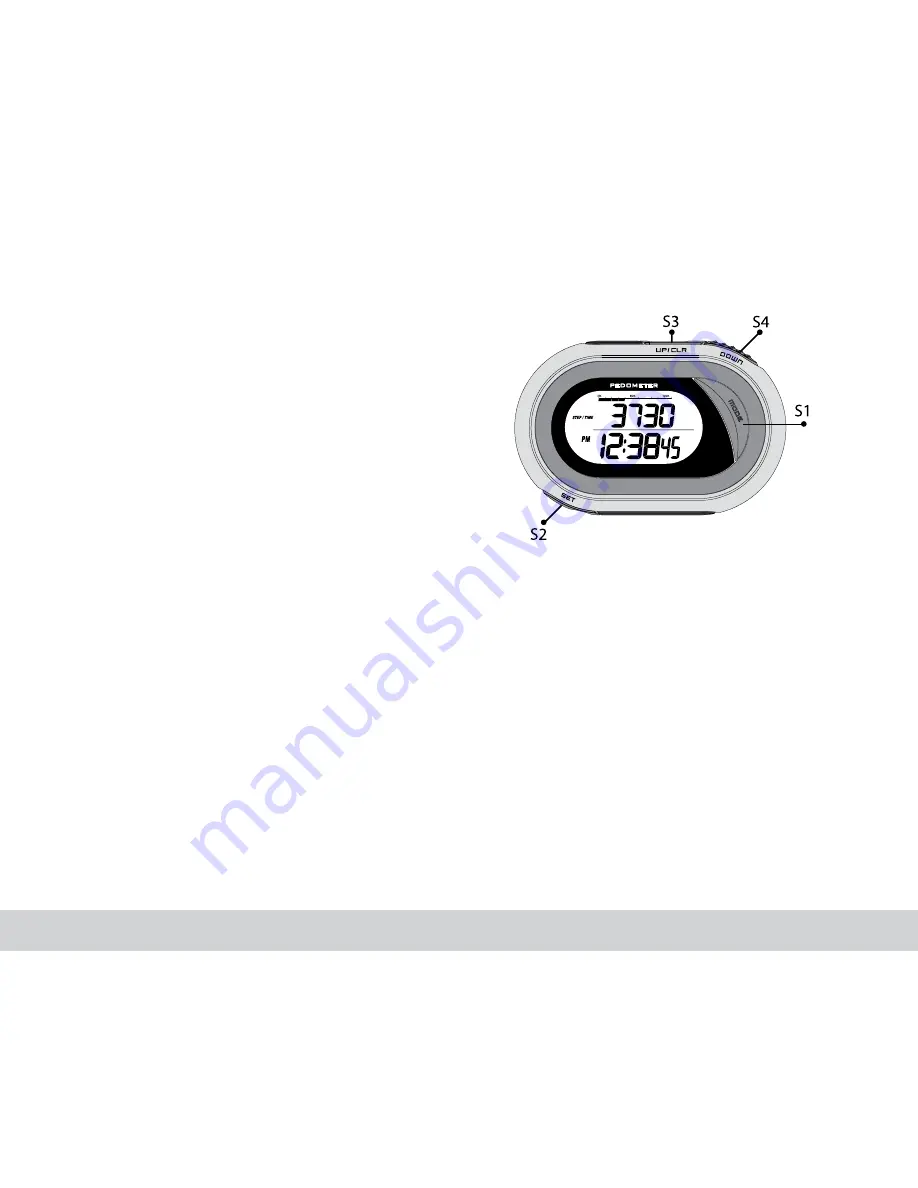
1)  Fasten the PE-SOS2 with the clip to your belt/trouser 

waistband in front of your body at hip height.

2)  Press the ‘MODE’ key (S1) until ‘STEP/TIME’ appears in the 

display (the number of steps is indicated at the top, and the 

time at the bottom)

3)  Press and hold the key ‘UP/CLR’ (S3) until the display of the 

number of steps is set to zero.

-> and off you go

  From the display, you can now see the number of steps in  

the top line.

  For more information on the device, please read through the 

instructions for use in their entirety.


TABLE OF CONTENTS

1.   Ready to start in just 3 steps! 

3

2.   Introduction 

4

3.   Wearing the pedometer properly  

6

4.   Select a function (MODE)  

9

4.1    The function step and time (STEP/TIME) 

10

4.2    The function distance and stopwatch (DIST/STW)     


 11

4.3.   The function calories and odometer (KCAL/ODO) 

12

4.4.   The function target calories and daily cal  

  (SETCAL/DAYCAL) 

13

5.   Change of battery 

14

6.   Care Instructions 

15

7.   Support 

16  

Summary of Contents for PE-SOS2

Page 1: ...ENGLISH 1 Instructions for use PE SOS2...

Page 2: ...d off you go From the display you can now see the number of steps in the top line For more information on the device please read through the instructions for use in their entirety TABLE OF CONTENTS 1...

Page 3: ...add an additional 3000 steps every day to your daily routine for example with a deliberate and vigorous evening walk You will find that the daily repetition will greatly increase your health and actu...

Page 4: ...the PE SOS 2 displays too many steps slide the switch to the right and carry out a test walk As a fundamental principle you set your movement type here Walking to the left Jogging to the right as dis...

Page 5: ...n also set your personal details and the time DIST STW Distance measurement and stopwatch KCAL ODO Used kcal and totalised distance measurement memory SETCAL DAYCAL Display and setting of the target c...

Page 6: ...g according to the following sequence 12 24 hour Hours Minutes Your step length in cm Your weight in kg 10 150kg can be set After the last setting in the sequence the setting is completed and you will...

Page 7: ...n the top display you can set a kcal consumption as your daily target A bar display is operated with this value at the very top in the display This displays in 10 steps where you are in regard to your...

Page 8: ...oft cloth that you have moistened with water and a mild cleaning agent Never use volatile substances such as benzene thinner cleansing agents in spray cans etc When the device is not being used store...

Page 9: ...ements of the device will take place that due to typographical procedures were not able to be listed in this manual Should you notice deviations which make it difficult for you to operate and use the...

Reviews: