background image

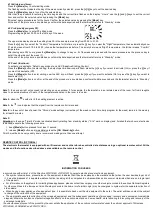
2.2 Holiday Mode 

“Holiday” mode activates the heating element of the electronic control when the ambient temperature falls below the antifreeze temperature. 
It is recommended to use this mode when the room is not occupied for several days. 
Press the [Mode] key until the respective icon is selected and set the holiday hours. 


When this time is past, the thermostat returns to “Comfort” mode. 


2.3 Comfort Mode 
The “Comfort” temperature corresponds to the temperature desired by the user and it is the temperature used for “Chrono”, “Pilot-wire” and “Comfort” 
modes. 
This operating mode is intended for normal use of the appliance. 

-

  Press the [Mode] key until the “Comfort” icon appears on the display; 

-

  Set the desired temperature with the [+/-] keys and wait for the temperature to stop blinking on the display. 

The “Comfort” temperature can be set in the whole interval ("Night" mode tempe 0.5°C) to 32°C. 


2.4 Night Mode 
In “Night” mode the settable temperature is lower than the “Comfort” temperature. It is recommended to use this mode during the night or when the 
room is not used for 2 hours or more. 
The “Night” temperature is also used for “Chrono” mode. 

-

  Press the [Mode] key until the “Night” icon appears on the display; 

-

  To modify the “Night” temperature, use the [+/-] keys and wait for the temperature to stop blinking on the display. 

NOTE:  The  “Night”  temperature  must  always  be  lower  than  or  the  same  as  the  “Comfort”  temperature;  for  this  reason  the  “Night” 
temperature can be set between 7°C and the “Comfort” temperature minus 0.5°C. 
 
2.5 Antifreeze Mode 
In “Antifreeze” mode the temperature is fixed at 7°C. The appliance activates the heating element automatically  when the room temperature falls 
below 7°C. 
It is recommended to use this mode when the room is not used for several days. 

-

  Press the [Mode] key until the “Antifreeze” icon appears on the display. 


2.6 2h Timer Mode 
“2h Timer” mode can be used to heat the room rapidly or to dry towels faster. 

-

  Press the [Mode] key until the “2h Timer” icon appears on the display. 

The heating element is activated for 2 hours, irrespective of the set temperature (in any case, the maximum temperature that can be reached in the 
room will be 32°C). At the end of the 2 hours, the thermostat returns to the mode set previously. If necessary, the user can deactivate the function at 
any time by pressing the [Mode] key. 


NOTE: Do not activate the 2h Timer mode directly from the Stand-by status  


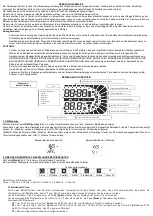
3 FUNCTIONS 
 

3.1 Keyboard lock 
It is possible to lock the keys of the device to avoid accidental modifications of the settings. 
Hold down the [+] and [-] keys for 3 seconds to lock all the keys except the [On/Stand-by] key. 
The key-lock icon will appear on the display. 
To unlock the keys, hold down the [+] and [-] keys again for 3 seconds. The key-lock icon will disappear from the display. 


3.2 “Detect open window” function  
The “Detect open window” function allows an open window to be detected by perceiving a sudden decrease of the temperature in the room.  
In this case, the device deactivates the heating element for a maximum of 30 minutes or until an increase in the ambient temperature indicates that 
the window has been closed. 

When this function is enabled, the 

 icon is lit. 

When the device detects that the window might be open, the “Open window” icon starts to blink. 
When the function is deactivated, the “Open window” icon is not shown on the display. 
 
 
3.3 Adaptive Starting Control (ASC) 
If activated, this function switches on the radiator earlier than the “Chrono” program (maximum 2 hours earlier) to ensure that the room has reached 
the desired temperature at the set time. 
Note: the function needs at least a couple of days to reach maximum efficiency. 


4 SETTINGS 
Setting of the device. 
From “Stand-by” mode, hold down 

the [Mode] key for at least 3 seconds.


The message "SEt" will be shown at the bottom of the display: 


To select what you want to change: 
Press the [+] key to choose between tEd (date and time), Pro9 (weekly program P3) and Funct (functions). 


Summary of Contents for ELLIPSIS B 1200

Page 1: ...suolo per evitare rischi di scottature ai bambini pi piccoli ISTRUZIONI Per l installazione del termostato sul radiatore scalda salviette vedi Fig C Prima di effettuare qualsiasi operazione assicurar...

Page 2: ...estata alla presenza di bambini e persone vulnerabili Durante il funzionamento normale che i due ultimi tubi in basso ed il primo dall alto rimangano tiepidi Sul radiatore possono essere asciugati sol...

Page 3: ...a modalit Timer 2h pu essere utilizzata per riscaldare rapidamente la stanza o accelerare l asciugatura delle salviette Premere il tasto Mode fino a quando sul display appare l icona Timer 2h L elemen...

Page 4: ...stanza lontano da correnti d aria vicino ad una fonte di riscaldamento esterna o se la variazione di temperatura nella stanza troppo lenta Nota 2 quando il simbolo acceso l elemento riscaldante attivo...

Page 5: ...ce que le tuyau chauffant le plus bas se trouve au moins 600 mm du sol pour viter que les enfants les plus petits puissent se br ler INSTRUCTIONS Pour l installation du thermostat sur le radiateur s c...

Page 6: ...TR S CHAUDES ET PROVOQUER DES BR LURES SI ON NE FAIT PAS SUFFISAMMENT ATTENTION Il faut pr ter une attention particuli re en pr sence d enfants et de personnes vuln rables Pendant le fonctionnement i...

Page 7: ...acc l rer le s chage des serviettes Enfoncer la touche Mode jusqu ce que l ic ne Timer 2h s affiche sur l cran L l ment chauffant est activ pour 2 heures ind pendamment de la temp rature configur e d...

Page 8: ...est trop lente Note 2 quand le symbole est allum l l ment chauffant est actif Note 3 l ic ne indique que le signal de la t l commande est re u Note 4 en cas de perte d alimentation les programmations...

Page 9: ...que os est n expuestos al riesgo de quemaduras INSTRUCCIONES Para la instalaci n del termostato en el radiador toallero v ase Fig C Antes de efectuar cualquier operaci n comprobar que el cable de sumi...

Page 10: ...erables Durante el funcionamiento es normal que los dos ltimos tubos inferiores y el primero superior permanezcan tibios En el radiador toallero pueden secarse nicamente tejidos lavados con agua No ut...

Page 11: ...a habitaci n o para acelerar el secado de las toallas Mantener pulsada la tecla Mode hasta que en la pantalla aparezca el icono Temporizador 2h El elemento calefactor permanece activado por 2 horas in...

Page 12: ...aire cerca de otra fuente de calor o si la variaci n de la temperatura en el cuarto fuese demasiado lenta Nota 2 cuando el s mbolo est encendido el elemento calefactor est activo Nota 3 el icono indi...

Page 13: ...IONS Proceed as follows to install the thermostat on the towel warmer radiator see Fig C Before performing any operation make sure that the power supply cord is not plugged into the socket Whenever a...

Page 14: ...NS UNLESS PARTICULAR CARE IS TAKEN Particular attention should be paid to the presence of children and vulnerable people During operation it is normal for the last two pipes at the bottom and the firs...

Page 15: ...n be used to heat the room rapidly or to dry towels faster Press the Mode key until the 2h Timer icon appears on the display The heating element is activated for 2 hours irrespective of the set temper...

Page 16: ...is too slow Note 2 when the symbol is lit the heating element is active Note 3 the icon indicates that the signal from the remote control is received Note 4 in the event of loss of power the Chrono m...

Page 17: ...INSTRUC IUNI Pentru a instala termostatul pe caloriferul usc tor de prosoape vezi Fig C nainte de a efectua orice opera ie asigura i v c cablul de alimentare nu este cuplat la priz n caz de defectare...

Page 18: ...copiilor si persoanelor vulnerabile n timpul func ion rii este normal ca ultimele dou tuburi de jos i primul de sus s r m n doar calde Pe calorifer pot fi uscate numai es turi sp late cu ap Nu folosi...

Page 19: ...uscarea prosoapelor Ap sa i tasta Mode p n c nd pe display apare simbolul Timer 2h Elementul de nc lzire este activat pentru 2 ore indiferent de temperatura setat n orice caz temperatura maxim care p...

Page 20: ...c lzire exterioar sau dac schimbarea temperaturii din nc pere este prea lent Not 2 C nd simbolul este aprins elementul de nc lzire e activat Not 3 Simbolul arat c este recep ionat semnalul de la telec...

Page 21: ...die Wasseranschl sse unten angebracht muss f r die senkrechte Montage der Patrone eine 1 2 T 3 Wege Verschraubung verwendet werden Die Position der hydraulischen Anschl sse wird in Abbildung 1 4 gezei...

Page 22: ...oberste und die beiden unteren Rohre w hrend des Betriebs lauwarm bleiben Am Heizk rper d rfen nur mit Wasser gewaschene Stoffe getrocknet werden Verwenden Sie f r die Reinigung des Heizk rpers und de...

Page 23: ...izelement bleibt unabh ngig von der eingestellten Temperatur 2 Stunden lang aktiv die im Raum erreichbare Maximaltemperatur von 32 C wird nicht berschritten Nach 2 Stunden schaltet das Ger t auf die z...

Page 24: ...r zu langsam sinkt Anmerkung 2 Wenn das Symbol leuchtet ist das Heizelement eingeschaltet Anmerkung 3 Das Symbol gibt an dass das Signal von der Fernsteuerung erhalten worden ist Anmerkung 4 Im Falle...

Page 25: ...69390 Vourles France Tel 33 04 28 00 01 67 Fax 33 04 72 31 86 40 Web http www irsap com E mail irsaprhoss irgroup fr IRSAP RHOSS Clima Integral S L Oficina y Almac n P I CAMI RAL Leonardo da Vinci 4 0...

Page 26: ...3 14 14 1 ON Stand by 1 Stb 0 5 2 Mode 1 2h 2 2 2 1 Mode P1 P2 P3 Mode 3 1 1 5 8 00 16 00 2 1 5 6 00 9 00 17 00 23 00 6 7 7 00 13 00 P3 IR Temperatura impostata...

Page 27: ...2 2 Mode 2 3 Mode 0 5 32 2 4 Mode 7 0 5 2 5 7 7 Mode 2 6 2 2 Mode 2 2 32 Mode 2h Timer Stand by 3 3 1 3 On Stand by 3 3 2 30 3 3 2 4 Mode 3 SEt tEd Pro9 P3 Funct...

Page 28: ...ode 4 2 Pro9 P3 Mode 3 00 00 00 00 00 01 00 01 01 00 o 02 00 24 Mode 7 4 3 Funct Mode Mode Mode 1 2 3 4 5 5 2h S tb 1 Mode 1 2 Mode ON Stand by 2 INFORMAZIONI AGLI UTENTI 14 2012 19 07 07 2012 2011 65...

Reviews: