w
1
For radiators up to 10 sections
you should have
• 1 Radiator
• 4 x 0.5” bushes
• 1 Manual Airvent
• 1 Blanking Plug
• Wall ties (if specified)
Marking Wall Ties
5
Contents
2
Joining Sections If Required
3
Uxbridge Diagrams
The Radiator Company prides itself on selecting products from
manufacturers who exercise tight quality control measures. We
only select models that exceed british manufacturing standards
for cast iron radiators and surpass requirements of our stringent
selection process. All of our products are well packaged and
should reach you in perfect condition. Just in case however, we
offer a 10 year no quibble guarantee for all cast iron radiators.
Please carefully unpack and inspect this
radiator and all fittings. The Radiator
Company must be notified of any shortages
or damage within 28 days of delivery. For
further information please see terms and
conditions on back page.
If you require joining sections, please see the separate
instructions provided.
Pipe Centres
Please refer to Fig 1
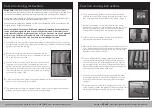
With the radiator in place, mark the positions for the wall
ties, which can be placed on the second section in from the
side (please see image to the left of this page.)
When placing the radiator in place for installation,
consideration needs to be taken for the width of the feet
as this will affect how far the radiator will sit from the wall/
skirting board.
Double check the markings then move the radiator out of
the way, then using a suitable drill bit and plugs, fix the
wall ties to the wall.
Wall ties can be screwed into wood or used in masonry
with a suitable wall plug.
Inspect
For radiators over 10 sections you
should have
• 1 Radiator (separated)
• 1 Joining key, if requested
• 2 Nipples per join in sealed bag
• 2 Gaskets per join in sealed bag
• 4 End bush gaskets in a sealed bag
• Wall ties (if specified)
All bushes will be screwed hand-tight
into the radiator.
Fitting Bushes IMPORTANT NOTE
4
Cast Iron radiators have specific left and right hand threaded
bushes and these can be easily damaged if forced or incorrectly
fitted (this will inevitably cause leaks).
Bushes require a dry fit
connection only; you must not use any Compound materials
(e.g. Jet Blue) or Plumbers Hemp.
If you choose you may use
up to 4 turns of PTFE tape making sure the sealing faces are
clean and free from any debris (the tape should be applied
in the direction of the thread and no more than this amount
should be used as this may cause leaks to occur)
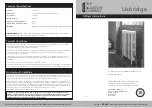
Uxbridge 4 Column Cast Iron Radiator with footed ends
6
In accordance with Part L1 2006 of the Building Regulations
and BS7593:1992 code of practice for the treatment of hot
water and central heating systems, we strongly recommend
flushing the heating system post installation of new radiators
and then adding the correct quantity and type of inhibitor
for use with your radiator and system to prevent corrosion.
Damage caused to systems not protected by a suitable
inhibitor will not be covered by manufacturer’s guarantee.
The manufacturer recommend using a vortex type filter to
separates any potential particulates before reaching the
boiler.
Commission
Fig 1
= Wall Tie Positions
Section
Height
Pipe centres
left to right
Pipe centres
from wall
455mm
60.5mm x number of sections
+ 32mm valves
104mm-119mm
650mm
750mm
61mm x number of sections
+ 32mm valves
104mm-119mm
800mm
56mm x number of sections
+ 32mm valves
104mm-119mm
750mm High, sections 61mm
800mm High, sections 56mm
455mm High, sections 60.5mm
650mm High, sections 61mm


