iRBX6GF User’s Manual
UM-iRBX6GF-4.5.1-EN.docx
Pages 112 of 119
The following table describes the labels for the
SNMP v2 Interface
screen.
Label
Description
Control
Enable
To enable SNMP, check the box adjacent to the
Enable
label. By default, SNMP is
enabled.
SNMP v2 Authorized Communities
#
A community string number. Default is
1 public read-only
Community
The default
Community
name is public and is read-only field for community # 1.
For community #2, the name entered in the
Edit Community Entry
will appear
in this field (e.g. private as shown in Figure 45).
Privilege
The default
Privilege
is read-only as shown for community # 1. For community
#2, the privilege entered in the
Edit Community Entry
will appear in this field
(e.g. read-write as shown in Figure 45). There are 2 options:
read only
or
read-
write.
To create a new community, on
the row # of the dialog box,
click
. The
Edit
Community Entry
appears.
•
Community
−
enter a
name (e.g. private)
•
Privilege
−
select one of the 2 options:
read only
or
read-write
After selection, click
OK
to save your choices or
Cancel
to discard them.
For community string to be deleted, click . The following dialog box appears.
Click
OK
to save your entry or
Cancel
to discard it.
Reload
Click to undo any changes made locally and revert to the saved ones.
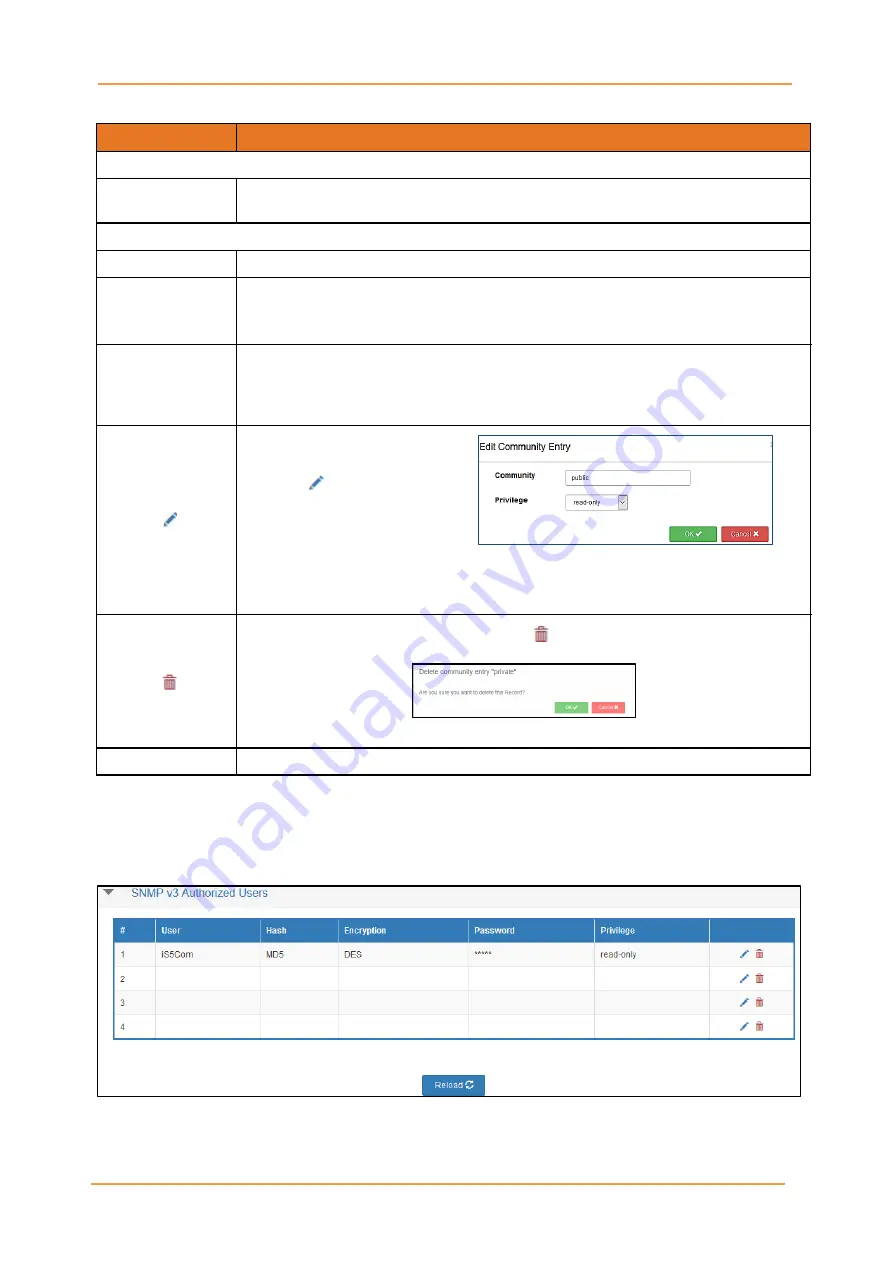
SNMPv3 is designed mainly to overcome the security shortcomings of SNMPv1/v2, and it supports
authentication and encryption. SNMP community strings are essentially used as “Passwords” for device
authentication within the SNMP management infrastructure. To configure SNMPv3, first, SNMP v3
Authorized Users are established.
Figure 46 – SNMP v3 Authorized Users Interface

