tool usE
y
y
Read section titled “Safety Warn-
ings,” before using tool.
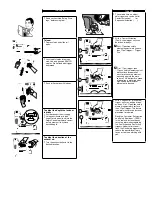
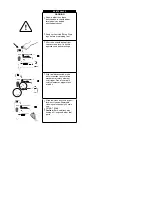
to load:
y
y
Depress latch and slide rail
open..
y
y
Lay strip of staples into maga-
zine. Use only genuine SENCO
staples. Do not load with trigger
depressed.
y
y
Push rail forward until it latches.
to adjust the depth the fastener
is driven:
y
y
First disconnect the air supply.
y
y
Using your thumb or index
finger, rotate wheel to adjust the
Depth Control workpiece contact
(safety element) to achieve
desired depth.
to adjust the direction of the
exhaust air:
y
y
Turn the exhaust deflector to the
desired location.
tool usE
yy
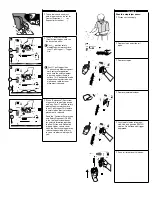
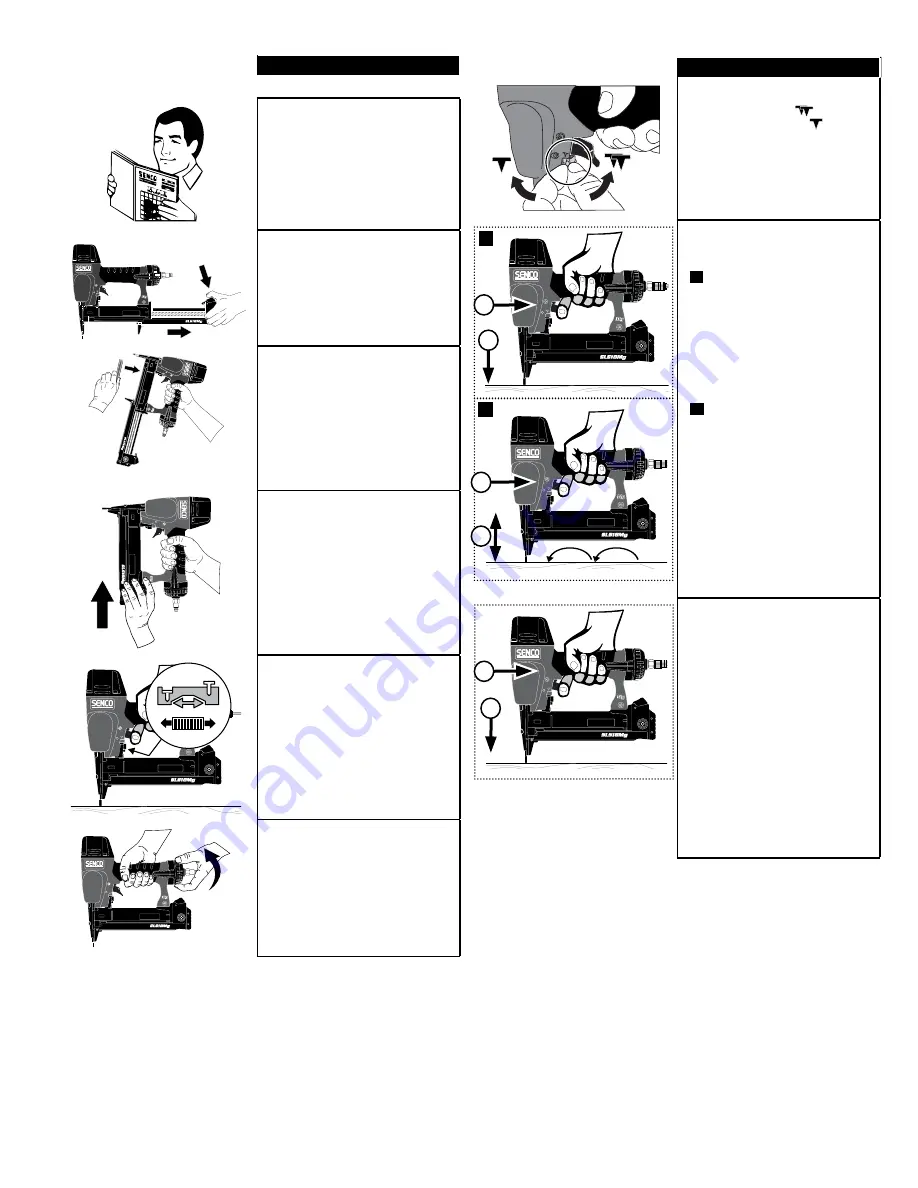
These tools have an adjust-
able trigger and can be set for
) or
Contact Actuation (
Sequential Actuation (
).
yy
With a “Contact-Actuation”
(Dual-Action) trigger, nails can
be driven two ways:
A
First,
position safety
element against work surface,
then
k
pull trigger — “Trigger
Fire.”
B
First,
pull trigger, then
k
push safety element against
work surface for operation
each time the safety element
is pushed against the work
surface. This “bottom-fire” mode
of operation is preferred when
high speed, rapid fastener
placement is desired.
yy
With a “Sequential” (Restrictive)
trigger, nails can only be driven
one way. First,
position safety
element against work surface,
then
k
pull trigger. This feature
is helpful when precise fastener
placement is required.
Read the “Customer Satisfaction
and Safety Reminder” (CSSR)
in the tool and fastener boxes
for safety information regarding
the Dual Action and Restrictive
triggers. Under certain condi-
tions, the Restrictive trigger may
reduce the possibility of injury
to you or to others working with
you.
2
1
B
1
2
A
1
2


