background image

Chapter 10  PROGRAM MODE 


 10.21.2  CHANGING 

EXISITING 

MESSAGES 

1. 

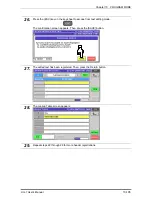
Press the "Fixed Mark” field on the Program Menu Select screen. 


2. 

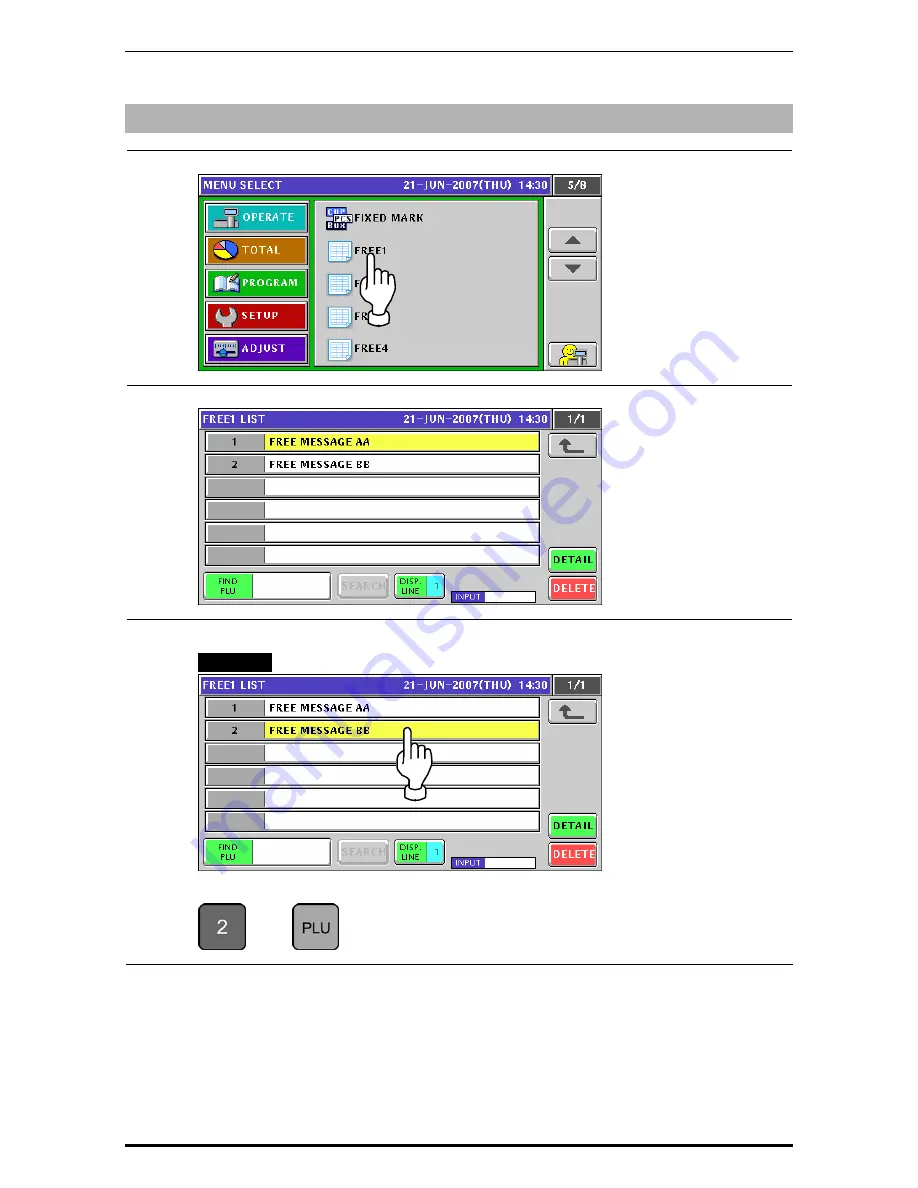
The Free Message List screen appears. 


3. 

Select a desired message number by pressing the corresponding field.


EXAMPLE


Message number “2”. 


or press the [PLU] key on the key sheet after a numeric entry. 


Î


10-118  

Uni-7 User’s Manual


Summary of Contents for UNI-7

Page 1: ... do not perform installation operation maintenance or inspection unless you fully understand all of the contents Keep this manual in a safe place where you can refer to it easily while installing operating and carrying out maintenance or inspections RS 61004 11 1 02 ...

Page 2: ... are reserved No part of this publication may be reproduced stored in a retrieval system or transmitted in any form or by any means mechanical electronic photocopying recording or otherwise without prior written permission of ISHIDA ...

Page 3: ...onnected with the machine whether such claim is based on contract warranty negligence or strict liability ISHIDA assumes no responsibility for the user s programming of this machine or any consequence thereof In no event shall ISHIDA be responsible for warranty repair or other claims regarding the machine unless ISHIDA s analysis confirms that the machines were properly handled stored installed an...

Page 4: ... the machine outside of the rated voltage may result in machine failure or danger such as electric shock Do not install the machine near a TV set or radio Doing so may cause static to the TV set and or radio as this machine emits week electric wave Do not allow water or any liquids to come into contact with the machine Doing so may result in fire or cause the machine to break down Do not drop or a...

Page 5: ...own Handle with care when removing or inserting the cassette Careless cassette handling may result in injury or cause the cassette to break down Do not drop the cassette Dropping the cassette may result in injury or cause the cassette to break down Do not press the touch panel with an edged thing Doing so may scratch the panel and cause the machine to break down Risk of explosion if battery is rep...

Page 6: ...Places exposed to direct sunlight Places where water or other liquids are easily spilled on the machine Places subject to excessive vibration or unstable foundations Places exposed to direct cold air from air conditioners or refrigerators Places where the floor or foundation is unstable Places subject to a lot of dust or dirt Places with large voltage fluctuations iv UNI 7 User s Manual ...

Page 7: ...rovided in this manual Failure to heed precautions can result in personal injury or property damage The following precaution symbols are used in this manual Indicates a potentially hazardous situation which if not avoided may result in serious injury or death Additionally there may be significant property damage Indicates a potentially hazardous situation where if not avoided may result in minor o...

Page 8: ...N USING CLEANING FLUIDS 1 13 1 9 STARTING PROCEDURES 1 14 1 9 1 TURNING ON THE POWER 1 14 1 9 2 PERFORMING ZERO ADJUSTMENT 1 15 1 9 3 GETTING BACK TO THE INITIAL SCREEN 1 16 CHAPTER 2 LABEL ISSUE 2 1 2 1 LABEL ISSUE WITHOUT OPERATOR 2 1 2 1 1 WEIGHING UNIT PRICE PRODUCTS 2 1 2 1 2 WEIGHING FIXED PRICE PRODUCTS 2 4 2 1 3 PROCESSING FIXED PRICE PRODUCTS 2 7 2 1 4 PROCESSING FIXED WEIGHT FIXED UNIT P...

Page 9: ...ION 7 3 7 3 MANUAL INPUT VOID 7 6 7 4 WEIGHING VOID 7 9 CHAPTER 8 TOTAL ADJUST MODE 8 1 8 1 MANUAL INPUT SUBTRACTION 8 1 8 2 WEIGHING SUBTRACTION 8 3 8 3 MANUAL INPUT ADDITION 8 6 8 4 WEIGHING ADDITION 8 9 CHAPTER 9 TOTAL MODE 9 1 9 1 DAILY TOTAL 9 1 9 2 WEEKLY TOTAL 9 4 9 3 CUMULATIVE TOTAL 9 6 9 4 TRACEABILITY TOTAL 9 8 9 5 PRESET REPORT PRINTING 9 9 9 6 TOTAL CLEAR 9 10 CHAPTER 10 PROGRAM MODE ...

Page 10: ...G NEW NUTRITION DATA 10 69 10 11 2 CHANGING EXISTING NUTRITION DATA 10 72 10 12 EXTRA MESSAGE REGISTRATION 10 75 10 12 1 CREATING NEW MESSAGES 10 75 10 12 2 CHANGING EXISITING MESSAGES 10 78 10 13 COUPON MESSAGE REGISTRATION 10 80 10 13 1 CREATING NEW MESSAGES 10 80 10 13 2 CHANGING EXISITING MESSAGES 10 83 10 14 POP MESSAGE REGISTRATION 10 85 10 15 TAX REGISTRATION 10 87 10 16 SCHEME TABLE REGIST...

Page 11: ... PROGRAM SETTING 11 19 11 9 DEFAULT DATA SETTING 11 21 11 10 PLU UPDATE SETTING 11 29 11 11 RECEIPT SETTING 11 35 CHAPTER 12 ADJUSTMENT MODE 12 1 12 1 ADJUSTMENT MODE ENTRY 12 1 12 2 DATE TIME ADJUSTMENT 12 2 12 3 TOUCH PANEL ADJUSTMENT 12 4 12 4 DISPLAY CHECK 12 6 APPENDIX TEXT EDITING A 1 A 1 OPERATION PANEL AND KEY FUNCTIONS A 1 A 2 NORMAL CHARACTER EDITING A 3 A 3 SPECIAL CHARACTER EDITING A 6...

Page 12: ...00 Operator Customer display 7 0 inch color liquid crystal with back light 480 X 234dots Printing method Direct thermal method Thermal head 2 inches 448dots and 8 dots mm Printing speed 100mm second 120mm second Note The printing speed may vary according to label conditions Printing effective size 56mm Label size Label width 30mm to 60mm Label length 20mm to 150mm Number of label cassettes 7 casse...

Page 13: ...Chapter 1 BEFORE USE 1 2 MODEL VARIATIONS Bakery Type Bench Type Pole Type Elevated Type Self service Type Hanging Type 1 2 UNI 7 User s Manual ...

Page 14: ...Chapter 1 BEFORE USE 1 3 PART NAMES AND FUNCTIONS 1 3 1 FRONT VIEW BENCH TYPE 1 3 2 REAR VIEW BENCH TYPE UNI 7 User s Manual 1 3 ...

Page 15: ...elect screen Used to call a registered product data Used to turn the previous page Used to feed labels Used to turn the next page Used to issue a label Used to jump to the top page Used to enter tare weight Used to jump to the end page Used to reset a weigh to zero Used to escape from the current mode 1 4 UNI 7 User s Manual ...

Page 16: ...and adjust the machine inclination by turning the four level adjustment feet so that the bubble is located at the center of the level gauge Accurate measurements cannot be performed if it is not installed horizontally 1 5 2 OPERATION PANEL ANGLE ADJUSTMENT BENCH TYPE To obtain a better view adjust the angle of the operation panel within the range between 0 and 70 degrees UNI 7 User s Manual 1 5 ...

Page 17: ...NG 1 Pull out the cassette from the main body Before pulling out the cassette unit ensure that nothing is placed on the weigh platter 2 Set a new roll around the roll holder and raise the roll stopper to fix the roll position 3 Thread the paper as shown in the figures below ...

Page 18: ...the paper end with the backing paper stopper and gently turn the winding bobbin counterclockwise until the label becomes tight 5 Slide the label receipt guide to help smooth paper feeding according to the paper width UNI 7 User s Manual 1 7 ...

Page 19: ...ng sticks to the magnet on the bottom of the cassette unit yPush the cassette slowly into the main body so as not to get your fingers caught 7 For labels press the FEED key on the key sheet to issue a label At this time confirm that the label is completely peeled off Confirm that the backing paper is wound up smoothly If the backing paper is wound up diagonally check that the label is set correctl...

Page 20: ...ubber platter holders and remove the platter by pulling it to disengage the two hooks at the rear side of the platter 1 7 2 REPLACING THE WEIGH PLATTER When replacing the weigh platter onto the main body engage the two hooks at the rear side of the platter and lower the platter so that the two pins on the bottom of the platter are inserted into holes of the rubber platter holders UNI 7 User s Manu...

Page 21: ...8 CLEANING OF THE MACHINE 1 8 1 CLEANING OF THE THEREMAL HEAD 1 Pull out the cassette from the main body Before pulling out the cassette unit ensure that nothing is placed on the weigh platter 2 Use a cotton tipped swab to clean off the thermal head ...

Page 22: ...LABEL SENSOR 1 Pull out the cassette from the main body Before pulling out the cassette unit ensure that nothing is placed on the weigh platter 2 Use a dry cloth to clean off the emitter and receiver of the label sensor UNI 7 User s Manual 1 11 ...

Page 23: ...Manual 1 8 3 CLEANING OF THE PRINT ROLLER AND PRISM 1 Pull out the cassette from the main body Before pulling out the cassette unit ensure that nothing is placed on the weigh platter 2 Use a dry cloth to clean off the print roller and prism ...

Page 24: ...wear contact lenses remove and wash them If the fluid comes into contact with your skin Immediately rinse the area of contact with water and then wash with soap If you notice any skin abnormalities at the area of contact or if any pain persists consult your doctor If the fumes of the fluid are inhaled Immediately move the victim to an area where fresh air is available and have the victim lie down ...

Page 25: ...The Time Check screen appears Then check that displayed date and time agree with current date and time and press the ENTER button on the screen to proceed to the next step Note Refer to Time Date Set menu in Adjust Mode when changing the date or time 3 After a while the initial screen appears 21 JUN 2007 11 13 38 1 14 UNI 7 User s Manual ...

Page 26: ...ING ZERO ADJUSTMENT 1 If the weight value is not zero on the initial screen Press the ZERO key on the key sheet to perform zero weight adjustment 2 The ZERO indicator lights up and the weight value becomes zero UNI 7 User s Manual 1 15 ...

Page 27: ...3 GETTING BACK TO THE INITIAL SCREEN 1 To get back to the initial screen from a Menu Select screen press either the SALES field or the icon at the bottom right on the screen 2 The initial screen appears 1 16 UNI 7 User s Manual ...

Page 28: ...the numeric keys and press the PLU key on the key sheet or simply press a preset key on the screen where the product is allocated EXAMPLE PLU No 6 Roast Beef Î or 3 When the product is preset as a traceable item the traceability screen appears See Chapter 4 for more details about traceability products 4 The selected PLU screen appears Without Preset Tare Weight Uni 7 User s Manual 2 1 ...

Page 29: ...xisting tare weight enter the tare weight using the numeric keys and press the TARE field on the screen EXAMPLE Tare weight 50g 5 See Chapter 5 for more details about temporary change operations 6 Put a product on the weigh platter The weight is measured and the total price is calculated 2 2 Uni 7 User s Manual ...

Page 30: ...s the PRINT key on the key sheet The label is issued Non traceable products Traceable products When AUTO is set in the Print Mode The label is automatically issued as soon as the weighing is stabilized Non traceable products Traceable products Uni 7 User s Manual 2 3 ...

Page 31: ...ess the PLU key on the key sheet or simply press a preset key on the screen where the product is allocated EXAMPLE PLU No 6 Roast Beef Î or 3 When the product is preset as a traceable item the traceability screen appears See Chapter 4 for more details about traceability products 4 The selected PLU screen appears Without Preset Tare Weight 2 4 Uni 7 User s Manual ...

Page 32: ...existing tare weight enter the tare weight using the numeric keys and press the TARE field on the screen EXAMPLE Tare weight 50g 5 See Chapter 5 for more details about temporary change operations 6 Put a product on the weigh platter The weight is measured but the fixed price stays same Uni 7 User s Manual 2 5 ...

Page 33: ... Mode Press the PRINT key on the key sheet Non traceable products Traceable products When AUTO is set in the Print Mode The label is automatically issued as soon as the weighing is stabilized Non traceable products Traceable products 2 6 Uni 7 User s Manual ...

Page 34: ...the key sheet or simply press a preset key on the screen where the product is allocated EXAMPLE PLU No 6 Roast Beef Î or 3 When the product is preset as a traceable item the traceability screen appears See Chapter 4 for more details about traceability products 4 The selected PLU screen appears 5 See Chapter 5 for more details about temporary change operations Uni 7 User s Manual 2 7 ...

Page 35: ...he key sheet to issue the labels The label is issued Non traceable products Traceable products Remove the label The next label is issued Non traceable products Traceable products Note To stop printing press the PRINT key again 2 8 Uni 7 User s Manual ...

Page 36: ...U key on the key sheet or simply press a preset key on the screen where the product is allocated EXAMPLE PLU No 6 Roast Beef Î or 3 When the product is preset as a traceable item the traceability screen appears See Chapter 4 for more details about traceability products 4 The selected PLU screen appears 5 See Chapter 5 for more details about temporary change operations Uni 7 User s Manual 2 9 ...

Page 37: ...HT field EXAMPLE Fixed weight 858g 7 Press the PRINT key on the key sheet to issue the labels The label is issued Non traceable products Traceable products Remove the label The next label is issued Non traceable products Traceable products Note To stop printing press the PRINT key again 2 10 Uni 7 User s Manual ...

Page 38: ...ess the PLU key on the key sheet or simply press a preset key on the screen where the product is allocated EXAMPLE PLU No 6 Roast Beef Î or 3 When the product is preset as a traceable item the traceability screen appears See Chapter 4 for more details about traceability products 4 The selected product screen appears Without Preset Tare Weight With Preset Tare Weight Uni 7 User s Manual 2 11 ...

Page 39: ...weight enter the tare weight using the numeric keys and press the TARE field on the screen EXAMPLE Tare weight 50g 5 See Chapter 5 for more details about temporary change operations 6 Put a product on the weigh platter The weight is measured and the total price is calculated 2 12 Uni 7 User s Manual ...

Page 40: ...Chapter 2 LABEL ISSUE 7 Press a operator button on the screen to issue the label EXAMPLE Operator BETTY The label is issued Uni 7 User s Manual 2 13 ...

Page 41: ... the PLU key on the key sheet or simply press a preset key on the screen where the product is allocated EXAMPLE PLU No 6 Roast Beef Î or 3 When the product is preset as a traceable item the traceability screen appears See Chapter 4 for more details about traceability products 4 The selected product screen appears Without Preset Tare Weight 2 14 Uni 7 User s Manual ...

Page 42: ...isting tare weight enter the tare weight using the numeric keys and press the TARE field on the screen EXAMPLE Tare weight 50g 5 See Chapter 5 for more details about temporary change operations 6 Put a product on the weigh platter The weight is measured and the total price is calculated Uni 7 User s Manual 2 15 ...

Page 43: ...Chapter 2 LABEL ISSUE 7 Press a operator button on the screen to issue the label EXAMPLE Operator BETTY The label is issued 2 16 Uni 7 User s Manual ...

Page 44: ...he key sheet or simply press a preset key on the screen where the product is allocated EXAMPLE PLU No 6 Roast Beef Î or 3 When the product is preset as a traceable item the traceability screen appears See Chapter 4 for more details about traceability products 4 The selected PLU screen appears 5 See Chapter 5 for more details about temporary change operations Uni 7 User s Manual 2 17 ...

Page 45: ...Chapter 2 LABEL ISSUE 6 Press a operator button on the screen to issue the label EXAMPLE Operator BETTY The label is issued 2 18 Uni 7 User s Manual ...

Page 46: ... key on the key sheet or simply press a preset key on the screen where the product is allocated EXAMPLE PLU No 6 Roast Beef Î or 3 When the product is preset as a traceable item the traceability screen appears See Chapter 4 for more details about traceability products 4 The selected PLU screen appears 5 See Chapter 5 for more details about temporary change operations Uni 7 User s Manual 2 19 ...

Page 47: ...ixed weight using the numeric keys on the key sheet and press the FIXED WEIGHT field EXAMPLE Fixed weight 858g 7 Press a operator button on the screen to issue the label EXAMPLE Operator BETTY The label is issued 2 20 Uni 7 User s Manual ...

Page 48: ...g the corresponding field on the screen EXAMPLE Select Meat category 2 2 The PLU preset screen for the selected category appears Then enter a desired PLU number using the numeric keys and press the PLU key on the key sheet or simply press a preset key on the screen where a desired product is allocated EXAMPLE Select PLU No 1 Rib Steak Î or Uni 7 User s Manual 3 1 ...

Page 49: ...SSUE 2 3 The PLU screen appears Weighing Unit Price PLU 2 4 Put a product on the weigh platter 2 5 Press a button on the screen for the operator who has sold the product EXAMPLE Select Operator 002 3 2 Uni 7 User s Manual ...

Page 50: ...ing field on the screen EXAMPLE Select Fish category 3 2 The PLU preset screen for the selected category appears Then enter a desired PLU number using the numeric keys and press the PLU key on the key sheet or simply press a preset key on the screen where a desired product is allocated EXAMPLE Select PLU No 102 Maine Lobster Î or Uni 7 User s Manual 3 3 ...

Page 51: ... the screen for the operator who has sold the product EXAMPLE Select Operator 002 3 5 The subtotal for the selected operator is shown on the screen 4 1 Select a desired product category by pressing the corresponding field on the screen EXAMPLE Select Bakery category 3 4 Uni 7 User s Manual ...

Page 52: ...ber using the numeric keys and press the PLU key on the key sheet or simply press a preset key on the screen where a desired product is allocated EXAMPLE Select PLU No 201 Live Wild Cherry Clam Î or 4 3 The PLU screen appears Weighing Fixed Price PLU 4 4 Put a product on the weigh platter Uni 7 User s Manual 3 5 ...

Page 53: ...he screen 5 1 Select a desired product category by pressing the corresponding field on the screen EXAMPLE Select Meat category 5 2 The PLU preset screen for the selected category appears Then enter a desired PLU number using the numeric keys and press the PLU key on the key sheet or simply press a preset key on the screen where a desired product is allocated 3 6 Uni 7 User s Manual ...

Page 54: ... Select PLU No 4 Pork Chops Î or 5 3 The PLU screen appears Fixed Unit Price PLU 5 4 Enter the weight using the numeric keys on the key sheet and press the Fixed Weight field on the screen EXAMPLE Weight 400g Uni 7 User s Manual 3 7 ...

Page 55: ...rator 002 5 6 The subtotal for the selected operator is shown on the screen 6 Press the subtotal field on the screen to display more detailed subtotal data 7 The detailed subtotal screen appears for confirmation of product registrations Then confirm that the detail of the transaction is correct 3 8 Uni 7 User s Manual ...

Page 56: ...Chapter 3 RECEIPT ISSUE 8 Press the PRINT key on the key sheet to issue the receipt Uni 7 User s Manual 3 9 ...

Page 57: ...Chapter 3 RECEIPT ISSUE 9 The Subtotal screen appears for the settlement 3 10 Uni 7 User s Manual ...

Page 58: ...gory by pressing the corresponding field on the screen EXAMPLE Select Meat category 2 2 The PLU preset screen for the selected category appears Then enter a desired PLU number using the numeric keys and press the PLU key on the key sheet or simply press a preset key on the screen where a desired product is allocated EXAMPLE Select PLU No 1 Rib Steak Î or Uni 7 User s Manual 3 11 ...

Page 59: ...SUE 2 3 The PLU screen appears Weighing Unit Price PLU 2 4 Put a product on the weigh platter 2 5 Press a button on the screen for the operator who has sold the product EXAMPLE Select Operator 002 3 12 Uni 7 User s Manual ...

Page 60: ...ressing the corresponding field on the screen EXAMPLE Select Fish category 3 2 The PLU preset screen for the selected category appears Then enter a desired PLU number using the numeric keys and press the PLU key on the key sheet or simply press a preset key on the screen where a desired product is allocated EXAMPLE Select PLU No 102 Maine Lobster Î or Uni 7 User s Manual 3 13 ...

Page 61: ...rator who has sold the product EXAMPLE Select Operator 002 3 5 The subtotal for the selected operator is shown on the screen 4 1 EXAMPLE Product registration by Operator 001 Select a desired product category by pressing the corresponding field on the screen EXAMPLE Select Bakery category 3 14 Uni 7 User s Manual ...

Page 62: ...ber using the numeric keys and press the PLU key on the key sheet or simply press a preset key on the screen where a desired product is allocated EXAMPLE Select PLU No 201 Live Wild Cherry Clam Î or 4 3 The PLU screen appears Weighing Fixed Price PLU 4 4 Put a product on the weigh platter Uni 7 User s Manual 3 15 ...

Page 63: ...e product EXAMPLE Select Operator 001 4 6 The subtotal for the selected operator is shown on the screen 5 1 EXAMPLE Product registration by Operator 002 Select a desired product category by pressing the corresponding field on the screen EXAMPLE Select Meat category 3 16 Uni 7 User s Manual ...

Page 64: ... the PLU key on the key sheet or simply press a preset key on the screen where a desired product is allocated EXAMPLE Select PLU No 4 Pork Chops Î or 5 3 The PLU screen appears Fixed Unit Price PLU 5 4 Enter the weight using the numeric keys on the key sheet and press the Fixed Weight field on the screen EXAMPLE Weight 400g Uni 7 User s Manual 3 17 ...

Page 65: ...ator 002 5 6 The subtotal for the selected operator is shown on the screen 6 Press the subtotal field on the screen to display more detailed subtotal data 7 The detailed subtotal screen appears for confirmation of product registrations Then confirm that the detail of the transaction is correct 3 18 Uni 7 User s Manual ...

Page 66: ...Chapter 3 RECEIPT ISSUE 8 Press the PRINT key on the key sheet to issue the receipt 9 The Subtotal screen appears for the settlement Uni 7 User s Manual 3 19 ...

Page 67: ...ect Meat category 10 2 The PLU preset screen for the selected category appears Then enter a desired PLU number using the numeric keys and press the PLU key on the key sheet or simply press a preset key on the screen where a desired product is allocated EXAMPLE Select PLU No 3 Round Steak Î or 10 3 The PLU screen appears Weighing Unit Price PLU 3 20 Uni 7 User s Manual ...

Page 68: ...Put a product on the weigh platter 10 5 Press a button on the screen for the operator who has sold the product EXAMPLE Select Operator 001 10 6 The subtotal for the selected operator is shown on the screen Uni 7 User s Manual 3 21 ...

Page 69: ...y Operator 001 Press the subtotal field on the screen to display more detailed subtotal data 12 The Subtotal screen appears for confirmation of product registrations 13 Press the PRINT key on the key sheet to issue the receipt 3 22 Uni 7 User s Manual ...

Page 70: ...Chapter 3 RECEIPT ISSUE 14 The Subtotal screen appears for the settlement Uni 7 User s Manual 3 23 ...

Page 71: ... screen for confirmation of product registrations 2 Press to select a desired product registration field EXAMPLE Void the third item Note To scroll the selection up or down press the c or d keys on the key sheet 3 Press the VOID button on the screen 4 The confirmation screen appears Then press the EXEC button for execution 3 24 Uni 7 User s Manual ...

Page 72: ...Chapter 3 RECEIPT ISSUE 5 The selected item has been voided 6 Press the PRINT key on the key sheet to issue the receipt Deleted by a dashed line Uni 7 User s Manual 3 25 ...

Page 73: ...Chapter 3 RECEIPT ISSUE 7 The Subtotal screen appears for the settlement 3 26 Uni 7 User s Manual ...

Page 74: ...itial screen is displayed 2 Enter a desired PLU number using the numeric keys and press the PLU key on the key sheet or simply press a preset key on the screen where the product is allocated EXAMPLE PLU number 6 Î or 3 When the product is preset as a traceable item the Traceability screen appears Uni 7 User s Manual 4 1 ...

Page 75: ...sed traceability data press the LIST button 5 The Traceability History screen appears Then press to select a desired data field 6 The selected data appears Then press the SET button 7 The selected PLU screen appears Weighing Unit Price Products 4 2 Uni 7 User s Manual ...

Page 76: ...Chapter 4 TRACEABILITY PRODUCTS Fixed Price Products Fixed Unit Price Products Weighing Fixed Price Products Uni 7 User s Manual 4 3 ...

Page 77: ...ys and press the PLU key on the key sheet or simply press a preset key on the screen where the product is allocated EXAMPLE PLU number 6 Î or 3 1 When the product is preset as a traceable item the Traceability screen appears Then confirm whether information on the screen is correct or not When the data is correct press the SET button 4 4 Uni 7 User s Manual ...

Page 78: ...a is not correct press to select a desired data field EXAMPLE Select France EXAMPLE Change to Argentina The data has been changed To change the FACTORY data press the corresponding field Press to select a desired data field Uni 7 User s Manual 4 5 ...

Page 79: ...hanged Then press the SET button 4 When changing the lot data press the LOT filed The Traceability Lot Number Set screen appears Change the lot number using the ABC ERASE and BACK SPACE buttons and press the BACK button to finish 4 6 Uni 7 User s Manual ...

Page 80: ...confirmation screen appears Then press the SAVE button to save the data The Traceability screen appears Then press the SET button 5 The selected PLU screen appears Weighing Unit Price Products Fixed Price Products Uni 7 User s Manual 4 7 ...

Page 81: ...Chapter 4 TRACEABILITY PRODUCTS Fixed Unit Price Products Weighing Fixed Price Products 4 8 Uni 7 User s Manual ...

Page 82: ...1 UNIT PRICE CHANGE 1 Ensure that the selected PLU screen is displayed Weighing Products Fixed Unit Price Products 2 Enter a desired unit price using the numeric keys and press the UNIT PRICE or FIXED UNIT PRICE field EXAMPLE 3 80 Weighing Products Uni 7 User s Manual 5 1 ...

Page 83: ...Chapter 5 TEMPORARY CHANGE OPERATIONS Fixed Unit Price Products 5 2 Uni 7 User s Manual ...

Page 84: ...RICE CHANGE 1 Ensure that the selected PLU screen is displayed Fixed Price Products Weighing Fixed Price Products 2 Enter a desired price using the numeric keys and press the FIXED PRICE field EXAMPLE 3 80 Fixed Price Products Uni 7 User s Manual 5 3 ...

Page 85: ...Chapter 5 TEMPORARY CHANGE OPERATIONS Weighing Fixed Price Products 5 4 Uni 7 User s Manual ...

Page 86: ...CE 1 Ensure that the selected PLU screen is displayed Weighing Unit Price Products Fixed Unit Price Products 2 Enter a desired discount amount using the numeric keys and press the U P field EXAMPLE Discount amount 1 00 Weighing Unit Price Products Uni 7 User s Manual 5 5 ...

Page 87: ...Chapter 5 TEMPORARY CHANGE OPERATIONS Fixed Unit Price Products 5 6 Uni 7 User s Manual ...

Page 88: ... PRICE 1 Ensure that the selected PLU screen is displayed Weighing Unit Price Products Fixed Unit Price Products 2 Enter a desired discount percentage using the numeric keys on the key sheet and press the U P field EXAMPLE Discount percentage 10 Uni 7 User s Manual 5 7 ...

Page 89: ...Chapter 5 TEMPORARY CHANGE OPERATIONS Fixed Unit Price Products 5 8 Uni 7 User s Manual ...

Page 90: ...TOTAL PRICE 1 Ensure that the selected PLU screen is displayed Fixed Price Products Weighing Fixed Price Products 2 Enter a desired discount amount using the numeric keys and press the field EXAMPLE Discount amount 1 00 Fixed Price Products Uni 7 User s Manual 5 9 ...

Page 91: ...Chapter 5 TEMPORARY CHANGE OPERATIONS Weighing Fixed Price Products 5 10 Uni 7 User s Manual ...

Page 92: ...OTAL PRICE 1 Ensure that the selected PLU screen is displayed Fixed Price Products Weighing Fixed Price Products 2 Enter a desired discount percentage using the numeric keys on the key sheet and press the field EXAMPLE Discount percentage 10 Uni 7 User s Manual 5 11 ...

Page 93: ...Chapter 5 TEMPORARY CHANGE OPERATIONS Weighing Fixed Price Products 5 12 Uni 7 User s Manual ...

Page 94: ...NGE 1 Ensure that the selected PLU screen is displayed Fixed Price Products 2 Enter a desired quantity using the numeric keys and press the PCS field EXAMPLE Quantity 2 pieces 3 To select a desired fix price mark press the PCS field again Uni 7 User s Manual 5 13 ...

Page 95: ...Chapter 5 TEMPORARY CHANGE OPERATIONS 4 The Fix Price mark List screen appears Then select a desired mark by pressing the corresponding field EXAMPLE Price mark PC PCS 5 14 Uni 7 User s Manual ...

Page 96: ...xed Price Products 2 Enter a desired number of labels and press the PRN QTY Print Quantity field on the screen EXAMPLE Print quantity 3 3 Press the PRINT key on the key sheet The set number of labels will be issued Note To interrupt the issue of labels press the PRINT key again To continue the issue of labels press the PRINT key again Uni 7 User s Manual 5 15 ...

Page 97: ...CE OPERATIONS 6 1 WEIGHING PRODUCTS 1 Ensure that the initial screen is displayed 2 Select a desired product by pressing the corresponding button on the screen EXAMPLE Select Roast Beef 3 The selected product screen appears Uni 7 User s Manual 6 1 ...

Page 98: ...RVICE OPERATIONS 4 Put a product on the weigh platter The weight is measured and the total price is calculated 5 Press the LABEL PRINT button on the screen to issue the label The label is issued 6 2 Uni 7 User s Manual ...

Page 99: ...nitial screen is displayed 2 Select a desired product by pressing the corresponding button on the screen EXAMPLE Select Roast Beef 3 The selected product screen appears Then press the LABEL PRINT button on the screen to issue the label The label is issued Uni 7 User s Manual 6 3 ...

Page 100: ...press the MODE key on the key sheet Then press the ACC Accumulator filed 2 The Accumulator Input Number Accumulation screen appears 3 Enter a desired PLU number and press the PLU key on the key sheet EXAMPLE PLU number 6 Î The Input Number Accumulation screen for the selected product appears 7 Uni 7 User s Manual 7 1 ...

Page 101: ...umulated and press the corresponding fields for registration Then press the ACC button on the screen EXAMPLE Quantity 1 pc Weight 169g Price 0 84 5 The confirmation screen appears Then press the EXEC button on the screen 6 The registration has been completed 7 2 Uni 7 User s Manual ...

Page 102: ...7 2 WEIGHING ACCUMULATION 1 To get the Operation Menu Select screen press the MODE key on the key sheet Then press the ACC Accumulator filed 2 To get the Weighing Accumulation screen press the WGT ACC tab Uni 7 User s Manual 7 3 ...

Page 103: ...on the key sheet EXAMPLE PLU number 6 Î The Weighing Accumulation screen for the selected product appears 4 Put a product on the weigh platter and press the ACC button on the screen 5 The confirmation screen appears Then press the EXEC button on the screen 7 4 Uni 7 User s Manual ...

Page 104: ...Chapter 7 ACCUMULATOR MODE 6 Remove the product from the weigh platter Uni 7 User s Manual 7 5 ...

Page 105: ...ODE 7 3 MANUAL INPUT VOID 1 To get the Operation Menu Select screen press the MODE key on the key sheet Then press the ACC Accumulator filed 2 To get the Input Number Void screen press the NUM VOID tab 7 6 Uni 7 User s Manual ...

Page 106: ...oid screen for the selected product appears 4 Enter a quantity weight and price that are to be voided and press the corresponding fields for registration Then press the VOID button on the screen EXAMPLE Quantity 1 pc Weight 169g Price 0 84 5 The confirmation screen appears Then press the EXEC button on the screen Uni 7 User s Manual 7 7 ...

Page 107: ...Chapter 7 ACCUMULATOR MODE 6 The registration has been completed 7 8 Uni 7 User s Manual ...

Page 108: ...OR MODE 7 4 WEIGHING VOID 1 To get the Operation Menu Select screen press the MODE key on the key sheet Then press the ACC Accumulator filed 2 To get the Weighing Void screen press the WGT VOID tab Uni 7 User s Manual 7 9 ...

Page 109: ...ey on the key sheet EXAMPLE PLU number 6 Î The Weighing Void screen for the selected product appears 4 Put a product on the weigh platter and press the VOID button on the screen 5 The confirmation screen appears Then press the EXEC button on the screen 7 10 Uni 7 User s Manual ...

Page 110: ...Chapter 7 ACCUMULATOR MODE 6 Remove the product from the weigh platter Uni 7 User s Manual 7 11 ...

Page 111: ...e Operation Menu Select screen press the MODE key on the key sheet Then press the TOTAL ADJUST filed 2 Enter a desired PLU number and press the PLU key on the key sheet EXAMPLE PLU number 6 Î The Total Adjust Input Number Subtraction screen for the selected product appears 8 Uni 7 User s Manual 8 1 ...

Page 112: ...btracted and press the corresponding fields for registration Then press the SUB button on the screen EXAMPLE Quantity 1 pc Weight 169g Price 0 84 4 The confirmation screen appears Then press the EXEC button on the screen 5 The registration has been completed 8 2 Uni 7 User s Manual ...

Page 113: ... WEIGHING SUBTRACTION 1 To get the Operation Menu Select screen press the MODE key on the key sheet Then press the TOTAL ADJUST filed 2 To get the Total Adjust Weighing Subtraction screen press the WGT SUB tab Uni 7 User s Manual 8 3 ...

Page 114: ... key sheet EXAMPLE PLU number 6 Î The Total Adjust Weighing Subtraction screen for the selected product appears 4 Put a product on the weigh platter and press the SUB button on the screen 5 The confirmation screen appears Then press the EXEC button on the screen 8 4 Uni 7 User s Manual ...

Page 115: ...Chapter 8 TOTAL ADJUST MODE 6 Remove the product from the weigh platter Uni 7 User s Manual 8 5 ...

Page 116: ...MANUAL INPUT ADDITION 1 To get the Operation Menu Select screen press the MODE key on the key sheet Then press the TOTAL ADJUST filed 2 To get the Total Adjust Input Number Addition screen press the NUM ADD tab 8 6 Uni 7 User s Manual ...

Page 117: ...umber Addition screen for the selected product appears 4 Enter a quantity weight and price that are to beaded and press the corresponding fields for registration Then press the ADD button on the screen EXAMPLE Quantity 1 pc Weight 169g Price 0 84 5 The confirmation screen appears Then press the EXEC button on the screen Uni 7 User s Manual 8 7 ...

Page 118: ...Chapter 8 TOTAL ADJUST MODE 6 The registration has been completed 8 8 Uni 7 User s Manual ...

Page 119: ...E 8 4 WEIGHING ADDITION 1 To get the Operation Menu Select screen press the MODE key on the key sheet Then press the TOTAL ADJUST filed 2 To get the Total Adjust Weighing Add screen press the WGT ADD tab Uni 7 User s Manual 8 9 ...

Page 120: ... the key sheet EXAMPLE PLU number 6 Î The Total Adjust Weighing Add screen for the selected product appears 4 Put a product on the weigh platter and press the ADD button on the screen 5 The confirmation screen appears Then press the EXEC button on the screen 8 10 Uni 7 User s Manual ...

Page 121: ...Chapter 8 TOTAL ADJUST MODE 6 Remove the product from the weigh platter Uni 7 User s Manual 8 11 ...

Page 122: ...DE 9 1 DAILY TOTAL 1 Press the PRODUCTION DAILY TOTAL filed 2 The Daily Total screen appears 3 To obtain the Hourly Total screen press the HOUR tab To change the pages press the b or a button on the screen 9 Uni 7 User s Manual 9 1 ...

Page 123: ...r a button on the screen 5 To obtain the Group Total screen press the GROUP tab To change the pages press the b or a button on the screen 6 To obtain the Designated Item Total screen press the ITEM tab Enter a desired PLU number using the numeric keys and press the PLU key on the key sheet 9 2 Uni 7 User s Manual ...

Page 124: ...bject of analysis is specified to be groups PLU No Analysis is performed in ascending PLU number order ABC PRICE Analysis is performed in descending price order ABC WEIGHT Analysis is performed in descending weight order ABC PCS Analysis is performed in descending quantity order Z PRICE Analysis is performed in ascending price order Z WEIGHT Analysis is performed in ascending weight order Z PCS An...

Page 125: ...LY TOTAL filed 2 The Weekly Total screen appears To change the pages press the b or a button on the screen 3 To obtain total for the day of the week press a desired day of the week tab To change the pages press the b or a button on the screen 9 4 Uni 7 User s Manual ...

Page 126: ...Chapter 9 TOTAL MODE Uni 7 User s Manual 9 5 ...

Page 127: ...ive Total screen appears 3 To obtain total for each department press the DEPT tab on the screen To change the pages press the b or a button on the screen 4 To obtain total for each group press the GROUP tab on the screen To change the pages press the b or a button on the screen 9 6 Uni 7 User s Manual ...

Page 128: ...t of analysis is specified to be departments GROUP The object of analysis is specified to be groups PLU No Analysis is performed in ascending PLU number order ABC PRICE Analysis is performed in descending price order ABC WEIGHT Analysis is performed in descending weight order ABC PCS Analysis is performed in descending quantity order Z PRICE Analysis is performed in ascending price order Z WEIGHT ...

Page 129: ...RACEABILITY TOTAL filed 2 The Traceability Item screen appears To change the pages press the b or a button on the screen To obtain Traceability Total screen press the DETAIL button on the screen 3 The Traceability Total screen appears 9 8 Uni 7 User s Manual ...

Page 130: ...RESET REPORT PRINTING 1 Press the PRESET REPORT filed 2 The Preset Report screen appears 3 Select desired reports by pressing the corresponding fields Press the STRAT button to issue selected join reports Uni 7 User s Manual 9 9 ...

Page 131: ...screen 2 The second page of the Menu Select screen appears To obtain the Total Clear screen press the TOTAL CLEAR field on the screen 3 The Total Clear screen appears 4 Select desired reports to be cleared by pressing the corresponding fields 9 10 Uni 7 User s Manual ...

Page 132: ...Chapter 9 TOTAL MODE 5 Press the EXEC button 6 The confirmation screen appears Then press the EXEC button on the screen for execution Uni 7 User s Manual 9 11 ...

Page 133: ... the initial screen is displayed 2 Press the MODE key on the key sheet The Operation Menu Select screen appears Then press the PROGRAM button on the screen 3 The Program Menu Select screen appears To change the pages press the b or a button on the screen Uni 7 User s Manual 10 1 ...

Page 134: ...Chapter 10 PROGRAM MODE 10 2 Uni 7 User s Manual ...

Page 135: ...Chapter 10 PROGRAM MODE Note To exit the Program Mode press the ESC Escape key on the key sheet Uni 7 User s Manual 10 3 ...

Page 136: ...een 2 The Item List screen appears To change the pages press the b or a button on the screen 3 Press to select a desired field Then press the DETAIL button on the screen EXAMPLE Select Roast Beef 4 The Item Detail screen appears To edit the PLU name press the EDIT button on the screen 10 4 Uni 7 User s Manual ...

Page 137: ... Edit a text according to the procedure explained in Appendix Text Editing 6 Ensure that the first sales related screen is displayed Sales Mode Weighing Product Sales Mode Fixed Price Product Sales Mode Weighing Fixed Price Product Uni 7 User s Manual 10 5 ...

Page 138: ...ice OPEN PRICE Press the or button to select whether or not to allow an open price system UNIT PRICE FIXED PRICE Enter a unit price or fixed price and press this field M D AMOUNT Enter a markdown amount or percentage and press this field QTY Quantity Enter a packed quantity and press this field UNIT TYPE Press this field to display the Fix Price Mark List screen Press to select a desired field TAX...

Page 139: ...ther or not to use the Point Flag POINT FLAG 0 OFF 1 ON Press the or button to select a desired Point Type POINT TYPE 0 Weight 1 Fixed weight POINTS Enter a desired number and press this field 8 1 Press the MESSAGE tab to select the message related screen 8 2 Press to select a desired field EXAMPLE Extra Message 1 Uni 7 User s Manual 10 7 ...

Page 140: ...e List screen appears Then press to select a desired field EXAMPLE Extra Message BB 9 1 Press the IMAGE tab to select the image related screen 9 2 Press to select a desired field EXAMPLE Select a desired image for Image 1 10 8 Uni 7 User s Manual ...

Page 141: ...t a desired field and press the SET button EXAMPLE Select Image No 8 10 Select whether or not to print Safe handling Image by pressing a desired field 11 1 Press the PRINT tab to select the print related screen 11 2 Press the First Label Format No button Uni 7 User s Manual 10 9 ...

Page 142: ...elect Format No 5 ITEM DESCRIPTION Press the or button to select whether or not to print the first labels FIRST LABEL PRINT 1 YES 2 NO Press the or button to select whether or not to print the second labels SECOND LABEL PRINT 1 YES 2 NO Note The same procedure applies to the Second Label Format Number setting 10 10 Uni 7 User s Manual ...

Page 143: ...elect whether or not to print the Sell By Date Press the or button to select a desired printing method SB TIME PRINT 0 No print 1 Designated time 2 Relative time SB TIME DATA This field is available only when Yes is selected in SB TIME PRINT Enter the number of hours and press this field SHELF LIFE days This field is available only when Yes is selected in SB DATE PRINT Enter the number of days and...

Page 144: ...E Enter the POS flag number and press this field BARCODE Enter the barcode number and press this field Select one of the following reference methods POS REFERENCE 0 Refer 1 PLU file BARCODE TYPE This field is available only when PLU File is selected in POS REFERENCE Press this field to get the Barcode Type screen and press to select one of the PLU types POS FORMAT Press this field to get the Barco...

Page 145: ... this field to get the Department List screen Set the desired department simply by pressing the field on the list or pressing the Department No field after a numeric entry GROUP No Pressing this field displays the Group List Set the desired group simply by pressing the field on the list or pressing the Group No field after a numeric entry ...

Page 146: ...t screen 2 The Campaign List appears To change the pages press the b or a button on the screen 3 Create a new campaign file by entering a campaign number and pressing the PLU key on the key sheet EXAMPLE Campaign number 2 Î The confirmation screen appears Then press the ENTER button 10 14 Uni 7 User s Manual ...

Page 147: ...paign Data List screen appears 5 Enter the campaign start date and press the Start Date display field EXAMPLE Start date June 25 2007 6 Enter the start time and press the Start Time display field EXAMPLE Start time 08 00 Uni 7 User s Manual 10 15 ...

Page 148: ...paign end date and press the End Date display field EXAMPLE End date June 27 2007 8 Enter the end time and press the End Time display field EXAMPLE End time 21 00 9 Press the CALL button to call up Item List screens 10 16 Uni 7 User s Manual ...

Page 149: ... to select a desired item field EXAMPLE PLU number 4 11 The Campaign Data List screen appears Then press the CALL button again when selecting the next item The pop up list appears Then press to select a desired field EXAMPLE Percent discount Uni 7 User s Manual 10 17 ...

Page 150: ...ric value and press the Markdown Price field for registration EXAMPLE 10 13 Repeat steps 9 through 12 for further registration Then press the Return button to finalize this procedure The Campaign List screen appears 10 18 Uni 7 User s Manual ...

Page 151: ...field on the Program Menu Select screen 2 The Operator List screen appears 3 To create a new operator enter the operator number and press the PLU key on the key sheet EXAMPLE Operator number 7 Î The confirmation screen appears Press the ENTER button Uni 7 User s Manual 10 19 ...

Page 152: ...elected operator number Edit a text according to the procedures described in Appendix Text Editing 5 Press the ESC key on the key sheet to escape from text editing mode The confirmation screen appears Then press the SAVE button to save the data 10 20 Uni 7 User s Manual ...

Page 153: ...Chapter 10 PROGRAM MODE 6 The edited text has been registered 7 Press the Return button to finalize this procedure Uni 7 User s Manual 10 21 ...

Page 154: ...ON 10 5 1 SETTING PRESET FUNCTIONS 1 Press the PRESET KEY field on the screen 2 The Preset Key Panel screen appears 3 Ensure that the SET button is selected 4 Press a desired button to which a preset function will be assigned 10 22 Uni 7 User s Manual ...

Page 155: ...Chapter 10 PROGRAM MODE 5 Available functions are listed on the screens To change the pages press the b or a button on the screen Uni 7 User s Manual 10 23 ...

Page 156: ... the list and press the SET button EXAMPLE Select PLU function 7 The Item List screen appears Then press to select a desired field EXAMPLE Select PLU No 2 8 The selected PLU has been assigned 9 Repeat steps 4 through 8 for more registrations 10 24 Uni 7 User s Manual ...

Page 157: ...ES ON THE PRESET KEYS 1 Press the PRESET KEY field on the screen 2 The Preset Key Panel screen appears 3 Press the IMAGE button 4 Press a desired preset key where the function is already assigned EXAMPLE Select Roast Beef Uni 7 User s Manual 10 25 ...

Page 158: ...r 10 PROGRAM MODE 5 The Image List screen appears 6 Press to select a desired image EXAMPLE Image No 3 7 The image has been assigned 8 Repeat steps 4 through 7 for more registrations 10 26 Uni 7 User s Manual ...

Page 159: ...SET KEYS 1 Press the PRESET KEY field on the screen 2 The Preset Key Panel screen appears 3 Press the COLOR button Then ensure that Back Color is selected 4 Press to select a desired preset key EXAMPLE Select Roast Beef Uni 7 User s Manual 10 27 ...

Page 160: ...ears Then press to select a desired color 6 Selected color has been given to the background of the key 7 Press the BACK COLOR button to change to the FORE COLOR button 8 Press to select a desired preset key EXAMPLE Select Roast Beef 10 28 Uni 7 User s Manual ...

Page 161: ... MODE 9 The Preset Key Color screen appears Then press to select a desired color 10 Selected color has been given to the foreground of the key 11 Repeat steps 4 through 10 for more registrations Uni 7 User s Manual 10 29 ...

Page 162: ...NG PRESET KEY SIZES 1 Press the PRESET KEY field on the screen 2 The Preset Key Panel screen appears 3 Press the SIZE button and ensure that SMALL is selected Press the SMALL button to change to the MIDDLE button 10 30 Uni 7 User s Manual ...

Page 163: ...he MIDDLE button to change to the LARGE button 4 1 Change the size of a desired key EXAMPLE Change to the middle size of the Roast Beef key Ensure that the MIDDLE button is selected Press the Roast Beef key Uni 7 User s Manual 10 31 ...

Page 164: ...hange the size of a desired key EXAMPLE Change to the large size of the Roast Beef key Ensure that the LARGE button is selected Press the Roast Beef key 5 Repeat steps 3 through 4 2 for more registrations 10 32 Uni 7 User s Manual ...

Page 165: ...TING PRESET KEY NAMES 1 Press the PRESET KEY field on the screen 2 The Preset Key Panel screen appears 3 Press to select the EDIT button 4 Press to select a desired preset key EXAMPLE Select the Roast Beef key Uni 7 User s Manual 10 33 ...

Page 166: ...t a desired text according to the procedures described in Appendix Text Editing EXAMPLE Beef Fillet 7 To finalize the editing press the ESC key on the key sheet The confirmation screen appears Then press the SAVE button to save the data 10 34 Uni 7 User s Manual ...

Page 167: ...Chapter 10 PROGRAM MODE 8 The edited text has been registered 9 Repeat steps 4 through 8 for more registrations Uni 7 User s Manual 10 35 ...

Page 168: ...DATA 1 Press the PRESET KEY field on the screen 2 The Preset Key Panel screen appears 3 Press to select the DATA button 4 Press a desired preset key The related data is displayed on the button EXAMPLE Beef Fillet and the PLU No 6 10 36 Uni 7 User s Manual ...

Page 169: ...eld on the screen 2 The Preset Key Panel screen appears Ensure that the SET button is selected 3 Press a desired preset key to be deleted EXAMPLE Delete the Roast Beef key 4 The Function List screen appears and the assigned function field is highlighted Uni 7 User s Manual 10 37 ...

Page 170: ...Chapter 10 PROGRAM MODE 5 Press to select the NO field and press the SET button 6 The selected key has been deleted 7 Repeat steps 3 through 6 for more deletions 10 38 Uni 7 User s Manual ...

Page 171: ...ress the PRESET KEY field on the screen 2 The Preset Key Panel screen appears Then press the MEMBRANE tab 3 The Preset Key Membrane screen appears 4 Press to select a desired membrane key to which the preset data is assigned Uni 7 User s Manual 10 39 ...

Page 172: ... to the selected key press the Name field 5 The Function List screen appears 6 Select a desired function to be assigned by pressing the corresponding field and press the SET button EXAMPLE Select PLU 7 The Item List screen appears Then press to select a desired field EXAMPLE PLU No 5 10 40 Uni 7 User s Manual ...

Page 173: ...Chapter 10 PROGRAM MODE 8 The selected PLU has been assigned to the selected membrane key Uni 7 User s Manual 10 41 ...

Page 174: ...Advertisement Message List screen appears When creating the first message press the NEW button 2 2 When creating a message other than the first one enter a desired message number using the numeric keys and press the PLU key on the key sheet XAMPLE Message number 2 Î 3 The confirmation screen appears Then press the ENTER button 10 42 Uni 7 User s Manual ...

Page 175: ...The Advertisement Message Edit screen appears Edit a desired message according to the procedures described in Appendix Text Editing Press the ESC key on the key sheet to escape from text editing mode The confirmation screen appears Then press the SAVE button to save the data Uni 7 User s Manual 10 43 ...

Page 176: ...e 2 Flash Press the or button to select a desired display type IMAGE DISPLAY TYPE 0 None 1 Slide 2 Flash Press the or button to select a desired display speed TEXT DISPLAY SPEED 0 Fast 1 Medium 2 Slow DISPLAY COUNT Enter a display count data and press this field 6 Press the IMAGE tab Then the Advertisement Message Image screen appears 7 When setting an image press a desired field 10 44 Uni 7 User ...

Page 177: ...desired field and press the SET button The selected image has been assigned in the designated field 10 Repeat steps 7 through 9 for more registrations Then press the Return button to finalize this procedure The edited message has been registered Uni 7 User s Manual 10 45 ...

Page 178: ... Press the STORE NAME field on the Program Menu Select screen 2 The default store data screen appears When changing the store data press the EDIT button 3 The Store Name Edit screen appears 4 Edit a text according to the procedures described in Appendix Text Editing 10 46 Uni 7 User s Manual ...

Page 179: ... confirmation screen appears Then press the SAVE button 6 The store name has been changed 7 Press to select the address field line and press the EDIT button 8 The Store Address Edit screen appears 9 Edit a text according to the procedures described in Appendix Text Editing Uni 7 User s Manual 10 47 ...

Page 180: ...10 PROGRAM MODE 10 Press the ESC key on the key sheet to escape from text editing mode The confirmation screen appears Then press the SAVE button 11 The store address has been changed 10 48 Uni 7 User s Manual ...

Page 181: ...E field on the Program Menu Select screen 2 The default store data screen appears 3 When creating a new store data enter the desired store number and press the PLU key EXAMPLE Store number 1 Î The confirmation screen appears Then press the ENTER button Uni 7 User s Manual 10 49 ...

Page 182: ...tore number 5 Edit a text according to the procedures described in Appendix Text Editing 6 Press the ESC key on the key sheet to escape from text editing mode The confirmation screen appears Then press the SAVE button 7 The store name has been registered 10 50 Uni 7 User s Manual ...

Page 183: ...button 9 The Store Address Edit screen appears 10 Edit a text according to the procedures described in Appendix Text Editing 11 Press the ESC key on the key sheet to escape from text editing mode The confirmation screen appears Then press the SAVE button Uni 7 User s Manual 10 51 ...

Page 184: ...ODE 12 The store address has been registered 13 Enter a desired store number as a default store data and press the Printer 1 or Printer 2 display field EXAMPLE Set the store number 1 for printer 1 10 52 Uni 7 User s Manual ...

Page 185: ...NEW DEPARTMENT NAMES 1 Press the Department field on the Program Menu Select screen 2 The Department List screen appears Then press the NEW button 3 The confirmation screen appears Then press the ENTER button 4 The Department Name Edit screen appears Uni 7 User s Manual 10 53 ...

Page 186: ...key sheet to escape from text editing mode The confirmation screen appears Then press the SAVE button 7 The edited text has been registered 8 When creating more department names enter a desired department number using the numeric keys and press the PLU key on the key sheet EXAMPLE Department number 2 Î 10 54 Uni 7 User s Manual ...

Page 187: ...tton 9 The Department Name Edit screen appears 10 Edit a text according to the procedures described in Appendix Text Editing 11 Press the ESC key on the key sheet to escape from text editing mode The confirmation screen appears Then press the SAVE button Uni 7 User s Manual 10 55 ...

Page 188: ...Chapter 10 PROGRAM MODE 12 The edited text has been registered 13 Repeat steps 8 through 12 for more registrations 10 56 Uni 7 User s Manual ...

Page 189: ...MES 1 Press the Department field on the Program Menu Select screen 2 The Department List screen appears 3 When changing an existing data press to select a desired field 4 The Department Name Edit screen appears for the selected department Uni 7 User s Manual 10 57 ...

Page 190: ...ibed in Appendix Text Editing 6 Press the ESC key on the key sheet to escape from text editing mode The confirmation screen appears Then press the SAVE button 7 The edited text has been registered 8 Repeat steps 3 through 7 for more registrations 10 58 Uni 7 User s Manual ...

Page 191: ...EATING NEW GROUP NAMES 1 Press the Group field on the Program Menu Select screen 2 The Group List screen appears Then press the NEW button 3 The confirmation screen appears Then press the ENTER button 4 The Group Name Edit screen appears Uni 7 User s Manual 10 59 ...

Page 192: ... on the key sheet to escape from text editing mode The confirmation screen appears Then press the SAVE button 7 The edited text has been registered 8 When creating more group names enter a desired group number using the numeric keys and press the PLU key on the key sheet EXAMPLE Group number 2 Î 10 60 Uni 7 User s Manual ...

Page 193: ...Chapter 10 PROGRAM MODE The confirmation screen appears Then press the ENTER button 9 The Group Name Edit screen appears 10 Repeat steps 5 through 9 for more registrations Uni 7 User s Manual 10 61 ...

Page 194: ...G GROUP NAMES 1 Press the Group field on the Program Menu Select screen 2 The Group List screen appears 3 When changing an existing data press to select a desired field 4 The Group Edit screen appears for the selected group 10 62 Uni 7 User s Manual ...

Page 195: ...ibed in Appendix Text Editing 6 Press the ESC key on the key sheet to escape from text editing mode The confirmation screen appears Then press the SAVE button 7 The edited text has been registered 8 Repeat steps 3 through 7 for more registrations Uni 7 User s Manual 10 63 ...

Page 196: ... NEW INSTRUCTIONS 1 Press the Cooking Instruction field on the Program Menu Select screen 2 The Cooking Time List screen appears Then press the NEW button 3 The confirmation screen appears Then press the ENTER button 4 The Cooking Time Edit screen appears 10 64 Uni 7 User s Manual ...

Page 197: ...key on the key sheet to escape from text editing mode The confirmation screen appears Then press the SAVE button 7 The edited text has been registered 8 Enter a numeric value for each filed using the numeric keys and press the corresponding field for registration EXAMPLE Base time 35 minutes Uni 7 User s Manual 10 65 ...

Page 198: ...tion number using the numeric keys and press the PLU key on the key sheet EXAMPLE Cooking instruction number 2 Î The confirmation screen appears Then press the ENTER button 10 The Cooking Time Edit screen appears 11 Repeat steps 5 through 10 for more registrations 10 66 Uni 7 User s Manual ...

Page 199: ...ing Instruction field on the Program Menu Select screen 2 The Cooking Time List screen appears 3 When changing an existing data press to select a desired field and press the DETAIL button 4 The Cooking Time Edit screen appears for the selected instruction Uni 7 User s Manual 10 67 ...

Page 200: ...ibed in Appendix Text Editing 6 Press the ESC key on the key sheet to escape from text editing mode The confirmation screen appears Then press the SAVE button 7 The edited text has been registered 8 Repeat steps 3 through 7 for more registrations 10 68 Uni 7 User s Manual ...

Page 201: ...d on the Program Menu Select screen 2 The Nutrition List screen appears Then press the NEW button 3 The confirmation screen appears Then press the ENTER button 4 The Nutrition Data Programming screen for the selected nutrition number appears When creating a text for Serving Size press the EDIT button Uni 7 User s Manual 10 69 ...

Page 202: ...x Text Editing 7 Press the ESC key on the key sheet to escape from text editing mode The confirmation screen appears Then press the SAVE button 8 The edited text has been registered Then enter a nutrition data for each field using the numeric keys and press the corresponding field for registration 10 70 Uni 7 User s Manual ...

Page 203: ... enter a desired nutrition number using the numeric keys and press the PLU key on the key sheet EXAMPLE Nutrition number 2 Î The confirmation screen appears Then press the ENTER button 10 Repeat steps 4 through 9 for more registrations Uni 7 User s Manual 10 71 ...

Page 204: ...N DATA 1 Press the Nutrition USA field on the Program Menu Select screen 2 The Nutrition List screen appears 3 Select a desired nutrition number EXAMPLE Nutrition number 2 or press the PLU key on the key sheet after a numeric entry Î 10 72 Uni 7 User s Manual ...

Page 205: ...n Data Programming screen for the selected nutrition number appears When changing a text for Serving Size press the EDIT button 6 The Nutrition Edit screen appears 7 Edit a text according to the procedures described in Appendix Text Editing Uni 7 User s Manual 10 73 ...

Page 206: ...Then press the SAVE button 9 The edited text has been registered When necessary enter a nutrition data for each field using the numeric keys and press the corresponding field for registration 10 Press the Return button after making necessary changes 11 Repeat steps 3 through 10 for more registrations 10 74 Uni 7 User s Manual ...

Page 207: ...G NEW MESSAGES 1 Press the Extra Message field on the Program Menu Select screen 2 The Extra Message List screen appears Then press the NEW button 3 The confirmation screen appears Then press the ENTER button 4 The Extra Message Edit screen appears Uni 7 User s Manual 10 75 ...

Page 208: ...on the key sheet to escape from text editing mode The confirmation screen appears Then press the SAVE button 7 The edited text has been registered 8 When creating more messages enter a desired message number using the numeric keys and press the PLU key on the key sheet EXAMPLE Message number 2 Î 10 76 Uni 7 User s Manual ...

Page 209: ...Chapter 10 PROGRAM MODE The confirmation screen appears Then press the ENTER button 9 Repeat steps 4 through 8 for more registrations Uni 7 User s Manual 10 77 ...

Page 210: ...s the Extra Message field on the Program Menu Select screen 2 The Extra Message List screen appears 3 Select a desired message number EXAMPLE Message number 2 Press a desired field or press the PLU key on the key sheet after a numeric entry Î 10 78 Uni 7 User s Manual ...

Page 211: ...ears 6 Edit a text according to the procedures described in Appendix Text Editing 7 Press the ESC key on the key sheet to escape from text editing mode The confirmation screen appears Then press the SAVE button 8 Repeat steps 3 through 7 for more registrations Uni 7 User s Manual 10 79 ...

Page 212: ... NEW MESSAGES 1 Press the Coupon Message field on the Program Menu Select screen 2 The Coupon Message List screen appears Then press the NEW button 3 The confirmation screen appears Then press the ENTER button 4 The Coupon Message Edit screen appears 10 80 Uni 7 User s Manual ...

Page 213: ...on the key sheet to escape from text editing mode The confirmation screen appears Then press the SAVE button 7 The edited text has been registered 8 When creating more messages enter a desired message number using the numeric keys and press the PLU key on the key sheet EXAMPLE Message number 2 Î Uni 7 User s Manual 10 81 ...

Page 214: ...Chapter 10 PROGRAM MODE The confirmation screen appears Then press the ENTER button 9 Repeat steps 4 through 8 for more registrations 10 82 Uni 7 User s Manual ...

Page 215: ... the Extra Message field on the Program Menu Select screen 2 The Coupon Message List screen appears 3 Select a desired message number EXAMPLE Message number 2 Press a desired field or press the PLU key on the key sheet after a numeric entry Î Uni 7 User s Manual 10 83 ...

Page 216: ...pears 6 Edit a text according to the procedures described in Appendix Text Editing 7 Press the ESC key on the key sheet to escape from text editing mode The confirmation screen appears Then press the SAVE button 8 Repeat steps 3 through 7 for more registrations 10 84 Uni 7 User s Manual ...

Page 217: ...OP Message field on the Program Menu Select screen 2 The message list screen appears 3 Enter a desired message number and press the PLU key on the key sheet EXAMPLE Message number 7 Î The confirmation screen appears Then press the ENTER button Uni 7 User s Manual 10 85 ...

Page 218: ... procedures described in Appendix Text Editing 5 P Press the ESC key on the key sheet to escape from text editing mode The confirmation screen appears Then press the SAVE button 6 The edited text has been registered 7 Repeat steps 3 through 6 for more registrations 10 86 Uni 7 User s Manual ...

Page 219: ...enu Select screen 2 The Tax List screen appears 3 When changing a tax system press to select a desired field ITEM DESCRIPTION Press to select one of tax types TAX TYPE Exclusive tax Inclusive tax Tax exemption TAX RATE Enter a numeric value and press this field Uni 7 User s Manual 10 87 ...

Page 220: ...1 Press the Scheme Table field on the Program Menu Select screen 2 The Scheme Table screen appears Then press the NEW button 3 The confirmation screen appears Then press the ENTER button 4 The Scheme Table Detail Basic screen appears Then press the EDIT button 10 88 Uni 7 User s Manual ...

Page 221: ...Edit a text according to the procedures described in Appendix Text Editing 7 Press the ESC key on the key sheet to escape from text editing mode The confirmation screen appears Then press the SAVE button 8 The edited text has been registered Uni 7 User s Manual 10 89 ...

Page 222: ...ight limit WEIGHT LIMIT CONTROL 0 No 1 Yes Press to select whether or not to control the date limit DATE LIMIT CONTROL 0 No 1 Yes LOSS Enter a numeric value and press this field ITEM DESCRIPTION LOT CARCASS Enter a numeric value and press the corresponding field GTIN Enter a numeric value and press the corresponding field WEIGHT Enter a numeric value and press the corresponding field PASSPORT LOT ...

Page 223: ... enter a desired table number using the numeric keys and press the PLU key on the key sheet EXAMPLE Table number 2 Î The confirmation screen appears Then press the ENTER button 10 Repeat steps 4 through 9 for more registrations Uni 7 User s Manual 10 91 ...

Page 224: ...the Scheme Table field on the Program Menu Select screen 2 The Scheme Table screen appears 3 Select a desired table number by pressing the corresponding field EXAMPLE Table number 2 or press the PLU key on the key sheet after a numeric entry Î 10 92 Uni 7 User s Manual ...

Page 225: ...MAT No Enter a numeric value and press this field ICON No Enter a numeric value and press this field LIFE OFFSET Enter a numeric value and press this field Press to select whether or not to control the weight limit WEIGHT LIMIT CONTROL 0 No 1 Yes Press to select whether or not to control the date limit DATE LIMIT CONTROL 0 No 1 Yes LOSS Enter a numeric value and press this field Uni 7 User s Manua...

Page 226: ...nd press the corresponding field WEIGHT Enter a numeric value and press the corresponding field PASSPORT LOT START Enter a numeric value and press this field PASSPORT GTIN START Enter a numeric value and press this field 6 When changing the table name press the EDIT button 7 The Scheme Table Edit screen appears 10 94 Uni 7 User s Manual ...

Page 227: ...ress the ESC key on the key sheet to escape from text editing mode The confirmation screen appears Then press the SAVE button 10 The edited text has been registered Then press the Return button 11 The Scheme Table screen appears 12 Repeat steps 3 through 11 for more registrations Uni 7 User s Manual 10 95 ...

Page 228: ...RATION 1 Press the GEN Table field on the Program Menu Select screen 2 The GEN Table screen appears 3 Select a desired GEN table by pressing the corresponding field 4 Enter a numeric value and press the corresponding field 10 96 Uni 7 User s Manual ...

Page 229: ...utton 6 The GEN Table Edit screen appears 7 Edit a text according to the procedures described in Appendix Text Editing 8 Press the ESC key on the key sheet to escape from text editing mode The confirmation screen appears Then press the SAVE button Uni 7 User s Manual 10 97 ...

Page 230: ...Chapter 10 PROGRAM MODE 9 The edited text has been registered 10 Repeat steps 3 through 9 for more registrations 10 98 Uni 7 User s Manual ...

Page 231: ... 1 Press the Lookup Table field on the Program Menu Select screen 2 The Lookup Table screen appears Then press the NEW button 3 The confirmation screen appears Then press the ENTER button 4 The Lookup Table Data List screen appears Then press the EDIT button Uni 7 User s Manual 10 99 ...

Page 232: ...t according to the procedures described in Appendix Text Editing 7 Press the ESC key on the key sheet to escape from text editing mode The confirmation screen appears Then press the SAVE button 8 The edited text has been registered Then press the NEW button 10 100 Uni 7 User s Manual ...

Page 233: ...ton 10 The Lookup Data Table Edit screen appears 11 Edit a text according to the procedures described in Appendix Text Editing 12 Press the ESC key on the key sheet to escape from text editing mode The confirmation screen appears Then press the SAVE button Uni 7 User s Manual 10 101 ...

Page 234: ...text enter the data number and press the PLU key on the key sheet EXAMPLE Data number 2 Î The confirmation screen appears Then press the ENTER button 15 The Lookup Data Table Edit screen appears 16 Edit a text according to the procedures described in Appendix Text Editing 10 102 Uni 7 User s Manual ...

Page 235: ...ng mode The confirmation screen appears Then press the SAVE button 18 The edited text has been registered 19 Repeat steps 14 through 18 for more data registrations 20 Press the Return button to return to the Lookup Table screen 21 The Lookup Table screen appears Uni 7 User s Manual 10 103 ...

Page 236: ...key sheet EXAMPLE Header number 2 Î The confirmation screen appears Then press the ENTER button 23 The Lookup Table Data List screen appears Then press the EDIT button 24 The Lookup Header Table Edit screen appears 25 Edit a text according to the procedures described in Appendix Text Editing 10 104 Uni 7 User s Manual ...

Page 237: ... from text editing mode The confirmation screen appears Then press the SAVE button 27 The edited text has been registered Then press the Return button 28 The Lookup Table screen appears 29 Repeat steps 22 through 28 for more header registrations Uni 7 User s Manual 10 105 ...

Page 238: ...he Lookup Table field on the Program Menu Select screen 2 The Lookup Table screen appears 3 Select a desired header table by pressing the corresponding field EXAMPLE Table number 2 or press the PLU key on the key sheet after a numeric entry Î 10 106 Uni 7 User s Manual ...

Page 239: ...on 5 The Lookup Table Data List screen appears When changing the header name press the EDIT button 6 The Lookup Header Table Edit screen appears 7 Edit a text according to the procedures described in Appendix Text Editing Uni 7 User s Manual 10 107 ...

Page 240: ...de The confirmation screen appears Then press the SAVE button 9 The edited text has been registered 10 When changing the data text select a desired data text by pressing the corresponding field and press the DETAIL button 11 The Lookup Data Table Edit screen appears 10 108 Uni 7 User s Manual ...

Page 241: ... ESC key on the key sheet to escape from text editing mode The confirmation screen appears Then press the SAVE button 14 The edited text has been registered 15 Repeat steps 10 through 14 for more data text registrations 16 Repeat steps 3 through 15 for more header table text registrations Uni 7 User s Manual 10 109 ...

Page 242: ...Press the Mince Traceability field on the Program Menu Select screen 2 The Mince Traceability screen appears 3 Enter a numeric value and press the corresponding field for registration Then press the Return button to finalize this procedure 10 110 Uni 7 User s Manual ...

Page 243: ...s the Fixed Mark field on the Program Menu Select screen 2 The Fix Price Mark List screen appears 3 Enter a desired mark number using the numeric keys and press the PLU key on the key sheet EXAMPLE Mark number 6 Î The confirmation screen appears Then press the ENTER button Uni 7 User s Manual 10 111 ...

Page 244: ...the procedures described in Appendix Text Editing 6 Press the ESC key on the key sheet to escape from text editing mode The confirmation screen appears Then press the SAVE button 7 The edited text has been registered To finalize this procedure press the Return button 10 112 Uni 7 User s Manual ...

Page 245: ...the Fixed Mark field on the Program Menu Select screen 2 Select a desired mark number by pressing the corresponding field EXAMPLE Mark number 2 or press the PLU key on the key sheet after a numeric entry Î 3 The Fix Price Mark Edit screen appears Uni 7 User s Manual 10 113 ...

Page 246: ...ibed in Appendix Text Editing 5 Press the ESC key on the key sheet to escape from text editing mode The confirmation screen appears Then press the SAVE button 6 The edited text has been registered 7 Repeat steps 2 through 6 for more registrations 10 114 Uni 7 User s Manual ...

Page 247: ...ATING NEW MESSAGES 1 Press the Free field on the Program Menu Select screen 2 The Free Message List screen appears Then press the NEW button 3 The confirmation screen appears Then press the ENTER button 4 The Free Message Edit screen appears Uni 7 User s Manual 10 115 ...

Page 248: ...s the ESC key on the key sheet to escape from text editing mode The confirmation screen appears Then press the SAVE button 7 The edited text has been registered 8 Enter a desired message number using the numeric keys and press the PLU key on the key sheet EXAMPLE Message number 2 Î 10 116 Uni 7 User s Manual ...

Page 249: ... message number using the numeric keys and press the PLU key on the key sheet EXAMPLE Message number 2 Î The confirmation screen appears Then press the ENTER button 9 Repeat steps 4 through 8 for more registrations Uni 7 User s Manual 10 117 ...

Page 250: ...Fixed Mark field on the Program Menu Select screen 2 The Free Message List screen appears 3 Select a desired message number by pressing the corresponding field EXAMPLE Message number 2 or press the PLU key on the key sheet after a numeric entry Î 10 118 Uni 7 User s Manual ...

Page 251: ...he procedures described in Appendix Text Editing 6 Press the ESC key on the key sheet to escape from text editing mode The confirmation screen appears Then press the SAVE button 7 The edited text has been registered 8 Repeat steps 3 through 7 for more registrations Uni 7 User s Manual 10 119 ...

Page 252: ...GISTRATION 1 Press the Check Label field on the Program Menu Select screen 2 The Check Label screen appears 3 Enter Start Number and End Number using the numeric keys and press the corresponding fields for registration 10 120 Uni 7 User s Manual ...

Page 253: ...Chapter 10 PROGRAM MODE 4 Press the STRAT button to print the labels Uni 7 User s Manual 10 121 ...

Page 254: ...that the initial screen is displayed 2 Press the MODE key on the key sheet The Operation Mode screen appears Then press the SETUP button on the screen 3 The Setup Menu Select screen appears To change the pages press the b or a button on the screen Uni 7 User s Manual 11 1 ...

Page 255: ...Chapter 11 SETUP MODE 11 2 Uni 7 User s Manual ...

Page 256: ...HINE No field on the Setup Menu Select screen 2 The Machine Number Basis screen appears 3 Enter a desired numeric value and press the Dept No field EXAMPLE Dept number 9 4 The confirmation screen appears Then press the EXEC button to continue Uni 7 User s Manual 11 3 ...

Page 257: ... 3 SALES MODE SETTING 1 Press the Sales Mode field on the Setup Menu Select screen 2 The Sales Mode screen appears 3 Select a desired mode by pressing the correponding button EXAMPLE Self service Mode 11 4 Uni 7 User s Manual ...

Page 258: ...d on the Setup Menu Select screen 2 The Password Operate screen appears To change the pages press the b or a button on the screen 3 Press the TOTAL tab to display the Password Total screen To change the pages press the b or a button on the screen Uni 7 User s Manual 11 5 ...

Page 259: ...Chapter 11 SETUP MODE 4 Press the PROGRAM tab to display the Password Program screen To change the pages press the b or a button on the screen 11 6 Uni 7 User s Manual ...

Page 260: ...Chapter 11 SETUP MODE Uni 7 User s Manual 11 7 ...

Page 261: ...screen To change the pages press the b or a button on the screen 6 Press the ADJUST tab to display the Password Adjust screen 7 Enter a 6 digit password using the numeric keys and press the PASSWORD display field on the screen EXAMPLE Password 999999 11 8 Uni 7 User s Manual ...

Page 262: ...Chapter 11 SETUP MODE 8 Press desired buttons to set whether or not to use the password EXAMPLE Set to apply the password to Virtual Receipt in Total Mode Uni 7 User s Manual 11 9 ...

Page 263: ... 1 Press the Key Lock field on the Setup Menu Select screen 2 The Key Lock Display Key screen appears 3 Press the FUNCTION KEY tab to display the Key Lock Function Key screen Press the b or a button to change the pages 11 10 Uni 7 User s Manual ...

Page 264: ...Chapter 11 SETUP MODE Uni 7 User s Manual 11 11 ...

Page 265: ...Chapter 11 SETUP MODE 11 12 Uni 7 User s Manual ...

Page 266: ...sing the numeric keys and press the PASSWORD display field on the screen EXAMPLE Password 999999 6 Press a desired mode by pressing the corresponding tab and press to select desired buttons to set whether or not to use the password EXAMPLE Set to apply the password to Multi in Function Key Mode Uni 7 User s Manual 11 13 ...

Page 267: ...e field on the Setup Menu Select screen 2 The Data Staorage Total Add screen appears Press the b or a button to change the pages 3 Press desired buttons to set whether or not to use the total addition EXAMPLE Set to use the operator total addition 11 14 Uni 7 User s Manual ...

Page 268: ...SETUP MODE 11 7 PRESET REPORT SETTING 1 Press the Preset Report field on the Setup Menu Select screen 2 The Preset Report Daily screen appears Press the b or a button to change the pages Uni 7 User s Manual 11 15 ...

Page 269: ...Chapter 11 SETUP MODE 3 Press the WEEKLY tab to display the Preset Report Weekly screen 11 16 Uni 7 User s Manual ...

Page 270: ...Chapter 11 SETUP MODE 4 Press the CUMULATIVE tab to display the Preset Report Cumulative screen Press the b or a button to change the pages Uni 7 User s Manual 11 17 ...

Page 271: ...MODE 5 Press a desired mode by pressing the corresponding tab and press to select desired buttons to set whether or not to print the totals EXAMPLE Set to print the Production Daily Total Total 11 18 Uni 7 User s Manual ...

Page 272: ...SETTING 1 Press the Auto Program field on the Setup Menu Select screen 2 The Item Auto Overwrite screen appears Press the b or a button to change the pages Note Display items may vary depending on the country setting Uni 7 User s Manual 11 19 ...

Page 273: ...Chapter 11 SETUP MODE 3 Press to select desired buttons to set whether or not to overwrite the items automatically 11 20 Uni 7 User s Manual ...

Page 274: ...o select a desired Sales Mode SALES MODE 0 Weighing product 1 Fixed price product 2 Weighing fixed price product 3 Fixed unit price Press the or button to select a desired Markdown Mode MARKDOWN MODE 1 Special price 2 Amount discount for total price 3 Percent discount for total price 4 Special unit price 5 Amount discount for unit price 6 Percent discount for unit price Uni 7 User s Manual 11 21 ...

Page 275: ...ress this field to display the Fix Price Mark List screen Then select a desired price mark by pressing the corresponding field EXAMPLE Pack Packs FIXED PRICE Enter a fixed price and press this field TAX Enter a tax number and press this field FIXED WEIGHT Enter a fixed weight and press this field TARE Enter a tare weight and press this field UNDER WEIGHT Enter a lower weight limit and press this f...

Page 276: ...se a point flag POINT FLAG 0 Off 1 On Press the or button to select a desired point type POINT TYPE 0 Weight 1 Fixed weight POINTS Enter a point data and press this field 4 1 Press the MESSAGE tab to display the Item Initial Data Message screen 4 2 Press a desired field to display the corresponding list screen EXAMPLE Extra Message 1 Uni 7 User s Manual 11 23 ...

Page 277: ... desired message by pressing the corresponding field 4 4 The selected message has been registered 5 1 Press the IMAGE tab to display the Item Initial Data Image screen 5 2 Press to select a desired image field 11 24 Uni 7 User s Manual ...

Page 278: ...lect a desired image by pressing the corresponding field 5 4 The selected image has been registered 5 5 Press the Display Image field 5 6 The Display Image List screen appears Then select a desired image by pressing the corresponding field Uni 7 User s Manual 11 25 ...

Page 279: ...reen ITEM DESCRIPTION FIRST LABEL FORMAT NO Enter a desired format number and press this field SECOND LABEL FORMAT NO Enter a desired format number and press this field Press the or button to select whether or not to print first labels FIRST LABEL PRINT 1 Yes 2 No Press the or button to select whether or not to print first labels SECOND LABEL PRINT 1 Yes 2 No 11 26 Uni 7 User s Manual ...

Page 280: ... time 2 Relative time SB TIME DATA Enter a number of Time After for sell by time and press this field SHELF LIFE DAYS Enter a number of days for shelf life and press this field UB DATE PRINT Press to select whether or not to print use by date UB DATE DATA Enter a number of days for use by date and press this field 8 Press the DATE tab to display the Item Initial Data Date screen ITEM DESCRIPTION I...

Page 281: ...ype POS FORMAT The Barcode Format screen appears when this field is pressed Press to select a desired format TRACE ENABLE Press to select whether or not to enable traceability function DEPARTMENT NO Enter a department number and press this field GROUP NO Enter a group number and press this field 11 28 Uni 7 User s Manual ...

Page 282: ...DATE SETTING 1 Press the PLU Update field on the Setup Menu Select screen 2 The PLU Update screen appears Press the b or a button to change the pages Note Display items may vary depending on the country setting Uni 7 User s Manual 11 29 ...

Page 283: ...Chapter 11 SETUP MODE 11 30 Uni 7 User s Manual ...

Page 284: ...Chapter 11 SETUP MODE Uni 7 User s Manual 11 31 ...

Page 285: ...Chapter 11 SETUP MODE 3 Enter the start and end numbers and press these fileds to specify the target PLUs 4 Select desired items by pressing the corresponding fields 11 32 Uni 7 User s Manual ...

Page 286: ...Chapter 11 SETUP MODE 5 To release the selection press the selected field again To release all the selections press the BATCH DELETE button Uni 7 User s Manual 11 33 ...

Page 287: ...Chapter 11 SETUP MODE 6 Press the EXECUTE button to update the selected items 7 Press the EXEC button for execution 11 34 Uni 7 User s Manual ...

Page 288: ... the Setup Menu Select screen 2 The Receipt Setting screen appears To edit the header and footer titles press the corresponding field 3 The Receipt Title Edit screen appears 4 Edit the text according to the procedure explained in Appendix Text Editing Uni 7 User s Manual 11 35 ...

Page 289: ...t has been registered 6 To edit the header and footer logo images press the corresponding field 7 The Image List screen appears 8 Select a desired image by pressing the corresponding filed and press the SET button 11 36 Uni 7 User s Manual ...

Page 290: ...Chapter 11 SETUP MODE 9 The edited logo image has been registered Uni 7 User s Manual 11 37 ...

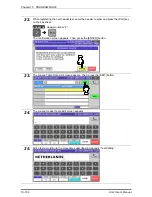
Page 291: ...STMENT MODE ENTRY 1 Make sure that the initial screen is displayed 2 Press the MODE key on the key sheet The Operation Mode screen appears Then press the ADJUST button on the screen 3 The Adjustment Menu Select screen appears 12 Uni 7 User s Manual 12 1 ...

Page 292: ...DATE TIME ADJUSTMENT 1 Press the TIME DATE SET field on the Adjustment Menu Select screen 2 The Time Date Set screen appears 3 To change the date enter a new date and press the DATE field EXAMPLE 22 June 2007 12 2 Uni 7 User s Manual ...

Page 293: ...To change the time enter a new time and press the TIME field EXAMPLE 13 50 00 5 To register new date and time press the SET button 6 The confirmation screen appears Then press the EXEC button for execution Uni 7 User s Manual 12 3 ...

Page 294: ...NEL ADJUSTMENT 1 Press the TOUCH PANEL field on the Adjustment Menu Select screen 2 The Touch Panel screen appears 3 Press the button on the upper left of the screen 4 Press the button on the lower right of the screen 12 4 Uni 7 User s Manual ...

Page 295: ...Chapter 12 ADJUSTMENT MODE 5 Press the SET button to confirm calibration Uni 7 User s Manual 12 5 ...

Page 296: ...screen appears Press the or button to adjust vertical brightnesses for the operator and customer displays 3 Press the HORIZONTAL button to change to the horizontal display check screen 4 The Display Check Horizontal screen appears Press the or button to adjust vertical brightnesses for the operator and customer displays 12 6 Uni 7 User s Manual ...

Page 297: ...rsor is positioned Used to insert a character or select characters followed by depressions of the or key Used to delete a line text Used to move the cursor to right Also used to select characters for changing the style Used to specify a normal character style Used to move the cursor to left Also used to select characters for changing the style Used to specify a bold character style Used to select ...

Page 298: ...d to specify an underlined character style Used to finalize editing a text Used to specify a revered character Used to begin a new character line Used to enter a space at the place where the cursor is positioned Used to select either a lower case or upper case mode for a character to be entered A 2 Uni 7 User s Manual ...

Page 299: ...een is displayed Select a desired character size by using the Size key on the key sheet The selected size is displayed in the FONT display field 2 Press the Lower Case key on the key sheet to select whether to use upper case characters or lower case characters Uni 7 User s Manual A 3 ...

Page 300: ...Appendix TEXT EDITING 3 Enter desired characters using alpha numeric keys on the key sheet or the screen Upper case characters Lower case characters A 4 Uni 7 User s Manual ...

Page 301: ... a new line press the New Line key on the key sheet Enter desired characters 5 To finalize the editing press the ESC key on the key sheet The confirmation screen appears Then press the SAVE button to save the data Uni 7 User s Manual A 5 ...

Page 302: ...screen is displayed 2 To select a desired character style using the following keys The selected style is displayed in the STYLE display field EXAMPLE Select reversed characters 3 Enter desired characters using alpha numeric keys on the key sheet or the screen A 6 Uni 7 User s Manual ...

Page 303: ...Appendix TEXT EDITING 4 Press the ESC key on the key sheet The confirmation screen appears Then press the SAVE button to save the data Uni 7 User s Manual A 7 ...

Page 304: ... text edit screen for a desired PLU is displayed 2 To delete the character line press the Line Delete key on the key sheet 3 Press the ESC key on the key sheet The confirmation screen appears Then press the SAVE button to save the data A 8 Uni 7 User s Manual ...

Page 305: ... To Make a correction for a misspelled word move the cursor to a place where misspelling is made by using the or key EXAMPLE GAUDA GOUDA or 2 Press the Character Delete key on the key sheet to delete the misspelled character Uni 7 User s Manual A 9 ...

Page 306: ... TEXT EDITING 3 Enter the correct character using the alpha numeric keys 4 Press the ESC key on the key sheet The confirmation screen appears Then press the SAVE button to save the data A 10 Uni 7 User s Manual ...

Page 307: ... 6 CHARACTER BACKSPACING 1 To delete a wrong character that was just entered press the Back Space key on the key sheet to move the cursor back by one character EXAMPLE E A 2 Enter a correct character Uni 7 User s Manual A 11 ...

Page 308: ...Appendix TEXT EDITING 3 Complete the text 4 Press the ESC key on the key sheet The confirmation screen appears Then press the SAVE button to save the data A 12 Uni 7 User s Manual ...

Page 309: ...44 SANNO CHO SHOGOIN SAKYO KU KYOTO 606 8392 JAPAN PHONE 81 75 771 4141 FACSIMILE 81 75 751 1634 URL http www ishidajapan com Design and specifications are subject to change without notice ...

Reviews: