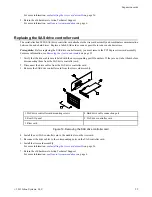
3. With the drives uninstalled, power on and off the replacement chassis but leave it connected to the power supply.
Important: Keep the power supply connected for a minimum of 30 minutes. This is critical to ensuring that
adequate power will be supplied to the NVRAM card in case a file system journal transfer is required.
4. If the failed node is running, shut down the node but leave it connected to the power supply.
For more information, see
Shutting down a node by using the command-line interface
on page 38.
Note: If the node does not respond to the shutdown command, press the Power button three times, and then
wait five minutes. If the node still does not shut down, press and hold the Power button until the node powers
off.
5. Remove the hard drives from the failed node.
For more information, see
.
Important: Drive bays are numbered left-to-right, top-to-bottom. For example, the top row of bays on the
front of a node are numbered 1-4. Each hard drive must be reinstalled from the failed node into its corresponding
bay in the replacement node. For your convenience, we have included stickers in the 3/4 chassis replacement
kit that you can use to track the drives.
6. Install the hard drives from the failed node into the replacement chassis.
For more information, see
on page 17.
Important: Make sure to install each hard drive into the same bay number in the replacement chassis that
the hard drive was removed from in the failed node.
7. Remove the failed node from the rack cabinet.
For more information, see
Remove a node from a rack cabinet
on page 39.
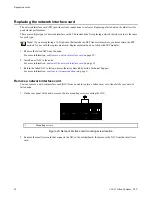
8. X-Series nodes only: Remove the network interface card (NIC) from the failed node.
Caution: Do not disconnect the NVRAM when replacing the NIC.
!
For more information, see
Remove a network interface card
on page 30.
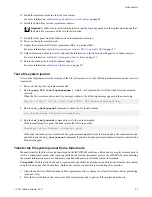
9. X-Series nodes only: Install the NIC into the replacement chassis.
For more information, see
Install the network interface card
on page 31.
10. Record the serial numbers of the failed and replacement nodes. You may need them for future reference.
Note: The serial number is printed on a sticker located on the back of the node.
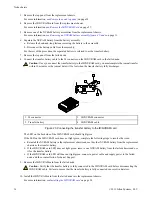
11. Power on the replacement chassis and test the file system journal integrity.
For more information, see
on page 35.
12. Shut down the replacement chassis.
For more information, see
Shutting down a node by using the command-line interface
on page 38.
Note: If the node does not respond to the shutdown command, press the Power button three times, and then
wait five minutes. If the node still does not shut down, press and hold the Power button until the node powers
off.
13. Disconnect the power cables from the replacement chassis.
14. Remove the hard drives from the replacement chassis.
Important: Keep track of the drive bay number that each hard drive was installed in. The hard drives must
be reinstalled to the same drive bay number.
34
©
2011 Isilon Systems, LLC.
Node chassis


