11
STEP 7:
1:
Firmly, but carefully, connect the plug on the solar panel with
the socket on the top of the umbrella. Do not pull on wires as
doing so may permanently damage the connections.
2:
Align the notches on the solar panel with the grooves on the
top of the umbrella, hide the plug and wires insides the hollow
space. Turn the solar panel clockwise to lock into place; do not
over-tighten.
3:
Before the first use, ensure the solar panel receives
at least 8 hours of direct sunlight to change the
batteries.
2
,
I
Step 5
Attach the Solar Panel ( part L ) on the top of Main Umbella ( part A ) .
Step 5
Attach the Solar Panel ( part L ) on the top of Main Umbella ( part A ) .
Step 5
Attach the Solar Panel ( part L ) on the top of Main Umbella ( part A ) .
NOTICE
The solar panel has a protective film to
prevent damage during shipping. Remove
the plastic film on the solar panel. Failure to
remove the film will result in the solar panel
not functioning properly.
INSTALLATION AND ASSEMBLY/
INSTALLATION ET ASSEMBLAGE
ASSEMBLY/
ASSEMBLAGE
Summary of Contents for NU6872
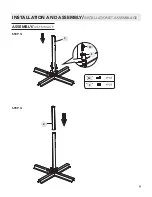
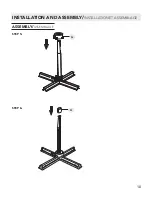
Page 10: ...10 STEP 5 STEP 6 G H INSTALLATION AND ASSEMBLY INSTALLATION ET ASSEMBLAGE ASSEMBLY ASSEMBLAGE...
Page 12: ...12 STEP 8 I STEP 9 J INSTALLATION AND ASSEMBLY INSTALLATION ET ASSEMBLAGE ASSEMBLY ASSEMBLAGE...
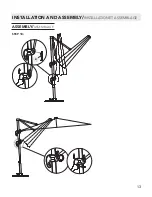
Page 13: ...13 STEP 10 K INSTALLATION AND ASSEMBLY INSTALLATION ET ASSEMBLAGE ASSEMBLY ASSEMBLAGE...
Page 14: ...14 INSTALLATION AND ASSEMBLY INSTALLATION ET ASSEMBLAGE 6ZLWK 21 2 KHUH ON OFF Switch...
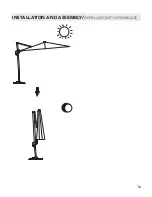
Page 15: ...15 INSTALLATION AND ASSEMBLY INSTALLATION ET ASSEMBLAGE...
Page 16: ...16 INSTALLATION AND ASSEMBLY INSTALLATION ET ASSEMBLAGE 9HUVLRQ 40...


