background image

14

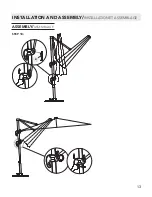
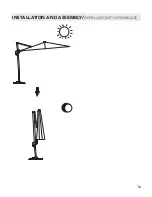
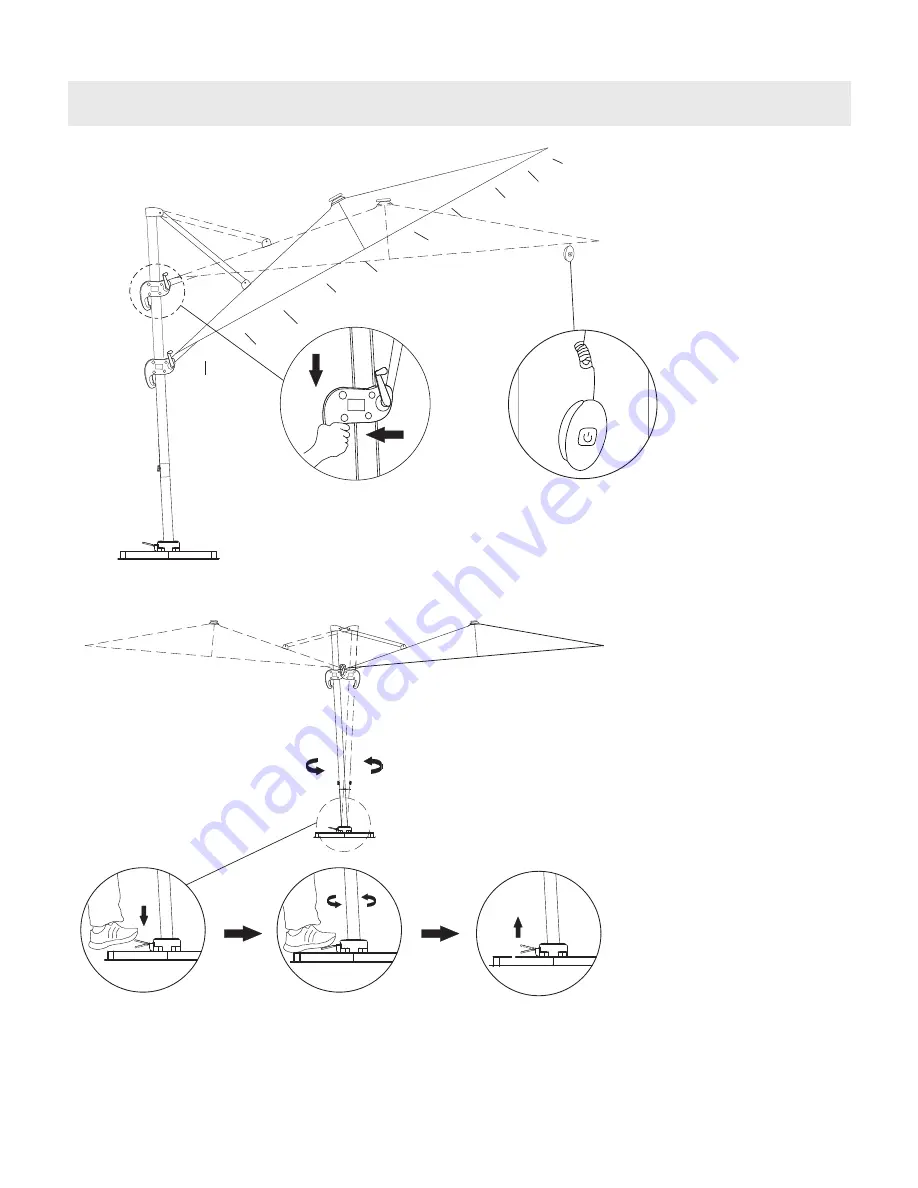
INSTALLATION AND ASSEMBLY/

INSTALLATION ET ASSEMBLAGE

6ZLWK212))KHUH

ON/OFF Switch

Summary of Contents for NU6872

Page 1: ...efore returning to your retailer call our Consumer Hotline at 1 800 759 0977 Monday Friday 8am 5pm CST Des questions des probl mes des pi ces manquantes Avant de retourner chez votre d taillant appele...

Page 2: ...Please keep this manual and hand it over when you transfer the product Personal injury and or damage to the product may occur if products are used outside of their intended purposes and or if product...

Page 3: ...kaging film plastic bags foam etc away from babies and children Keep the parasol away from fire do not use it during extreme cold and heat and severe weather like rainy windy snowy days and hailstorms...

Page 4: ...Base Gear Engrenage de base NUP4375 1 E Base Cover Sleeve Housse de protection de base NUP4376 1 F Washer M8 Rondelle M8 NUP4377 8 G Base Gear Cover Couvercle d engrenage de base NUP4378 1 H Extension...

Page 5: ...se Gear Engrenage de base NUP4375 1 E Base Cover Sleeve Housse de protection de base NUP4376 1 F Washer M8 Rondelle M8 NUP4377 8 G Base Gear Cover Couvercle d engrenage de base NUP4378 1 H Extension S...

Page 6: ...ear Engrenage de base NUP4375 1 E Base Cover Sleeve Housse de protection de base NUP4376 1 F Washer M8 Rondelle M8 NUP4377 8 G Base Gear Cover Couvercle d engrenage de base NUP4378 1 H Extension Sleev...

Page 7: ...ear Engrenage de base NUP4375 1 E Base Cover Sleeve Housse de protection de base NUP4376 1 F Washer M8 Rondelle M8 NUP4377 8 G Base Gear Cover Couvercle d engrenage de base NUP4378 1 H Extension Sleev...

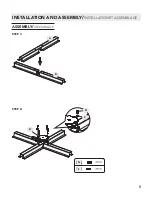
Page 8: ...8 1 1 STEP 1 STEP 2 1 1 A B N F D N F INSTALLATION AND ASSEMBLY INSTALLATION ET ASSEMBLAGE ASSEMBLY ASSEMBLAGE...

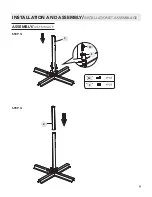
Page 9: ...9 0 0 0 0 STEP 3 STEP 4 C E M M F F INSTALLATION AND ASSEMBLY INSTALLATION ET ASSEMBLAGE ASSEMBLY ASSEMBLAGE...

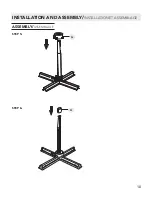
Page 10: ...10 STEP 5 STEP 6 G H INSTALLATION AND ASSEMBLY INSTALLATION ET ASSEMBLAGE ASSEMBLY ASSEMBLAGE...

Page 11: ...he first use ensure the solar panel receives at least 8 hours of direct sunlight to change the batteries 2 I Step 5 Attach the Solar Panel part L on the top of Main Umbella par Step 5 Attach the Solar...

Page 12: ...12 STEP 8 I STEP 9 J INSTALLATION AND ASSEMBLY INSTALLATION ET ASSEMBLAGE ASSEMBLY ASSEMBLAGE...

Page 13: ...13 STEP 10 K INSTALLATION AND ASSEMBLY INSTALLATION ET ASSEMBLAGE ASSEMBLY ASSEMBLAGE...

Page 14: ...14 INSTALLATION AND ASSEMBLY INSTALLATION ET ASSEMBLAGE 6ZLWK 21 2 KHUH ON OFF Switch...

Page 15: ...15 INSTALLATION AND ASSEMBLY INSTALLATION ET ASSEMBLAGE...

Page 16: ...16 INSTALLATION AND ASSEMBLY INSTALLATION ET ASSEMBLAGE 9HUVLRQ 40...

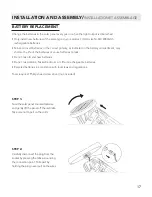
Page 17: ...the batteries or cause batteries to leak Do not mix old and new batteries Do not mix Alkaline Nickel Cadmium or Lithium rechargeable batteries Recycled batteries in accordance with local laws and regu...

Page 18: ...e screws removed in step 3 Do not over tighten the screws This product uses a rechargeable battery When the battery can no longer be used it should be removed form the unit and recycled The battery mu...

Page 19: ...ial or incidental costs expenses or damages incurred by the consumer for any other use The user assumes all risk of injury resulting from the use of this product This warranty is expressly in lieu of...

Page 20: ...ial or incidental costs expenses or damages incurred by the consumer for any other use The user assumes all risk of injury resulting from the use of this product This warranty is expressly in lieu of...

Reviews: