18
INSTALLATION AND ASSEMBLY/
INSTALLATION ET ASSEMBLAGE
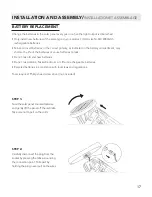
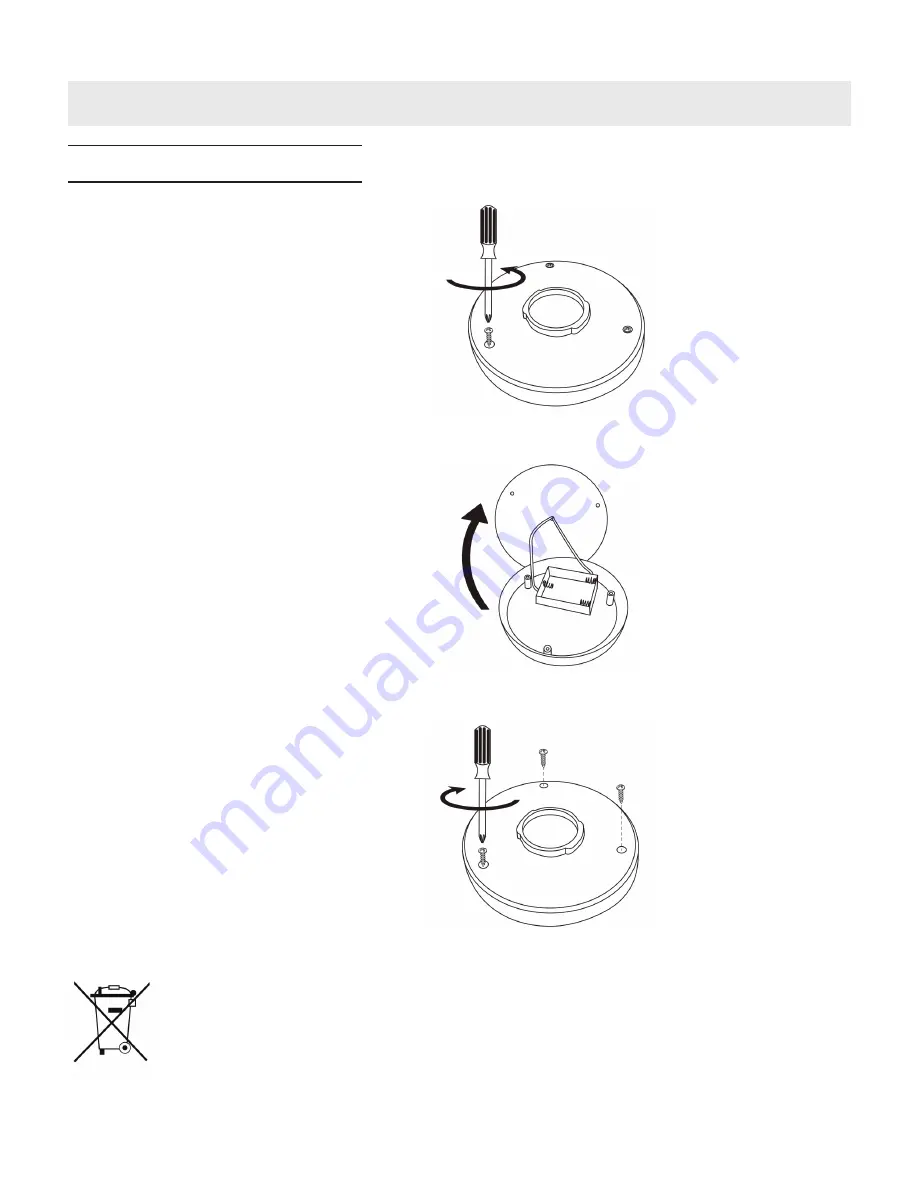
BATTERY REPLACEMENT
STEP 3:
Place the solar panel upside down on soft,
clean surface. Remove (3) screws on the
bottom of the panel.
STEP 5:
Carefully replace the bottom of the panel and
align the screw holes. Secure the panel with the
screws removed in step 3. Do not over-tighten
the screws.
This product uses a rechargeable battery. When the battery can no longer be used, it should be
removed form the unit and recycled. The battery must not be incinerated or composted. Recycle
the battery in accordance with local laws and regulations.
STEP 4:
Carefully lift the bottom panel, ensuring the
wires remain intact. Gently remove the old
batteries. Paying attention to the positive and
negative terminals, insert new batteries.
Summary of Contents for NU6872
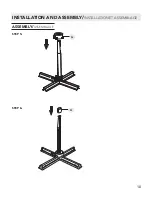
Page 10: ...10 STEP 5 STEP 6 G H INSTALLATION AND ASSEMBLY INSTALLATION ET ASSEMBLAGE ASSEMBLY ASSEMBLAGE...
Page 12: ...12 STEP 8 I STEP 9 J INSTALLATION AND ASSEMBLY INSTALLATION ET ASSEMBLAGE ASSEMBLY ASSEMBLAGE...
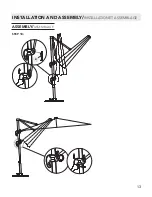
Page 13: ...13 STEP 10 K INSTALLATION AND ASSEMBLY INSTALLATION ET ASSEMBLAGE ASSEMBLY ASSEMBLAGE...
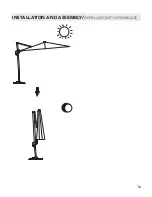
Page 14: ...14 INSTALLATION AND ASSEMBLY INSTALLATION ET ASSEMBLAGE 6ZLWK 21 2 KHUH ON OFF Switch...
Page 15: ...15 INSTALLATION AND ASSEMBLY INSTALLATION ET ASSEMBLAGE...
Page 16: ...16 INSTALLATION AND ASSEMBLY INSTALLATION ET ASSEMBLAGE 9HUVLRQ 40...


