©Isothermal Technology
Page 19 of 61
914 millisKanner manual Iss. 1.00
2.5
2.5
2.5
2.5
Controlling
Controlling
Controlling
Controlling millisKanner
millisKanner
millisKanner
millisKanner Manually
Manually
Manually
Manually
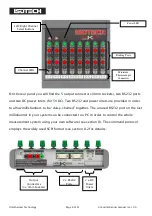
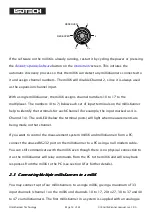
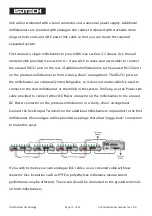
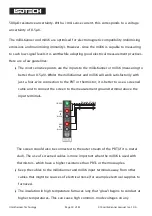
Control your millisKanner manually using the ‘Left’ and ‘Right’ buttons on the top panel:
The millisKanner starts up with no channel selected. Pressing the ‘Right’ button will then
select Channel 0. Press the ‘Right’ button when Channel 7 is selected or the ‘Left’ button
when Channel 0 is selected to turn off all channels. The ‘Channel LEDs’ indicate which
channel is selected.
When the millisKanner is connected to a milliK, the left/right buttons no longer operate
because the milliK sends the
REM
(see section 8.2.6.1) command to disable local control
of the millisKanner. To re-enable the left/right buttons, either send the
LOC
command
(see section 8.2.6.2) to the RS232 port or cycle the power to the instrument.
The millisKanner can be used manually with the milliK (do not connect it to the milliK
with the RS232 cable so that it is not detected by the milliK) or with another compatible
thermometer instrument. In both cases, the feature that reverses the sense connections
inside the millisKanner (to eliminate the effect of thermal EMFs generated in the wires
Left Button
Channel LEDs
Right Button

