MEASUREMENT AND ASSEMBLY MANUAL
Validity of the manual: 1. 6. 2017
19
voltages will burn out the switches inside the motor housing.
Thus heed the following advice: Always use the relay boxes and switches supplied by us, to control two or more motors
with a single switch.
The same applies when using an wind/sun automatic controller.
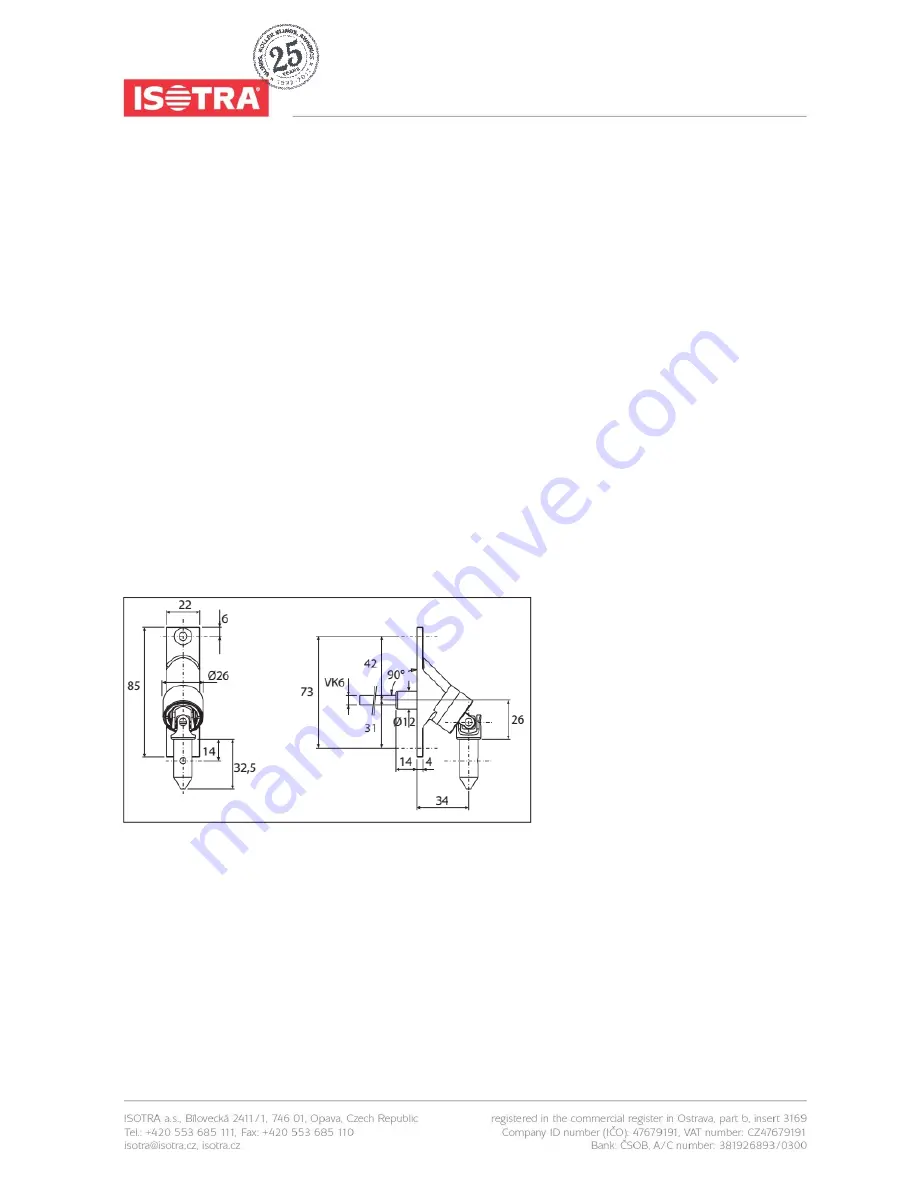
4.2. FITTING THE CRANK HANDLE LEAD-THROUGH, INDOORS
– FOR CRANK
HANDLE OPERATION
Push the supplied crank handle lead-through with the 6x6 mm square rod through the previously drilled opening until the
rod is pushed far enough to engage with the gearbox. Determine the required length of the rod and shorten it if necessary
by sawing off the surplus length.
Position the lead-through in such a way that the rod will not rub against the opening anywhere along its length. Also make
sure the rod goes straight through the opening and is neither bent nor twisted. Drill the holes (Ø3.2 mm) and fasten the
lead-through to the mounting surface.
Push the crank handle over the spherical part of the lead-through and insert the split pin or solid pin to join the two parts.
Slide the locking bush over the pin.
Determine where the magnetic holder should be positioned on the window frame or the wall and screw it in place. Make
sure the metal part of the unfolded crank handle contacts the magnetic holder.
If you are installing a detachable rod with a rod coupling: the detachable crank handle is fitted with a cone-shaped end
piece. A split pin is then inserted into the free-hanging spherical part of the lead-through. The crank can then be attached
or detached from the crank handle with a twist of the handle.
fig. 33


