MEASUREMENT AND ASSEMBLY MANUAL
Instruction validity: as of 1 August 2013
5
6.1 PREPARATION OF ROLLER BLIND INSTALLATION
Prior to installing the roller blind, check whether the surface of the installation place is not damaged and if it is suitable for
installation. Select suitable attachment screws (type and dimensions) corresponding to the type of structure onto which the
roller blind is to be installed (wood, cement, brick).
NOTE: Faulty installation can lead to accidents. Observe instructions for the proper roller blind installation to prevent the
risk of separation of the roller blind from a wall or window. ISOTRA a. s. shall not be held responsible for defects caused
by faulty installation.
6.2 ROLLER BLIND INSTALLATION TO CEILING OR WALL
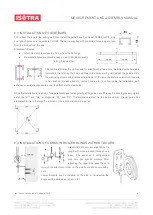
Start the screen roller blind installation to the
ceiling by marking out the attachment holes of
the supporting brackets.
The distance of the screws from the roller
blind edge should be 30 mm. The screw
spacing is 76 mm.
Leave a gap of at least 5 mm between the
wall or ceiling and the supporting bracket, as
shown in the picture.
You can check the accuracy of marking
before drilling by placing the roller blind in assembled condition. Drill the holes
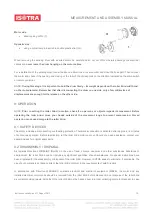
and attach the supporting brackets. Mount and secure the roller blind rolling
unit to the attached brackets.
The rolling unit is to be seated at the motor side to HiPro clamp (7) and
secured by a lock, while, on the opposite side, the unit is inserted in plastic
housing (12) and secured by a screw.


