background image


MEASUREMENT AND ASSEMBLY MANUAL 

Validity of  the manual: 1. 9. 2014 

  screws are located into the oval holes on the holder. For wooden windows the holes are pre-drilled to prevent cutting 

the glazing bar.  

  drill holes for the tightening pins of the leading nylons upwards into the lower part of the glazing bar  

If the shape or the size of the glazing bar does not allow drilling holes for the tightening pins into the glazing bar from 

upwards, choose the option of drilling the holes for pins into the face of the glazing bar. In this case, take care not to 

damage the glass with the drill. It is important to state the correct depth of the drilling! The client must be informed in 

advance of this form of assembly and consent in writing in the handing over protocol. Finally, ensure the full functionality of 

the blind and the window. 


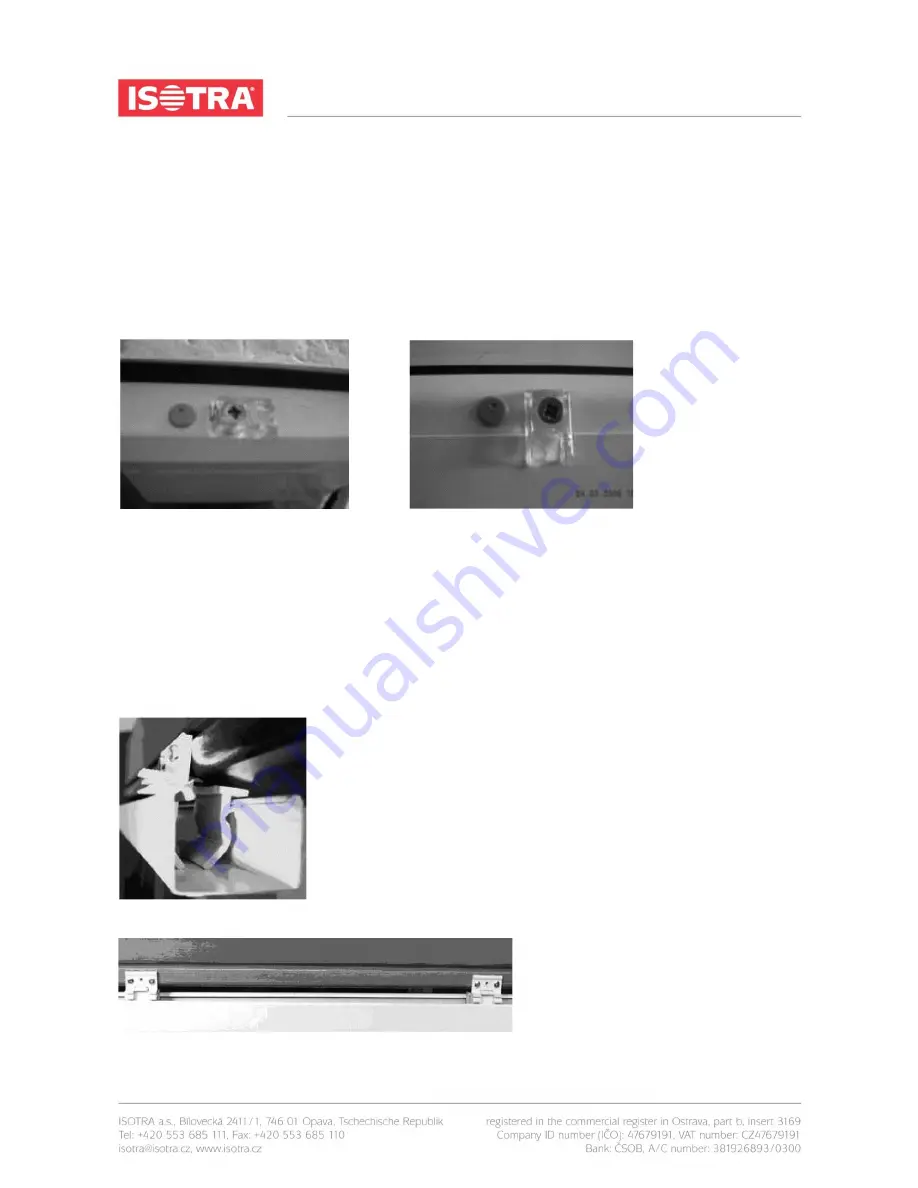
Fig. assembly from upwards  

Fig. assembly from the front  

  insert the nylon with the knot into the hole and press the pin. When drilling these holes ensure that the span of the 

holes to the glazing bar for the pin corresponds to the span of the hole in the upper profile to the glazing bar.  

  tightening is done by drawing the nylon in the face of the upper profile. Press both pins to arrest the nylon in the 

tightening status. Cut the redundant ends of the nylon and fix them in the upper profile.  

If the blind is not assembled into the glazing bar at 90 degrees and the blind is not in a position that is perpendicular to the 

glass of the wing, use the component, the so called pig which is inserted into the hole in the plastic hole until the requested 

position is reached. Ensure that this component is oriented with the teeth upward. The screws are not tightened fully, the 

holder is slightly caught, the position is adjusted by the pig and then the screws are tightened. 


Fig. holder with the pig for the upper cover profile 


Summary of Contents for SYSTEM 25

Page 1: ...chart with a tolerance of 1 mm It is recommended to consult with the manufacturer for dimensions outside the stated limits H height is measured the same as the width in three points including sealing...

Page 2: ...20 2 mm hole for tightening pin 3 2 mm for plastic and Al windows 3 mm for wooden windows INSPECTION before assembly we recommend inspecting all the parts after the delivery of the goods to prevent an...

Page 3: ...ndow Fig assembly from upwards Fig assembly from the front insert the nylon with the knot into the hole and press the pin When drilling these holes ensure that the span of the holes to the glazing bar...

Page 4: ...th the lever check the function of the blind ATTENTION Pursuant to the EN 13120 2014 standard window blinds shall be installed in accordance with the following instructions Chain If a breakaway couple...

Page 5: ...the bottom part of the pull cord s H1 shall be at least 1 5 m see Fig H1 1 5 m b The distance between two loop strands shall not exceed 50 mm at the output from the fixed tensioning device THE PULLEY...

Page 6: ...6 If installation height H0 is specified the distance from the floor to the bottom part of the pull cord s H1 shall be at least 1 5 m see Fig H1 1 5 m The pull cords shall meet the following requireme...

Page 7: ...EASUREMENT AND ASSEMBLY MANUAL Validity of the manual 1 9 2014 7 ILLUSTRATIVE ASSEMBLY OF THE BLIND WITHOUT THE COVER PROFILE ASSEMBLY ASSEMBLY WITH COVER PROFILE CONSTRUCTION CHAIN CORD HANDLE ENGINE...

Page 8: ...the glazing bar does not allow drilling holes to secure the tightening pins into the glazing bar from upwards choose the option of drilling the holes for pins into the face of the glazing bar In this...

Page 9: ...MEASUREMENT AND ASSEMBLY MANUAL Validity of the manual 1 9 2014 9 ILLUSTRATIVE ASSEMBLY OF THE BLIND WITHOUT THE COVER PROFILE...

Reviews:

Related manuals for SYSTEM 25