Page 21
| (678) 261-7611 |
Section 3: Troubleshooting Guide for Newly Installed Systems
1)
Zero output water from RO faucet
a)
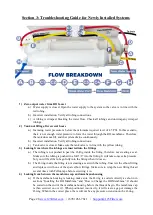
Water supply is closed. Open the water supply to the system so the valve is in line with the
red tubing.
b)
Incorrect installation. Verify all tubing connections.
c)
A tubing is crimped, blocking the water flow. Check all tubings and uncrimp any crimped
tubings.
2)
Tank not filling after several hours
a)
Incoming water pressure is below the minimum required level of 45 PSI. In this scenario,
there is not enough water pressure to force the water through the RO membrane. Therefore,
the tank does not fill, and the system drains continuously.
b)
Incorrect installation. Verify all tubing connections.
c)
Tank valve is closed. Make sure the tank valve is in line with the yellow tubing.
3)
Leaking from where the tubings are inserted into the fittings
a)
The tubing is not pushed in past the O-ring inside the fitting, therefore not creating a seal.
Make sure the tubing is pushed in a full 5/8” into the fitting. It will take some extra pressure,
but you will feel the tube go fully into the fitting when it does so.
b)
The O-ring inside the fitting is not creating a seal with the tubing. Unscrew the elbow fitting,
and replace it with one of the spare elbow fittings. Make sure to wrap the new fitting thread
several times with Teflon tape before screwing it in.
4)
Leaking from between the membrane cap and membrane housing
a)
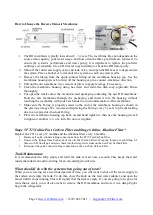
If the membrane housing is leaking, make sure the O-ring is seated correctly as shown in
sections “Installing the RO Membrane” and “How to Change the RO Membrane”. It should
be seated on the end of the membrane housing before the threads begin. The membrane cap
is then screwed on over it. When positioned incorrectly, it will create a gap or damage the
O-ring. When in the correct place, there will not be any pressure or tension on the O-ring.

