Page 9
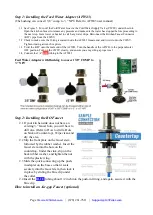
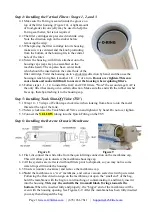
Step 1: Installing the Feed Water Adapter (AFW43)
(The bushing can convert 3/8” comp. to ½” NPT. Refer to AFW43 user manual)
1.1
See Figure 5. Turn off the Cold Water Line via the Cold Water Supply Valve (CWSV) under the sink.
Open the kitchen faucet to release any pressure and make sure the water has stopped before proceeding to
the next step. Get a towel or bucket to catch any water drips. Disconnect the Kitchen Faucet Connector
(KFC) pipe from the CWSV.
1.2
Check to make sure the O-ring is seated inside the AFW43 female end, and twist it onto the CWSV.
Tighten it using a wrench or pliers.
1.3
Twist the KFC onto the male end of the AFW43. Turn the handle of the AFW43 to the perpendicular
OFF position. Turn on the CWSV slowly, and ensure you are getting a proper seal.
1.4
Connect the 1/4”
RED
tubing to the AFW43.
Feed Water Adapter with Bushing to convert 3/8” COMP to
½” NPT
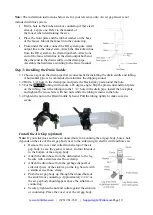
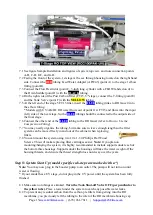
Step 2: Installing the RO Faucet
2.1
If your kitchen sink does not have an
existing ½” faucet hole, you will have to
drill one. (Refer to How to drill a Hole
on Sink or Counter-top). Wipe clean and
dry the area.
2.2
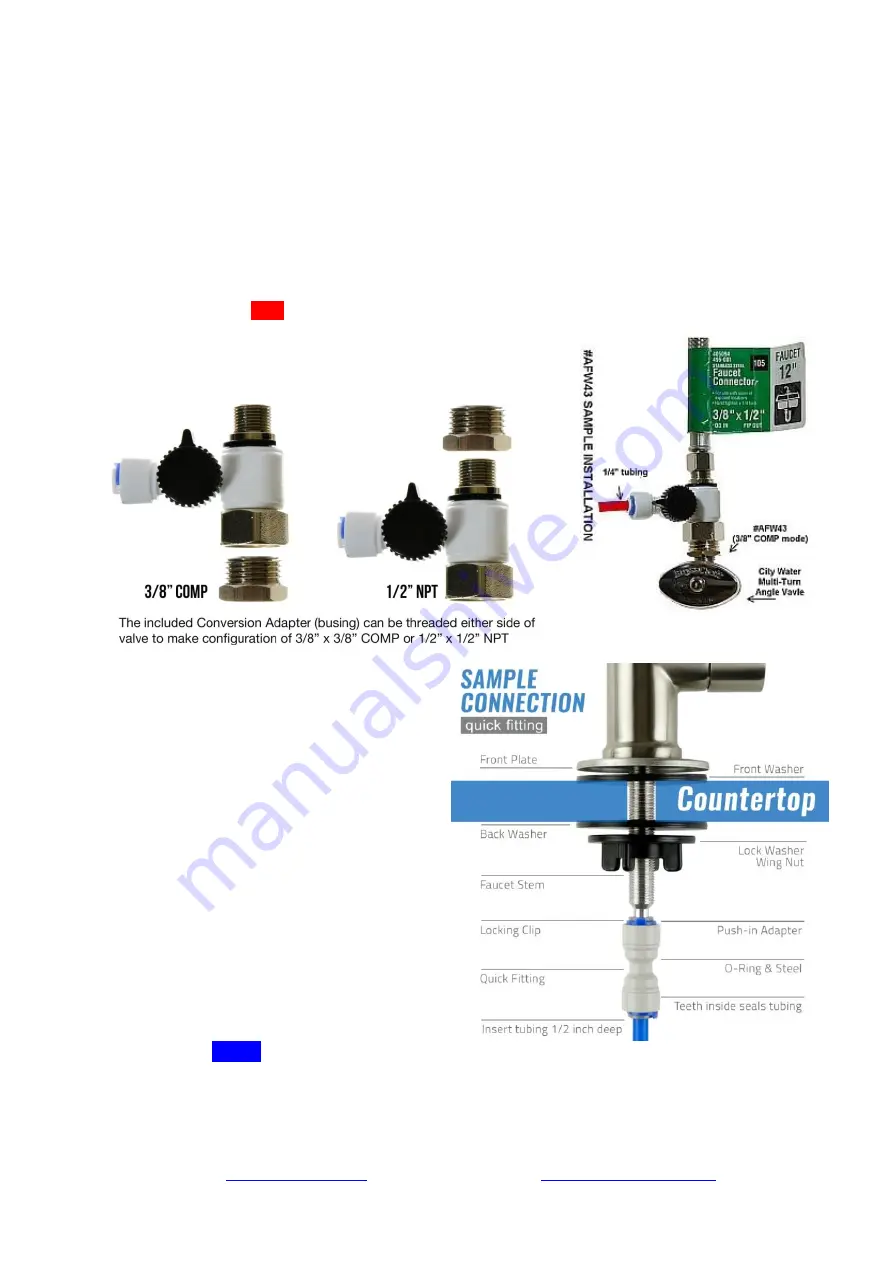
Slip the front plate on the faucet stem,
followed by the rubber washer. Insert the
faucet stem into the hole on the
countertop. Under the sink, slip on the
back rubber washer, and tighten the nut
with the plastic wing.
2.3
Slide the quick connecting up the push-
in adapter on the base so that it seats
securely into the faucet stem, then lock it
in place by sliding the blue clip under
the collet.
2.4
Insert the
BLUE
tubing about 1/2 inch into the push-in fitting, and again, secure it with the
blue clip.
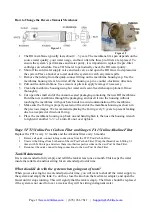
How to install an Air-gap Faucet (optional)
Summary of Contents for RCC1P
Page 26: ......

