background image

- 7 - 


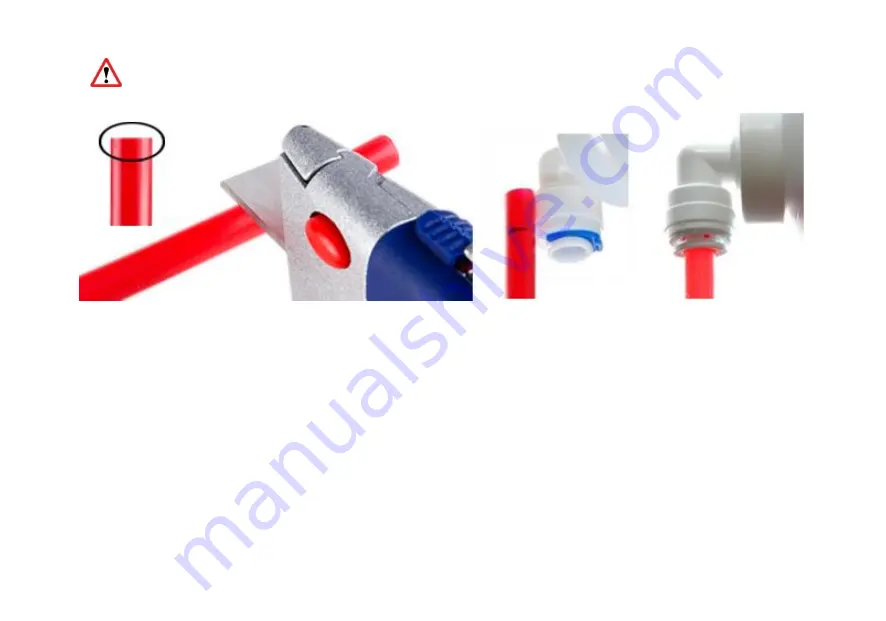
Please cut the tubing in an appropriate length to avoid kinking. Please make sure the tubing is fully inserted into 
the quick-fitting connection about one half-inch deep in order to be sealed by the O-ring at the bottom.


8) Connect the UV transformer to an electrical outlet. 
9) Turn on water supply and faucet. Observe the system for any leaks and check if water flow activates the UV light. 
 
--------------------------------------End of installation of Model UVF11A/UVF11B/UVF11B-E---------------------------------------------


Summary of Contents for UVF11A

Page 1: ...iSpring Ultraviolet Disinfection Sterilizer Water Filter Installation and Maintenance Manual Model UVF11A UVF11B UVF11B E UVF55 Please read the User s Manual Carefully and keep it available...

Page 2: ...to effective management of various water born microorganisms including algae fungi bacteria rickettsia and viruses resulting in cleaner and clearer water UV water sterilizers can be mounted before or...

Page 3: ...2 Product Overview Structure Diagram of Ultraviolet Water sterilizer Quartz Sleeve...

Page 4: ...der body Philips UV lamp Model UVB55 Lamp wire connector Ballast with Plug Clamp Bracket 2 pcs Precautions Please do not install this product outside or at a place where it is exposed to direct sunlig...

Page 5: ...Operating Pressure 4psi Maximum Ambient Air Temperature 100 F Minimum Ambient Air Temperature 32 F Maximum Humidity 100 Maximum Hardness 120ppm Maximum Iron 0 3ppm Minimum UVT 70 Installation Vertical...

Page 6: ...clear free of particles larger than 20 microns It is recommended that you install the UV sanitizer after the filters as the last stage 1 Plug one end of the lamp into the small power socket with gree...

Page 7: ...ing into the clips provided then mount the UV sanitizer on one of the stages on the filter 7 UVF11A has 2 ports Either one can be IN or OUT as long as water flow matches the arrow sign on the Smart Fl...

Page 8: ...e quick fitting connection about one half inch deep in order to be sealed by the O ring at the bottom 8 Connect the UV transformer to an electrical outlet 9 Turn on water supply and faucet Observe the...

Page 9: ...tor in the inlet outlet in order to protect the quartz sleeve o Please install the sterilizer at a position by the retaining clip retaining nuts or other mounting device in order to prevent it from dr...

Page 10: ...end of the green wires into the big power socket of the lamp holder 3 Plug the other end of the lamp into the same big power socket of the lamp holder Step 3 Insert the lamp into the pre installed qua...

Page 11: ...he water pipe Step 5 If there are no leaks insert the plug and turn the power on the green light will turn on to indicate it is working properly The ballast will automatically detect if the UV lamp is...

Page 12: ...the water line Next drain the water and remove the black rubber cap which has the power cord attached then remove the lamp from the quartz sleeve Wipe the lamp with a piece of lint free cloth moisten...

Page 13: ...s that prove to be defective in material workmanship or factory preparation This warranty covers parts only all labor is excluded from this warranty including but not limited to services related to th...

Page 14: ...nit or failure of a unit caused by such alterations and modifications This Limited Warranty does not cover malfunctions of the unit due to tampering misuse alteration lack of regular maintenance misap...

Page 15: ...ter your product for the warranty please visit our website at 123filter com and go to the Warranty Registration tab We provide a 30 day money back guarantee a 1 year manufacturer warranty and lifetime...

Page 16: ...How To Contact Us Office Hours Monday Friday 9 00 a m 5 00 p m EST Phone 678 261 7611 Email support ispringfilter com iSpring Water Systems LLC 3020 Trotters Parkway Alpharetta GA 30004 Georgia USA...

Reviews: