background image

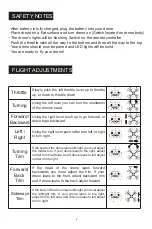
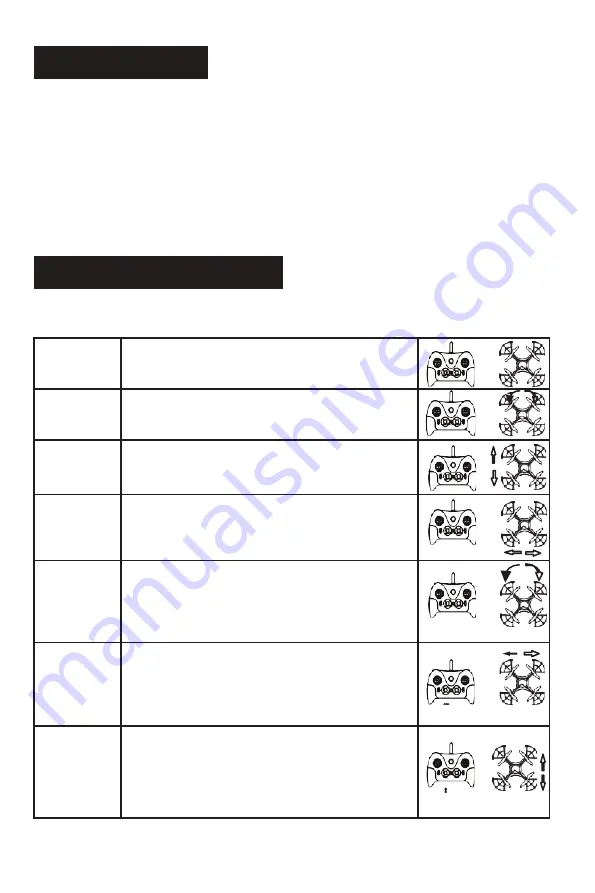
Throttle

Turning

Forward/

Backward

Left /

Right

Turning

Trim

Forward/

Back

Trim

Sideways

Trim

4

SAFETY NOTES

After battery is fully charged, plug the battery into your drone.

Place drone on a flat surface and turn drone on (Switch located on drone body)

The drone’s lights will be flashing. Switch on the remote controller

Push the throttle stick all the way to the bottom and then all the way to the top

Your drone should now be paired and LED lights will be solid.

You are ready to fly your drone!

FLIGHT ADJUSTMENTS

Slowly push the left throttle lever up to throttle 

up, or down to throttle down

Using the left lever you can turn the orientation 

of the drone’s head

Using the right lever push up to go forward, or 

down to go backward

Using the right lever push left to turn left, or right 

to turn right.

If the head of the drone leans left/right you must adjust 

the rudder trim. If your drone leans to the right, adjust 

rudder trim to left side, and if drone leans to left adjust 

rudder trim to right

If the head of the drone leans forward 

backwards you must adjust the trim. If your 

drone leans to the front, adjust backward trim 

and if drone leans to the back adjust forward

If the body of the drone leans left/right you must adjust 

the left/right trim. If your drone leans to the right, 

adjust trim to left side, and if drone leans to left adjust 

trim to right

Summary of Contents for 500B Camera Edition

Page 1: ...as of a result of R C aircraft models This product is suitable for indoor and outdoor use please choose a place without obstacle and keep distance from crowd and pets Don t fly it near unsafe areas f...

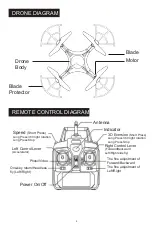
Page 2: ...Right Control Lever Forward Backward Left Right side fly The fine adjustment of Forward Backward The fine adjustment of Left Right Speed Short Press Long Press 360 right rotation Long Press Stop Left...

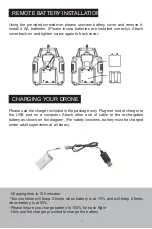
Page 3: ...Please use the charger included in the package only Plug one end of charger to the USB port on a computer Attach other end of cable te the re chargable battery as shown on the diagram For safety conce...

Page 4: ...throttle down Using the left lever you can turn the orientation of the drone s head Using the right lever push up to go forward or down to go backward Using the right lever push left to turn left or...

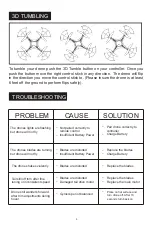
Page 5: ...Pair drone correctly to controller Charge Battery Replace the blades Charge Battery Replace the blades Replace the blades Replace the main motor Place on flat surface and turn drone off After 10 secon...

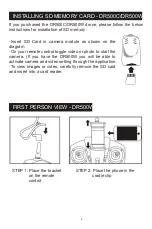
Page 6: ...w the below instructions for installation of SD memory Insert SD Card in camera module as shown on the diagram On your remote control toggle video or photo to start the camera If you have the DR500W y...

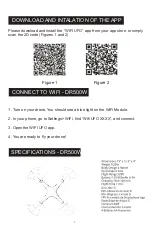
Page 7: ...from your app store or simply scan the 2D code Figures 1 and 2 CONNECT TO WIFI DR500W 1 Turn on your drone You should see a blue light on the WiFi Module 2 In your phone go to Settings WiFi find Wifi...

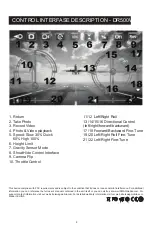
Page 8: ...e 19 20 Left Right Roll Fine Tune 21 22 Left Right Fine Tune 8 CONTROL INTERFASE DESCRIPTION DR500W This device complies with FCC requirements and is subject to the condition that it does not cause ha...

Reviews: