background image

-16-

-17-

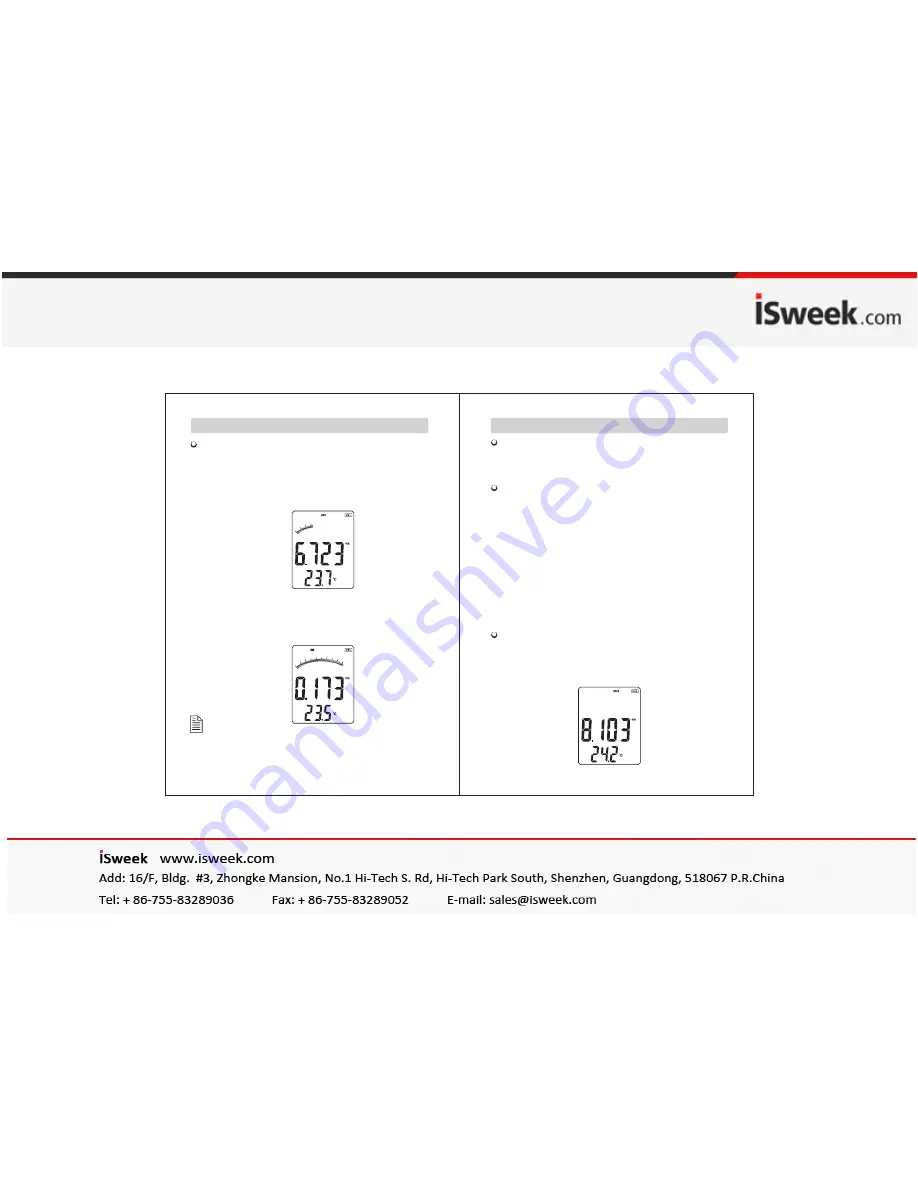
In wind flow and velocity measuring process, press the 
"MAX/MIN" key to obtain the maximum and minimum 
 values, press again to exit. For example:

1).When measuring maximum value of wind velocity, a 
     "MAX"  will be shown on the upper LCD screen, as 
     shown in following figure:

2). When measuring minimum value of wind velocity, a 
      "MIN"  will be shown on the upper LCD screen, as 
      shown in following figure:

Note:
Operation of Max/Min wind flow measurement is the 
same as wind velocity.


Max and min measurement 

Data holding:
When taking measurement of wind velocity and flow, press 
the "HOLD" key to freeze the Data , press the "HOLD" key 
again return to normal operation. 

Data storage:
1). Instantaneous (one-shot) data storage: under "VEL" state, 
     set the sampling rate=0 by pressing "SAMPLE" key and 
     in put a "0" sampling time and then press "ENTER". 
     Now, each time "REC" is pressed, the present  reading 
     will be stored.
2). Automatic data storage: under "VEL" state, press the "
    SAMPLE" key and input sampling rate, (the sampling 
    rate from 1~99 seconds using the numeric keys to enter 
    your desire rate,) then press the "ENTER" key to confirm. 
    Press the "REC" key to begin storing readings in every 
    sampling rate. The "REC" icon will appear on the LCD 
    indicating the data storage function being activated. Press 
    again the "REC"key to finish data storage.
3). Press "REC" Key to stop recording. 

Reading data stored sequentially:
1). Press the "READ" key, you can read the stored data 
      in memory sequentially,  the LCD will first shows serial 
      number then shows the data. 
2). Press "RST" key to return normal operation. 
      As shown in following figure:

Date holding /Storeage/Reading and clearing 

Summary of Contents for GM8902

Page 1: ...Version 8902 EN 0 AIR FLOW ANEMOMETER INSTRUCTION MANUAL FLOW CMM M 2...

Page 2: ...ith PC 09 11 13 14 16 17 19 CONTENTS 1 Before Use 2 Operation 3 Other Items Thank you for purchasing our Air Flow Anemometer Carefully unpack your kit and ensure that you have the following Items In c...

Page 3: ...Unit conversion of wind velocity temperature and flow Measurement of maximum and minimum wind velocity Measurement of 2 3 Vmax and average wind flow Data holding storing and deleting function Low bat...

Page 4: ...rature in metric FLOW 1 2 3 4 5 6 7 8 9 10 11 12 13 14 15 16 17 19 18 20 21 22 27 26 25 24 23 FT 2 1 USB interface 2 LCD display 3 ON OFF key 4 Data holding key 5 Unit transform key 6 Backlight on off...

Page 5: ...data symbol 25 2 3 of maximum value measurement one of the wind flow measuring method 26 Showing minimum values 27 When measuring average values one of the wind flow measuring Method this symbol appe...

Page 6: ...y Temperature Temperature Humidity Measurement of Wind Velocity and Temperature Press The key all the symbols will be shown on the screen for 1 second then the unit goes into current wind velocity and...

Page 7: ...e Measurement 1 Small Vanes pattern will showing along with the display of TEMP symbol 2 Press button or number 6 key to Switch Duct area Measurement of Windflow If the area value has been set before...

Page 8: ...t area to measure current wind flow value right away As shown in following figure Aim the vane of the attached unit at duct area properly take measurement of 2 3 V max wind flow right away press again...

Page 9: ...ill show serial number in the meantime you can take measurement of the first group wind flow values As shown in following figure Then select another test point press the NEXT key to take measurement o...

Page 10: ...r VEL state set the sampling rate 0 by pressing SAMPLE key and in put a 0 sampling time and then press ENTER Now each time REC is pressed the present reading will be stored 2 Automatic data storage un...

Page 11: ...ry the LCD will shows the last stored Note a Clearing the Stored data Press down the CLEAR Key for 5 seconds then CRL appears on the LCDindicating all the stored data being Cleared As shown in followi...

Page 12: ...ction as shown in following figure File menu bar Option menu bar Helpmenu bar 3 Software interface Menu Bar 20 21 NOTE 1 Double click the software shortcut on the desktop to start from menu the route...

Page 13: ...l time as shown on the computer Open measurement data file that is saved as the LAB format Save real time measurement data Import data stored in the anemometer to computer Export the saved data to Exc...

Page 14: ...ack If the unit connect with PC LCD will display symbol If the unit dis connect with PC symbol will not shown Button Function Click to start real time measurement Click to stop real time measurement C...

Page 15: ...f the unit is not working properly 1 Screen is blank Check the battery is inserted correctly Open the bat tery door on the bottom rear of the unit The symbols on the battery should match the corres po...

Page 16: ...or thinner to clean the unit casing which will especially erode the LCD surface just clean the unit lightly as needed with little clean water Never impact the unit or use on humidity condition Do not...

Reviews: