-4-
Thank you very much for purchasing this TV. To enjoy
your product from the very beginning, read this manual
carefully and keep it handy for easy reference.
INSTALLATION
CAUTION
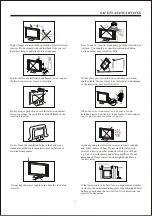
Locate the TV in the room where light does not strike
the screen
.
Total darkness or a reflection on the picture screen can
cause eyestrain. Soft and indirect lighting is recommended
for comfortable viewing.
Allow enough space between the TV and the wall to
permit ventilation.
Avoid extremely warm locations to prevent possible
damage to the cabinet or premature component failure.
This TV can be connected to AC 100-240 Volts. 50/60 Hz.
Never connect to a DC supply or any other power supply.
Do not cover the ventilation openings when using the TV.
directly
Never tamper with any components inside the TV, or any
other adjustment controls not mentioned in this manual.
All LCD-TVs are high voltage instruments. When you
clean up dust or water drops on the LCD PANEL or
CABINET, the power cord should be pulled out from the
receptacle, then wipe the TV with a dry soft cloth. During
thunder and lighting, unplug the power cord and antenna
cord to prevent damage to your TV. All repairs to this TV
should only be performed by qualified TV service personnel.
Earthing connection--- The apparatus shall be connected
to MAINS socket outlet with a protective earthing connection
MAINS plug or appliance coupler of the apparatus is used
as disconnect device, it should remains readily operable
SAFETY AND WARNINGS
Warning: Change or modifications to this unit not expressly
by the part responsible for compliance could void the user 's
authority to operate the Equipment.
NOTE:
This equipment has been tested and found to comply with
the limits for a Class B digital device, pursuant to Part 15
of the FCC Rules. These limits are designed to provide
reasonable protection against harmful interference in a
residential installation. This equipment generates, uses, and
can radiate radio frequency energy and, if not installed and
used in accordance with the instructions, may cause harmful
interference will not occur in a particular installation. If this
equipment does cause harmful interference to radio or
television reception, which can be determined by turning
the equipment off and on, the user is encouraged to try to
correct the interference by one or more of the following
measures:
- Reorient or relocate the receiving antenna.
- Increase the separation between the equipment and receiver.
- Connect the equipment into an outlet on a circuit different
from that to which the receiver is connected .
-Consult the dealer or an experienced radio TV technician
for help.
Shield cables must be used with this unit to ensure
compliance with the Class B FCC limits.
This symbol indicates that this productincorporates
double insulation between hazardous mains voltage
and user accessible parts. When servicing use only
identical replacement parts.
WARNING: To reduce the risk of fire or electric shock,
do not expose this apparatus to rain or cords.
Summary of Contents for LC19iH56
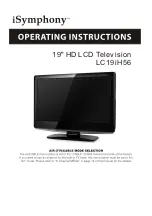
Page 1: ...19 HD LCD Television LC19iH56...
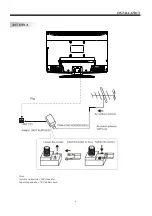
Page 9: ...ANTENNA Note Aerial connections IEC female Input impendance 75 unbalanced INSTALLATION 8...
Page 18: ...Symphony i Phone 1 800 710 7740 www isymphonyproducts com Ver 091204...
Page 19: ...Printed in China iSymphony Distribution and Sales 1 800 710 7740 www isymphonyproducts com...

