Mic-Fi Wi-Fi Microscope User’s manual
page 4
3.
Use of the Microscope
WARNING : IMPAIRMENT OF IMAGE OR SLOW VIDEO ARE THE RESULT OF A LOW BATTERY. BEFORE THE FIRST USE OF THE
MICROSCOPE, PLEASE CHARGE THE BATTERY FOR AT LEAST 12 HOURS.
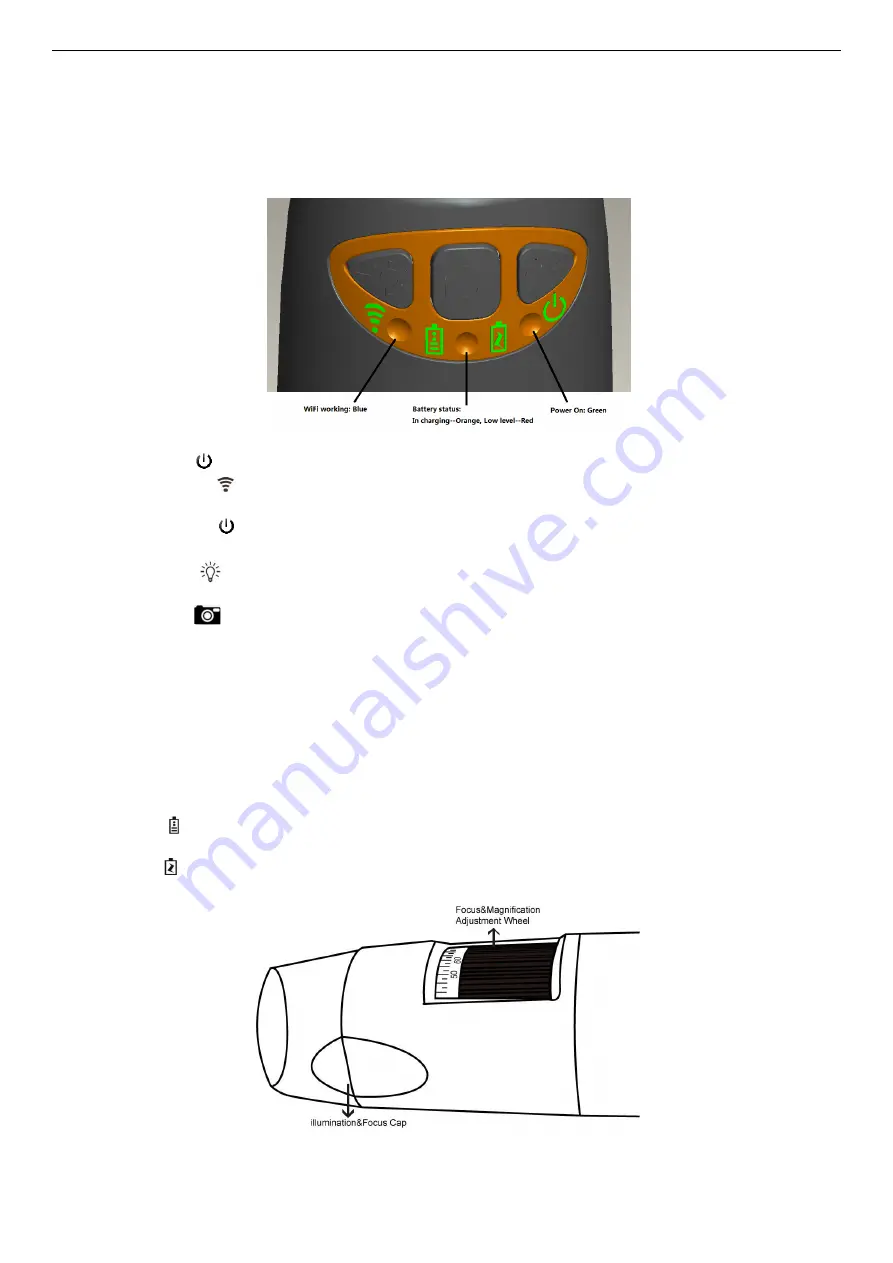
Wi-Fi: Press
for 2 seconds; the microscope will generate a Wi-Fi network
Wi-Fi Indicator
(
Blue LED
): Flashing light indicates data transmission; constant light indicates no data
transmission.
Power Indicator
(
Green LED
): Lights up when Wi-Fi power on or connected to PC or AC adaptor via MiniUSB
cable.
Led : Press
for 2 seconds to switch different LED (depend of the models); press + and – to increase or
decrease the intensity of light
Photo: Press
to capture the picture of the microscope image.
Snapshot Button: Every time after the successful connection of the WiFi microscope, you have to enable the
Snapshot feature on the App (The LED illumination will be off and then lights up again). The Snapshot only works
with the receiver when the App snapshot feature has been enabled.
3.1
Charging Instructions
1.
Connect the DC Adapter (plug the AC adapter into an AC outlet) or PC’s USB cable, it charges whether the power
switch is on Wi-Fi or OFF/USB.
We DO NOT recommend charging Wi-Fi Microscope while in use.
2.
Battery LED (
Orange
LED
or
Red LED
):
Red LED
when the battery level is low;
Orange
LED blinking
when the
battery is charging
3.
LED charge : When the battery is at fully charged, the battery LED
is
Orange
fix.


