background image

ITALGI s.r.l. – DUPLA – Use and maintenance manual 


7/28  

2.2 - Electric connections 


WARNING  !!!  For  your  personal  safety  all  the 
electrical connections and installation must be 
carried out by a trained electrician. 


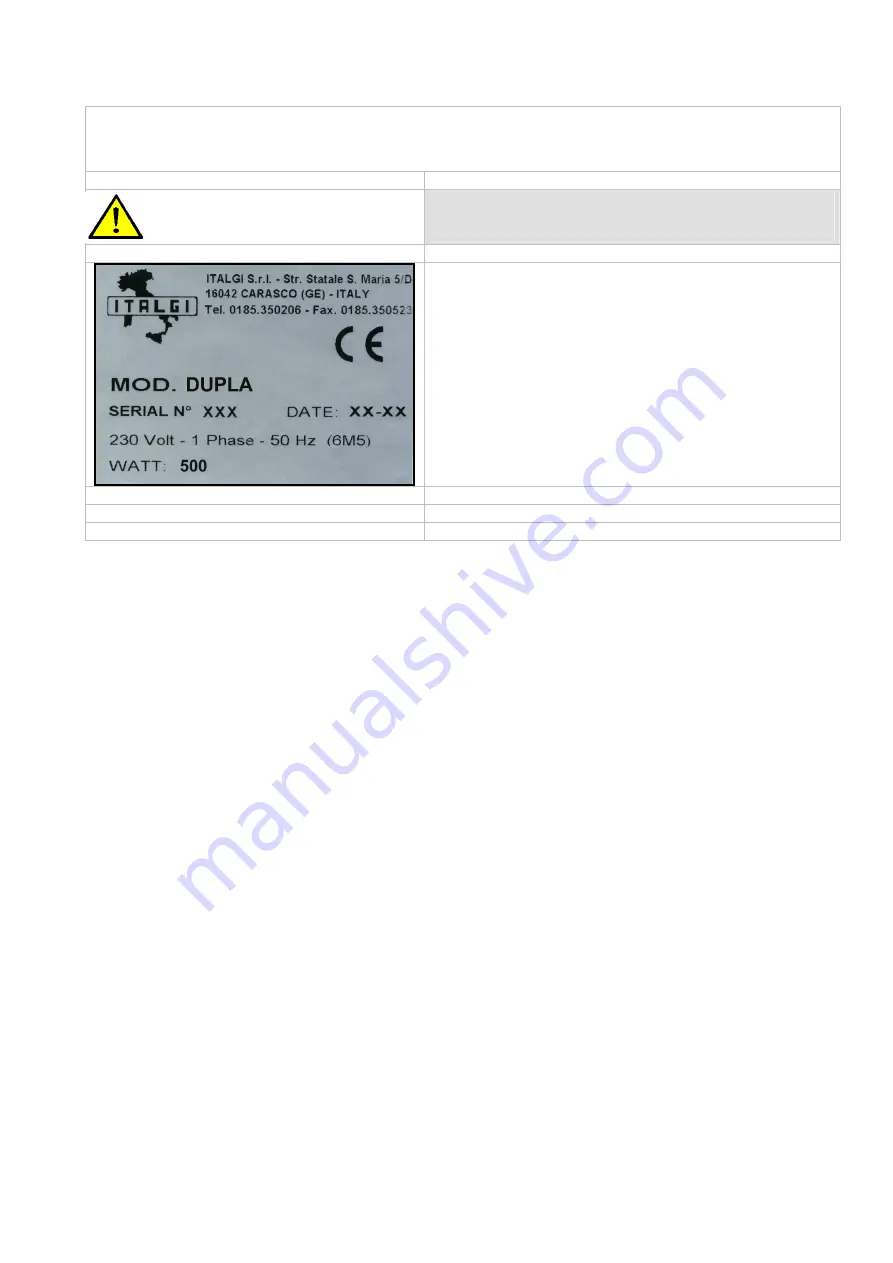
Verify that the electric power available is compatible with the 
electric  characteristic  of  your  machine,  as  reported  on  the 
identity plate placed on machine.  
 
Connect  machine  to  a  power  outlet  with  ground  wires  and 
equipped with a differential breaker. 


Summary of Contents for Dupla

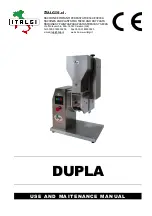
Page 1: ...MACHINES AND PLANTS FOR FRESH AND DRY PASTA M QUINAS Y PLANTAS PARA PASTAS FRESCAS Y SECAS Via Pontevecchio 96A 16042 Carasco GE Tel 0039 0185350206 Fax 0039 0185350523 e mail italgi italgi it web sit...

Page 2: ...ified by anyone after installation Always wear suitable clothes do not wear any unlaced jacket ties or loose clothes Always gather up your long hairs For your personal safety all the electrical connec...

Page 3: ...all users and a long life of machine just like all ITALGI machines The machine designed by ITALGI has been made to simplify both use and cleaning and it has been manufactured according to the latest h...

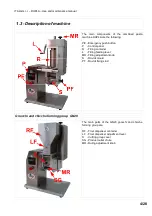
Page 4: ...tton P Control panel R Filling container L Filling feeding lever MR Filling adjustment knob S Ravioli mould PF Ravioli fixing stud Gnocchi and chicche forming group GN20 The main parts of the GN20 gno...

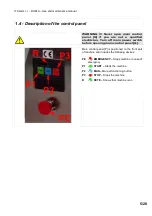
Page 5: ...lified electrician Turn off main power switch before opening main control panel Q Main control panel P is positioned on the front part of machine and includes the following devices PE EMERGENCY Stops...

Page 6: ...rizontal desk It must be strong enough to support the weight of the machine according with the technical data table WARNING Moving heavy machinery can be very dangerous Make sure that the forklift or...

Page 7: ...al connections and installation must be carried out by a trained electrician Verify that the electric power available is compatible with the electric characteristic of your machine as reported on the...

Page 8: ...leaning it 3 1 Making ravioli Open the cover 1 and insert the desired ravioli mould 2 as shown in picture Check that the ravioli mould 2 is properly inserted till the end of its seat this must allow t...

Page 9: ...any filament or crumb These pieces could obstruct the holes of the mould s stuffing distributor and they could compromise the proper filling of the ravioli The filling must not be fat or greasy as it...

Page 10: ...filling coming out stop the machine pressing the button P3 STOP to save from dirtying the mould For the first use of the day it is suggested to fill the distributor before beginning to make ravioli Th...

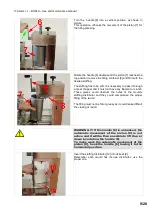
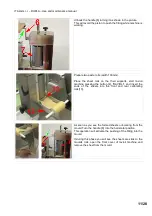
Page 11: ...art ravioli machine pressing the button 4 RAVIOLI and insert the ends of the sheets into the front and rear calibrating rolls 13 As soon as you see the formed sheets out coming from the mould Turn the...

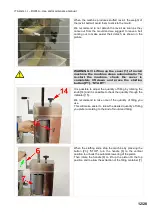
Page 12: ...completely lift down and press the starting button P1 START It is possible to adjust the quantity of filling by rotating the knob 14 and it is possible to check the quantity through the indicator 15 W...

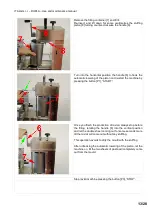
Page 13: ...ne by pressing the button P1 START Once you finish the production of ravioli always stop before the filling rotating the handle 6 into the vertical position and let the double sheet coming out for som...

Page 14: ...ons given by the producer of the product If you use dried potato flakes you can mix the ingredients in a mixer according to the proportions given in the table on the side The mixture will be ready in...

Page 15: ...roup till it is completely inserted into its seat inside the ravioli group Insert the fixing pin 9 into the hole 10 on the side of gnocchi group GN20 turning it till the end When the gnocchi group GN2...

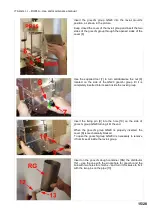
Page 16: ...r RG with the dough Insert the container RG by the back side of the machine taking care to insert properly the distributor 12 into the hole 14 as shown in the picture Push the filling container RG til...

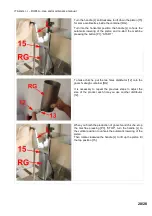
Page 17: ...oid the sticking of gnocchi Pull the lever LF to adjust the quantity of dispensed flour on the product The lever LF has three positions 1 If is it completely inserted the dispenser does not work 2 If...

Page 18: ...of production Start the machine pressing the button 4 RAVIOLI After some seconds gnocchi will come out through the chute SG To adjust the size of gnocchi turn the knob 16 on the top of the machine The...

Page 19: ...he vertical position to unhook the automatic lowering of the piston Then rotate clockwise the handle L to lift up the piston till the top position and to allow the extraction of the container 15 Remov...

Page 20: ...he button P1 START To make chicche put the two holes distributor 12 onto the gnocchi dough container RG It is necessary to repeat the previous steps to adjust the size of the product each time you use...

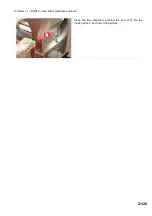
Page 21: ...ITALGI s r l DUPLA Use and maintenance manual 21 28 Close the flour dispenser pushing the lever LF into the inside position as shown in the picture...

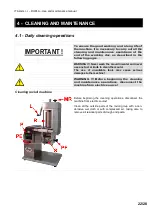
Page 22: ...er wash the mould in water and never use any tool or knife to clean the mould The use of unsuitable tools may cause serious damages to the machine WARNING Before beginning the cleaning and maintenance...

Page 23: ...to clean the mould The use of unsuitable tools may cause serious damages to the machine Turn the handle 6 into the vertical position to unhook the automatic lowering of the piston and turn the handle...

Page 24: ...in dish washing machine Cleaning gnocchi forming group GN20 Before beginning the cleaning operations disconnect the machine from electric source Clean all the external parts of the GN20 gnocchi group...

Page 25: ...kwise the handle L to lift up the piston till the top position to allow the extraction of the container RG Remove the container RG and disassemble the distributor 12 Clean both components with water o...

Page 26: ...se the nut 8 located on the side of the GN20 gnocchi group till it is released from its seat inside the ravioli group Remove the gnocchi group as shown in picture It is now possible to open the cover...

Page 27: ...d maintenance manual 27 28 4 2 Maintenance WARNING Before beginning the cleaning and maintenance operations disconnect the machine from electric source Combined pasta machine DUPLA does not require an...

Page 28: ...E 4 1 4 DESCRIPTION OF THE CONTROL PANEL 5 2 INSTALLATION TO BE CARRIED OUT BY TRAINED PERSONNEL 6 2 1 POSITIONING THE MACHINE 6 2 2 ELECTRIC CONNECTIONS 7 3 USE 8 3 1 MAKING RAVIOLI 8 3 2 GNOCCHI AND...

Reviews: