background image

iTALK VoIP-1 User Manual 

Setting up the VoIP-1 System 

 
1.


Remove the VoIP-1 device, wall mount power 
adapter, phone cord, and Ethernet cable from the 
packaging. 

2.


Connect one end of the blue Ethernet cable to your 
available internet connection. 

3.


Insert the other end of the blue Ethernet cable into 
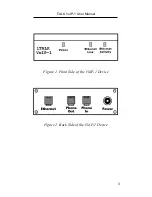
the VoIP-1 device in the socket labeled “Ethernet”. 

4.


Disconnect your telephone cord from the phone 
jack. 

5.


Connect one end of the black phone cord in the now 
empty phone jack. 

6.


Insert the other end of the black phone cord into the 
VoIP-1 device in the socket labeled “Phone In”. 

7.


Connect your telephone cord to the VoIP-1 device 
in the socket labeled “Phone Out”. 

8.


Insert the circular power plug coming from the wall 
mount power adapter into the VoIP-1 device in the 
socket labeled “Power”. 

9.


Plug the wall mount power adapter into a 120V AC 
outlet. 
 

If everything is working correctly a red light on the 
VoIP-1 device will come on indicating it has power. 
A few moments later the green Ethernet link light 
should come on indicating the device is linked to the 
internet. 


10.


Pick up the telephone handset and confirm that you 
hear a dial tone. 

Summary of Contents for VoIP-1

Page 1: ...Prepared for English 273 Instructor Joe Benge June 17 2005 iTALK VoIP 1 User Manual By David Watson Nathan Dyczkowski Mathew Bennett Khang Tran ...

Page 2: ...ur IP 4 Making a Regular Telephone Call 4 Making a VoIP Call by Entering an IP 5 Making a VoIP Call by Entering a Phone Number 5 Making a VoIP Call Using Speed Dial 6 Setting up the Address Book 6 Accessing the Address Book 6 Storing Information in the Address Book 7 Deleting Information in the Address Book 8 Contact Information 9 Warranty Information 9 Copyright 2005 iTALK Inc All Rights Reserved...

Page 3: ...erson who has a similar VoIP system All you need to do is connect the VoIP 1 box to your regular touch tone telephone and an internet connection and you will be making calls within minutes Included with the System VoIP 1 Device Wall Mount Power Adapter Black 2 m Phone Cord Blue 2 m Ethernet Cable User Manual What Else You ll Need A regular touch tone telephone An internet connection through a rout...

Page 4: ...e jack 6 Insert the other end of the black phone cord into the VoIP 1 device in the socket labeled Phone In 7 Connect your telephone cord to the VoIP 1 device in the socket labeled Phone Out 8 Insert the circular power plug coming from the wall mount power adapter into the VoIP 1 device in the socket labeled Power 9 Plug the wall mount power adapter into a 120V AC outlet If everything is working c...

Page 5: ...iTALK VoIP 1 User Manual 3 Figure 1 Front Side of the VoIP 1 Device Figure 2 Back Side of the VoIP 1 Device ...

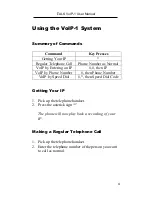
Page 6: ... Entering an IP then IP VoIP by Phone Number then Phone Number VoIP by Speed Dial then Speed Dial Code Getting Your IP 1 Pick up the telephone handset 2 Press the asterisk sign The phone will now play back a recording of your IP Making a Regular Telephone Call 1 Pick up the telephone handset 2 Enter the telephone number of the person you want to call as normal ...

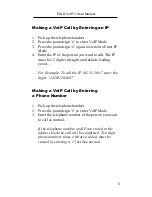
Page 7: ...gth and include leading zeroes For Example To call the IP 142 31 204 7 enter the digits 142031204007 Making a VoIP Call by Entering a Phone Number 1 Pick up the telephone handset 2 Press the pound sign to enter VoIP Mode 3 Enter the telephone number of the person you want to call as normal If the telephone number and IP are stored in the address book the call will be completed Ten digit phone numb...

Page 8: ... speed dial code and IP are stored in the address book the call will be completed Setting up the Address Book Accessing the Address Book 1 Get your IP see Getting Your IP on page 4 2 Enter your IP into the address bar of a web browser such as Internet Explorer The web page that comes up is stored on your VoIP 1 device This web page allows you to store phone numbers and speed dial codes with their ...

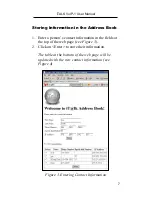
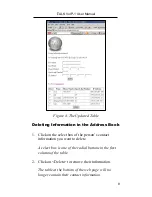
Page 9: ...ter a person s contact information in the fields at the top of the web page see Figure 3 2 Click on Enter to store their information The table at the bottom of the web page will be updated with the new contact information see Figure 4 Figure 3 Entering Contact Information ...

Page 10: ...ok 1 Click on the select box of the person s contact information you want to delete A select box is one of the radial buttons in the first column of the table 2 Click on Delete to remove their information The table at the bottom of the web page will no longer contain their contact information ...

Page 11: ... Information This iTALK product is not warranted against any defects in materials and workmanship iTALK does not certify that this product met its published specifications at the time of shipment No guarantee of correct operation of this device as expressed in the preceding document is given iTALK shall not be liable for any errors contained herein or for incidental or consequential damages in con...

Reviews:

Related manuals for VoIP-1