background image

4

ENGLISH

FRANÇAIS

SAFETY PRECAUTIONS FOR AIR COMPRESSOR

9.  CHECK FOR DAMAGED PARTS

.  Make frequent inspections for the correct 

function of components and safety mechanism.

10. REPLACEMENT PARTS

.  When servicing, use only identical ITC   replace-

ment parts and fasteners recommended by us.

11. EMPLOYERS 

must enforce compliance with the safety warnings and all other 

instructions in this manual.  Keep it available for use by everyone assigned to 

use this equipment.

SAFETY PRECAUTIONS FOR COMPRESSOR COMPONENTS

 

TANK SAFETY VALVE:  

This valve prevents damage to the air receiver if a 

malfunction in the compressor pump occurs.  It is factory pre-set at a limit  

specific to your particular model and adjustment.  Do not tamper with it.  This 

will automatically void your warranty.

 

PRESSURE SWITCH:  

The air pressure switch is factory pre-set for optimum 

performance.  Do not bypass or remove this switch.  Serious damage to  

equipment or personal injury could result from too high an air pressure.

 

MOTOR AND COMPRESSOR PUMP:  

Air compressors get hot during  

operation.  Do not touch the motor, discharge tubing, or compressor while it is 

running.  The compressor turns itself on automatically while the power is  

connected.

 

AIR TANKS:  

Over-pressurizing the air receivers, piping or tanks could cause 

it to explode or burst.  To protect from over-pressurizing, the compressor is 

equipped with a factory preset safety valve.  

Do not

 remove, make adjustments 

to or substitutions for this valve.  Perform a test of the valve from time to time: 

pull the ring on the valve to make sure that it operates freely.  If the valve does 

not operate freely, replace it before further use.  Never weld to, drill into, or 

change the air receivers in any way.

 

TAMPERING:

  If any of the components above are found to have been changed 

or tampered with, the warranty will be made void.  When servicing, we recom-

mend using only identical ITC replacement parts and any replacement parts 

used must have the same specification as the original equipment.

SPECIFICATIONS

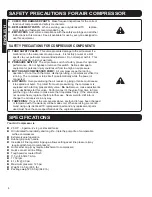
Your Air Compressor is

:

 

2.5 HP – 8 gallon –2 x 4 gal. stacked tanks

 

Oil lubricated for durability and long life - triple the pump life of comparable  

oil-free compressors

 

Extremely quiet operation

 

Rubber grip carry handle

 

Includes air line regulator & gauge- allows setting exact line pressure (may 

require attachment to compressor)

 

Oil breather cap (may require attachment to compressor)

 

Quick-connect air line fitting 

 

Tough powder coated finish

 

115 volt, 60Hz, 7 Amp

 

1 750 rpm 

 

4.1 cfm @ 90 psi

 

Maximum pressure: 125 psi

 

Weight: 36.5 kg (80.5 lb.)

 

Package weight: 38.5 kg (84.9 lb.)
Summary of Contents for 13426

Page 1: ...or future reference CONSERVEZ CE GUIDE Vous aurez besoin de ce guide pour les instructions de s curit les proc dures d utilisation et la garantie Conservez le dans un endroit s r et sec pour r f rence...

Page 2: ...When working wherever live electrical wires may be encountered try to ascertain whether there is a danger of shock Even so DO NOT TOUCH ANY METAL PARTS OF THE TOOL while using it Hold the tool only by...

Page 3: ...arts breakage of parts mountings and other conditions that may affect its operation Inspect screws and tighten any ones that are loose Any part that is damaged should be properly repaired or replaced...

Page 4: ...is connected AIR TANKS Over pressurizing the air receivers piping or tanks could cause it to explode or burst To protect from over pressurizing the compressor is equipped with a factory preset safety...

Page 5: ...r cooling Keep them and other parts free of dust or dirt that could interfere with cooling A clean compressor runs cooler and provides longer service Do not place anything on top of the compressor WAR...

Page 6: ...ow been properly disconnected from the air compressor unit You can now move the tank freely Installing the Air Tank 1 Turn the power switch off 2 Place the portable air tank in the appropriate positio...

Page 7: ...ndency to loosen up After two weeks tighten all nuts and bolts including head bolts Will not start Fuse blown or circuit breaker tripped Loose electrical connections Extension cord not correct Overhea...

Page 8: ...Bolt 18 O ring 58 Wheel 19 Crankcase Cover 59 Exhaust Pipe 20 Connecting Rod 60 Tank 2 21 Head Bolt 61 Rubber Foot 22 Crank Shaft 62 Head Bolt 23 Gasket 63 Exhaust Pipe 24 Washer 64 Leather Hose 25 Nu...

Page 9: ...t ITC distributor to determine those products that are covered by our over the counter warranty Any ITC tool that fails during normal use and within the specified warranty period and qualifies for ove...

Page 10: ...ION DOUBLE Cet outil est doublement isol Il est quip d une fiche polaris e Une lamelle de la fiche est plus large que l autre et elle ne s adaptera une prise de courant polaris e que d une seule fa on...

Page 11: ...ut entier si le travail que vous effectuez produit de la limaille m tallique de la poussi re ou des clats de bois Des lunettes de s curit sont appropri es dans les autres situations Portez un masque p...

Page 12: ...uilibre tout moment Ne vous penchez pas sur des machines qui sont en marche 9 V RIFIEZ POUR D CELER TOUTE PI CE ENDOMMAG E Effectuez souvent des inspections afin de vous assurer du fonctionnement corr...

Page 13: ...l anneau afin de vous assurer qu elle fonctionne librement Si la soupape ne fonctionne pas librement remplacez la avant de continuer d utiliser l appareil Ne soudez et ne percez jamais le r servoir d...

Page 14: ...Il est muni de palmes pour dissiper la chaleur permettant un refroidissement appropri Garder celles ci et les autres pi ces sans poussi re ou salet qui pourrait nuire au refroidissement Un compresseu...

Page 15: ...servoir d air portatif 3 Fermez la soupape 1 4 D connectez la soupape 2 5 Desserrez les sangles en caoutchouc pour lib rer le r servoir d air Le r servoir est maintenant d connect de mani re appropri...

Page 16: ...de l eau savonneuse sur tous les joints S il y a une fuite serrez les joints V rifiez ce que les crous et les boulons sont toujours bien serr s 250 HEURES OU SIX 6 MOIS le premier qui survient Changez...

Page 17: ...u 17 Indicateur de niveau d huile 57 Boulon de t te 18 Joint torique 58 Meule 19 Couvercle du carter d huile 59 Tuyau d chappement 20 Tige de pouss e 60 R servoir 2 21 Boulon de t te 61 Patte en caout...

Page 18: ...r de ITC La pr sente garantie ne s applique cependant pas aux d fectuosit s d coulant d un usage impropre ou abusif d une usure anormale ou de modifications effectu es hors de l usine S V P consulter...

Page 19: ...orized repair centre Opening this tool could invalidate your warranty Avertissement Toutes les r parations doivent tre ex cut es par le personnel d un centre de service autoris Si vous ouvrez cet outi...

Reviews: