background image

www.itec-audio.com     

7

POWER-BOX

ITEC POWER-BOX

7. Using a radio microphone

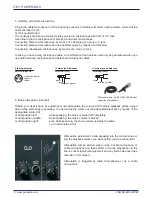
switch on the radio microphone and adjust the volume at the corresponding control (8).
See 13. General advice.

When using a radio microphone make sure the batteries are alright:
Using WM-702, WM-802 or TOA: This is the case when the green LED light shows;
when the red LED light shows the batteries should be replaced.

8. Separate control with two radio receiver  

Even when there are 2 built-in radio receivers the volume is normally adjusted with control (8). Should you 
need to adjust the receivers separately you can do so by using the optional control (12)  for the 2nd recei-
ver.

9. Connecting the ITEC LECTERN SUCCESS 

Cable connection: the POWER -BOX is connected to the LECTERN SUCCESS by means of the attached 
cable. At the POWER -BOX plug the signal cable in one of the CASS/CD LINE IN cinch sockets(5a), at the 
LECTERN SUCCESS plug it in one of the LINE OUT cinch sockets. The volume control CASS/CD (7) lets 
you choose how loud the POWER -BOX shall be in proportion to the LECTERN SUCCESS; the best way of 
doing this is to

· 

set up the LECTERN SUCCESS and the POWER -BOX/ES, connect them with the devices left off;

· 

connect the microphone to the LECTERN SUCCESS;

· 

switch on the LECTERN SUCCESS and adjust the volume;

· 

switch on POWER -BOX/ES and turn up the volume (control CASS/CD, 7) making sure


that there is no feedback.

Radio transmission: requirements: the LECTERN SUCCESS needs to have a radio transmitter, and the PO-
WER -BOX needs to have a radio receiver. The volume control WIRELESS (8) lets you choose how loud the 
POWER -BOX shall be in proportion to the LECTERN SUCCESS; the best way of doing this is to 

· 

set up the LECTERN SUCCESS and the POWER -BOX/ES, connect them with the devices left off;

· 

connect the radio transmitter to the LECTERN SUCCESS: plug an MC 12 in one of the LINE OUT  

 cinch 

sockets;

· 

connect the microphone to the LECTERN SUCCESS;

· 

switch on the LECTERN SUCCESS and adjust the volume;

· 

switch on the radio transmitter and POWER -BOX/ES and turn up the volume 


(control WIRELESS, 7) making sure that there is no feedback.

10. 12V DC – Output - jack

When using ITEC – supplementary devices, for example the CONFERENCE – SET, it is possible to use the 
supply voltage on this jack (10). Maximum current amounts 0,5A – an installed automatic safety device swit-
ches off when an overload takes place.

Summary of Contents for POWER-BOX

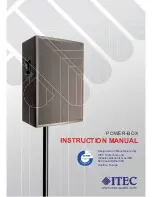
Page 1: ...POWER BOX INSTRUCTION MANUAL Designed and Manufactured by ITEC Tontechnik und Industrieelektronik GesmbH 8200 La nitzthal 300 Austria Europe...

Page 2: ...BOX as an independent audio system with cable or radio microphones with play backs from your tape recorder or CD player Use the POWER BOX as an additional and enriching sub system together with the I...

Page 3: ...crophone 6 6 Music attenuation optional 6 7 Using a radio microphone 7 8 Separate control with two radio receiver 7 9 Connecting the ITEC LECTERN SUCCESS 7 10 12V DC Output jack 7 11 Recording 8 12 Co...

Page 4: ...not appropriate intervention short circuits are possible which can lead to demage or to a heat growth By any intervention of a practitioner the device has to be unplugged After the carefully removal...

Page 5: ...to the ON OFF indicator light 2 As soon as you switch POWER BOX the battery will start recharging immediately with the mains indicator light 3 staying On and the ON OFF indicator light 2 disappearing...

Page 6: ...ouncement Attenuation will be started when using a radio microphone or cable microphone and takes effect on music playbacks via the line in socket external equipment and any built in devices tape reco...

Page 7: ...ing this is to set up the LECTERN SUCCESS and the POWER BOX ES connect them with the devices left off connect the microphone to the LECTERN SUCCESS switch on the LECTERN SUCCESS and adjust the volume...

Page 8: ...Not having used the POWER BOX for months we recommend you switch it on for several hours and then recharge it 14 General advice Do not place microphones and speakers close to each other in order to a...

Page 9: ...he bottom of the casing and exchange all three batteries Mind the poles Battery type 3 pcs Mignon AA 1 5 V Batteries are okay red LED blinking Batterie are low red LED permanently on ITEC WM 5100 hand...

Page 10: ...io microphone optional 12 Indicator lamp PEAK Limiter Indicator LED 17 THE INTEGRATED CD Player This CD Player is able to read following formats CD CD R CD RW MP3 The integrated USB data link enables...

Page 11: ...eat button a new time the display appears PLAY ALL The whole CD is played normal Programming It is possible to choose in which order the tracks on the CD should be played There to push the Prog button...

Page 12: ...mm Dimensions 400 x 580 x 415 mm W x H x D Weight 24 1 kg Color black shock resistant polyuretane coating UV resistant CONNECTIVITY Microphone Socket symetric XLR jack combo socket phantom power 12 V...

Reviews: