www.ittcontrols.com
contact@ittcontrols.com
14
Section 3
Model 581A Differential Pressure Switch
2.
perpendicular blows to avoid bending the shaft.
3. Check the calibration of the indicating switch over its entire range (refer
to
Scale Plate Installation and Removal, page 14
). If the indicating switch
is correctly calibrated, secure the pointer to the movement shaft by tap-
4. Test the pointer for tightness by moving the pointer from the zero to the
50% position manually, and then letting the pointer return freely to zero.
If the pointer indicates a shift, tap the pointer hub to tighten it to the
shaft.
Pointer Removal
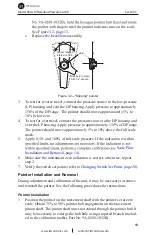
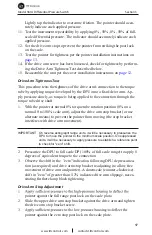
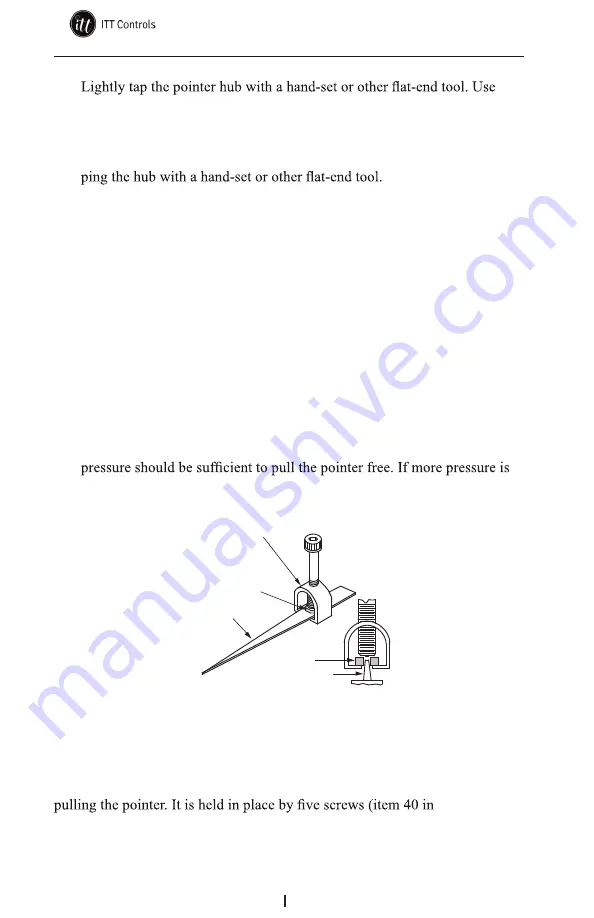
The pointer is removed with a pointer puller shown in Figure 3.3. This tool is
included in the calibration toolkit, Part No. 9A-0288-1032B.
To remove the pointer, perform the following steps:
1. Slide the pointer puller along the pointer until the pin protruding from the
tip of the screw in the pointer puller is directly over the movement shaft
and the arms of the pointer puller are directly under the pointer.
2. Gently turn the knurled head of the screw clockwise, pushing the pin
against the movement shaft and lifting the pointer with the arms. Finger
required, an Allen wrench (inserted into head of the screw) can be used.
However, care should be exercised to avoid breaking the pin.
HUB
MOVEMENT SHAFT
POINTER
HUB
POINTER PULLER
Figure 3.3—Pointer puller (Part No. 9A-0163-0005B)
Scale Plate Installation and Removal
During adjustments and calibration of the unit, it may be necessary to remove
and reinstall the scale plate. The scale plate is split to allow removal without
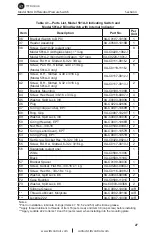
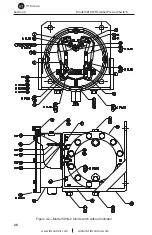
Figure 4.1,
page 25
) and two mounting tabs at 12 o'clock and 6 o'clock positions. The scale
plate halves rest against the top tab (12 o'clock), and slide beneath the bottom
tab (6 o'clock).


