Page 26 (52)
Ver 2_en_2022-06-27
Assembly Instructions
Envistar Flex
ivprodukt.docfactory.com
Order Portal
6.4.2 Join together with tensioning lugs
On larger sizes, tensioning lugs are used.
1. Put part of the tensioning lug on each side of the profile.
2. Put in the bolt and screw together with a washer under the nut.
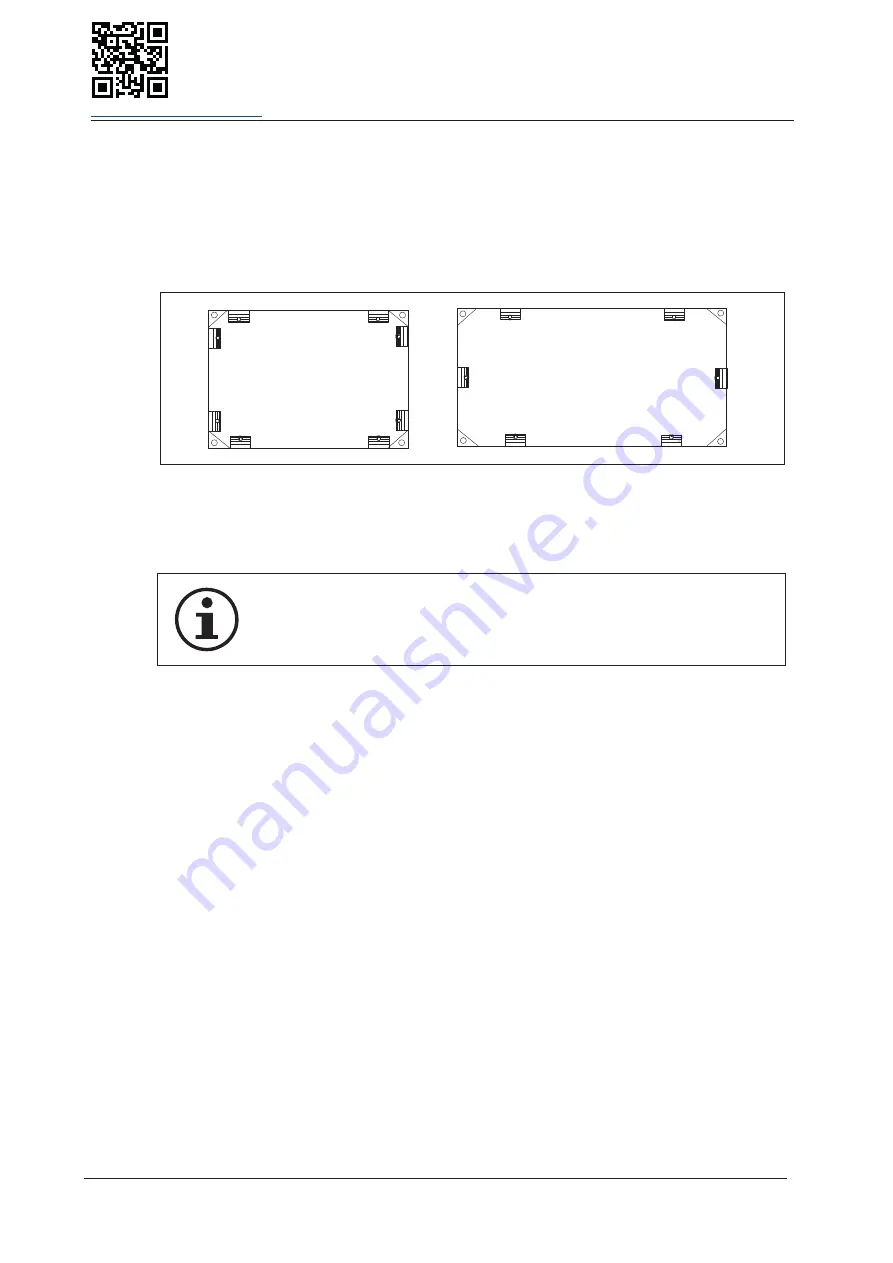
3. The tensioning lugs are located according to the following figure:
00059
1
2
Figure: Assembly of screw joints and tensioning lugs
1. Locating tensioning lugs, 1080-1550. 8 tensioning
lugs are fitted next to the screw joints.
2. Locating tensioning lugs, 1950-3150. 6 tensioning
lugs are fitted between the screw joints.
6.4.3 Join with guide pins
• Guide pins must always be set all the way from corner to corner on the
units parts, as well as also on the opposite side.
• If two flush parts are assembled vertically with guide pins, the pins must
be put through both parts (over the division).
Make sure the unit parts are completely pushed together.
1. Pull the parts together with tensioning straps.
2. Push the guide pin into the track of the profile, all the way to the other end of the unit.
3. Do the same on the opposite side of the unit.


