background image


English


5


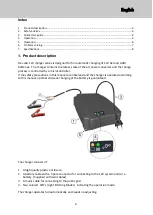
The output cable has 3 connections: 


Connect  (A)  to the battery or 12V system with one of the two included connection cables.  
Red is positive (+)  and black is minus (-). 
For fixed installations the connection cable with the Ring Tongues are recommended.  
The crocodile clamp connection cable should not be used to charge a battery in a fixed 
setup. 
 
Connector (B) is not used. 
 

Operation: 

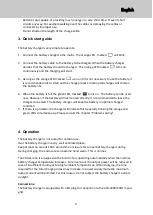
After the battery charger has been positioned or mounted correctly, connect the battery 
charger to the mains grid. The orange LED , marked  

  will start to blink slowly. 

This is the stand-by position indicating that no battery is connected. 

Connect the battery cable to the battery or the equipment in where the batteries are 
mounted.  After 3 seconds the battery charger has detected if the battery can be charged. 
If yes, it will start the charging process.  The orange LED marked  

  turns on.  Also some 

clicking sounds can be heard from inside the battery charger.  This is normal. 

If the battery is charged fully very recently, it is possible that the charging will not start. 
The orange LED will keep blinking slowly until the voltage has dropped enough to enable 
charging.  

Depending on the state of charge and the battery capacity the charging process will take 
minimal 1 and maximal 24 hours. 

End of charge: 

If the battery charger detects the battery is full, the green LED, marked  

  turns on. 

The battery may be disconnected and used. However, if the battery will not be used directly, 
it is recommended to leave the charger connected. The battery charger will keep the battery 
in optimal charged condition by applying a maintenance charge periodically.  Also here some 
clicking sounds can be heard from inside the battery charger. This is normal. 


Summary of Contents for c-Go 12V/10A

Page 1: ...1 c Go 12V 4A 12V 6A 12V 8A 12V 10A 12V 16A 12V 20A Battery charger Instruction manual GB...

Page 2: ...controlled by a microcontroller If the safety precautions in this manual are observed and the charger is operated according to this manual optimal and save charging of the battery is guaranteed The c...

Page 3: ...he cables are damaged the enclosure is open or the charger is damaged in such way that internal parts become accessible If the supply cord is damaged it must be replaced by the manufacturer its servic...

Page 4: ...it is recommended to leave the charger connected The battery charger will keep the battery in optimal charged condition 5 If there is a problem the charger will indicate this by quickly blinking the o...

Page 5: ...ted if the battery can be charged If yes it will start the charging process The orange LED marked turns on Also some clicking sounds can be heard from inside the battery charger This is normal If the...

Page 6: ...he battery life will be reduced significantly Charge a deep discharged battery as soon as possible Let the battery charger finish the charge cycle completely If the battery is not charged for a longer...

Page 7: ...Problem detected Count the number of flashes between the pauses and consult table 2 Table 2 Error codes Error code s Description Possible causes and solution s 1 2 3 Internal battery charger problem R...

Page 8: ...A 0 20A lllMaximum output power 60W 90W 120W 150W 240W 240W Efficiency 90 at full load and 230Vac Protections Polarity Output voltage Temperature Dimensions 210 x 175 x 65mm Charge status indication 2...

Page 9: ...EN IEC60335 2 29 2004 A2 2010 A13 2017 Household and similar electrical appliances Safety Part 2 29 Particular requirements for battery chargers EMC 2014 30 EU EN 55014 1 2006 A1 2009 A2 2011 Electrom...

Reviews: