User Guide
2.1
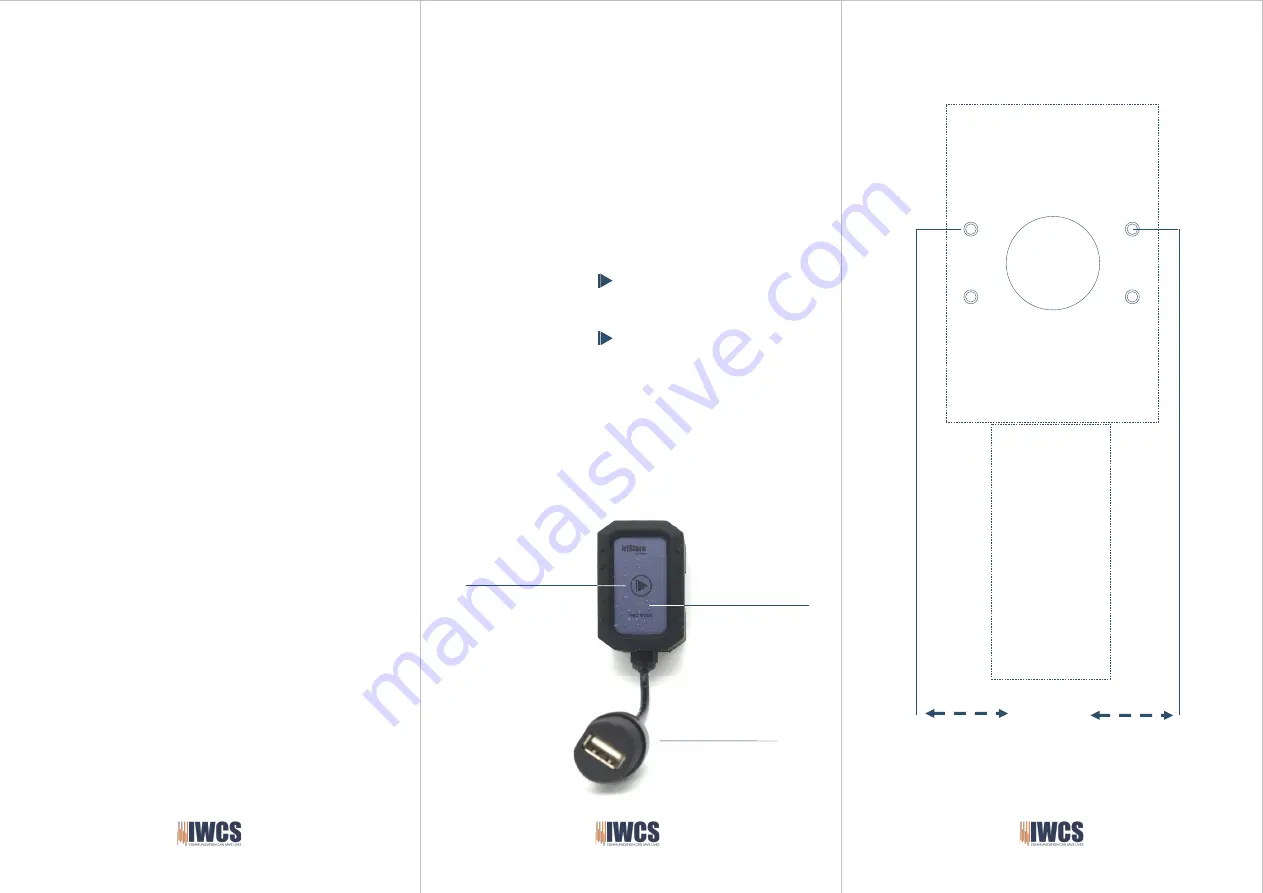
Connect your USB recording device ( 1 )
Being able to store any recordings, your iriStore must use a USB Flash Drive. Your
iriStore supports up to 32 GB USB Flash Drive.
Insert a USB Flash Drive into USB connector on your iriStore ( 1 )
2.2
Recording
When the USB Flash Drive is connected and the iriSound system is ON, your
iriStore is ready to record.
•
Press the Record
button ( 2 ) once to start recording
•
REC MODE LED ( 3 ) will light up red
-
indicates that recording is ON
•
Press the Record
button ( 2 ) to STOP recording
•
REC MODE LED ( 3 ) flashes one time to indicate that recording has
stopped and are saved
2.3
Play Back
Your recordings are stored as MP3 files on your USB Flash drive. Remove the USB
Flash Drive and insert the USB into a PC / MAC. The recorded files can now be
saved or played directly from your PC / MAC.
Installation Guide
1.1
Unpacking
Congratulations on your new IWCS product. Before you start installation, please
make sure that all parts are included in the box.
•
IWCS iriStore
•
Bracket
•
Installation Guide/User Manual (this)
•
IWCS Data Cable, if ordered.
1.2
Tools
Before installation please prepare the following tools:
•
Tape
•
3,3 or 2,5 mm drill bits
•
22 mm hollow drill bit
•
Drill
1.4
Installation
Place the Drill Template in an appropriate position. Make sure that the IWCS data
connector underneath, will have free access from the inside. Also make sure that
the USB connector ( 1 ) is placed so the USB Flash Drive can be connected easily.
Mount the iriStore in such way that the USB connector and USB Flash Drive will
not be stressed or forced in the bracket. Make sure to prevent excessive tension to
the USB wire.
Drill holes according to the drill Template (next page) and mount the bracket with
M3 Pan Head screws. Mount the IWCS data cable from iriSound in the rear con-
nector, and feed the wire through the M22 centre hole. Carefully press the iriStore
into the gap of the bracket, and make sure that the taps are fully inserted.
1.5
Connect to iriSound
Install the other end of your IWCS data cable in any port of your iriSound. Your
iriStore is now ready to use.
Note: If your system includes an iriSelect you need to make sure to connect to the
correct port on iriSound. Otherwise the correct channels will not be recorded.
REC / PLAY button ( 2 )
REC indicator ( 3 )
USB Connector
Keep this space free
Keep this space free
1.3
Drill Template
Dia 22,0 mm
D
ri
ll
4
x
3
,3
m
m
a
nd
us
e
se
lf
-
ta
pp
in
g
pa
n
he
ad
sc
re
w
s
w
it
h
fl
at
h
ea
d
OR
dri
ll
4
x
3
,3
m
m
a
nd
us
e
M
3
m
ac
hi
ne
s
cre
w
s
w
it
h
a
nu
t a
nd
pa
n
he
ad
sc
re
w
s
w
it
h
fl
at
h
ea
d
Either or
X 4


