background image

Support: 855-473-7449 or 408-943-4100                                     Email: support@ixsystems.com

Page 5

4  Install Drive Trays

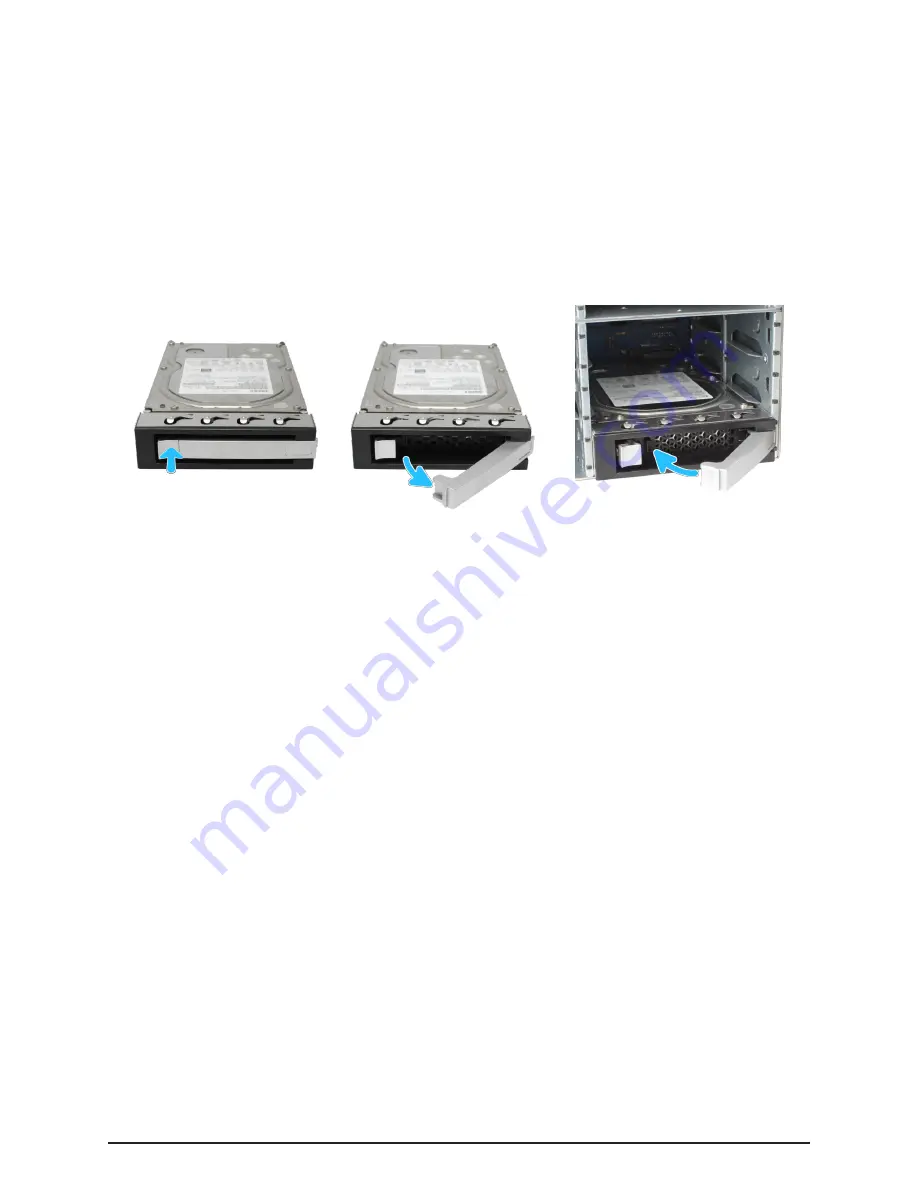
Drives are mounted in drive trays, which are then installed in drive bays in the ES24 chassis� 

Each drive bay in the chassis has two indicator lights to the right of the tray� The upper light is blue when the 

drive is active or a hot spare� The lower light is solid red if a fault has occurred� 

Press the silver button on the drive tray to open the latch� Carefully slide the tray into a drive bay until the right 

side of the latchtouches the metal front edge of the chassis, then gently swing the latch closed until it clicks into 

place� 

All drive bays must be filled to maintain proper air flow for cooling. If fewer than 24 drives are connected, filler 

blanks must be placed in the empty bays�

Summary of Contents for TrueNAS ES24

Page 1: ...TrueNAS ES24 Expansion Shelf Basic Setup Guide Version 1 9...

Page 2: ...nts 1 Unpacking the Unit 1 2 Become Familiar with the ES24 System 2 3 ES24 Rail Kit Assembly 3 3 1 Separate Cabinet Rails from Rack Rails 3 3 2 Mount Cabinet Rails 3 3 3 Mount the Rack Rails 3 3 4 Mou...

Page 3: ...tain proper air ow for cooling Two 3 meter Mini SAS HD to Mini SAS HD cables One Serial Cable Accessory kit with 2 IEC C13 to NEMA 5 15P power cords 2 IEC C13 to C14 cords and a set of velcro cable ti...

Page 4: ...for power 1 locate ID 3 and fault 4 The fault light illuminates during the initial power on self test POST or when the TrueNAS software generates an alert On the back panel is the serial number 1 two...

Page 5: ...net rail on the other side A TrueNAS ES24 requires 4U of vertical rack space The rack rails are installed in the bottom 2U of the total 4U height The inner rack rail must be unlocked and retracted bef...

Page 6: ...both inner rails outwards from the rack until they lock in place Align the cabinet rails with the inner rack rails and slide them into the rack rails until they are fully seated When both cabinet rai...

Page 7: ...lue when the drive is active or a hot spare The lower light is solid red if a fault has occurred Press the silver button on the drive tray to open the latch Carefully slide the tray into a drive bay u...

Page 8: ...5 Connect Power Cords Do not plug the power cords into a power outlet yet Connect a power cord to the back of one power sup ply Place the cord in the plastic clamp and press the tab into the latch to...

Page 9: ...into power outlets Wait two minutes for the drives to start If the TrueNAS system is on it can remain on while the expansion shelf is connected The ES24 is compatible with several TrueNAS systems Typ...

Page 10: ...Support 855 473 7449 or 408 943 4100 Email support ixsystems com Page 8 6 2 M50...

Page 11: ...s com docs 8 Contacting iXsystems For assistance please contact iX Support Contact Method Contact Options Web https support ixsystems com Email support iXsystems com Telephone Monday Friday 6 00AM to...

Page 12: ...Support 855 473 7449 or 408 943 4100 Email support ixsystems com Page 10...

Reviews: