20
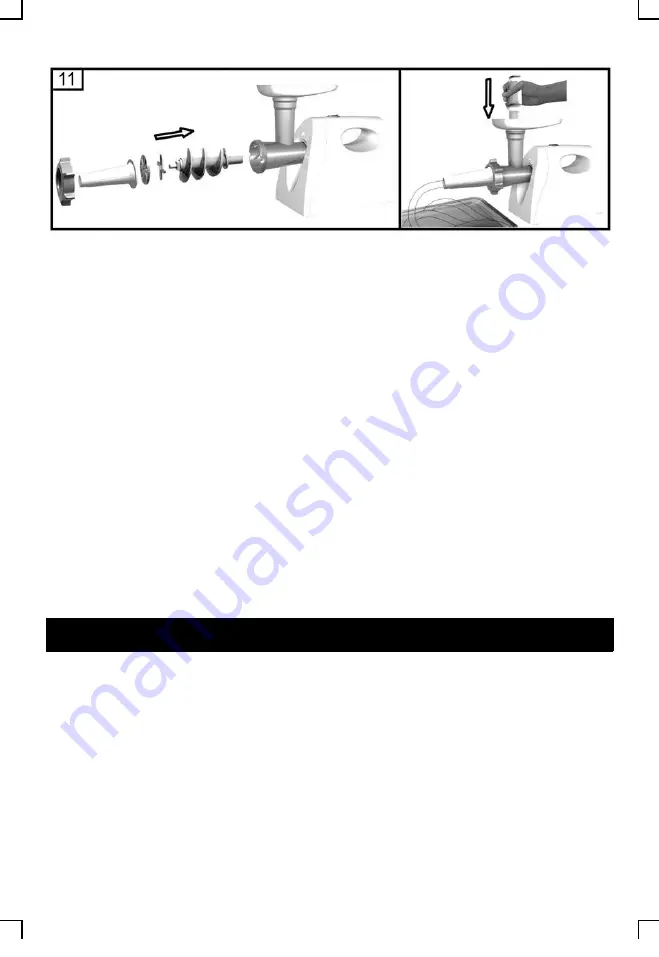
• This accessory is for use once you have minced and tasted your meat.
• Put the ingredients in the tray. Use the pusher to gently push the meat into the head tube.
• Put the sausage skin in lukewarm water for 10 minutes. Then slide the wet skin onto the
sausage filler leaving about 5cm hanging over the end.
• Start the appliance and press down with the pusher until the meat shows at the end of the
sausage filler and then stop the appliance.
• Make a knot in the overhanging end of the sausage skin. Push the knot up against the end of
the filler tube to avoid any air being trapped in the sausage skin.
• Start the appliance again and keep up the supply of sausage meat. The sausage skin will fill
with meat. To avoid overstretching the skin, do not make your sausages too fat.
• This job is more easily done by two people, one to feed the meat and the other to support
and control the sausage skin.
• When all the sausages meat has been used, stop the appliance, pull the remaining sausage
skin off the filler tube and tie a knot.
• Push the minced meat into the cutter housing. If the skin gets stuck onto the sausage filler,
wet it with some water.
TIP
: If the skin gets stuck onto the sausage filler, wet it with some water.
Making Tomato Juice
1. Place the plastic screw locking ring into the sleeve (fig.1).
2. Place the gauze into the sleeve next to the plastic screw locking ring (fig.2).
3. Put the fixing ring through the sleeve and make it at the end of the sleeve (fig.3).
4. Place the worm shaft into the head, long end first, and turn to feed the worm shaft slightly
until it is set into the motor housing (fig.4).
5. Insert the shaft of the worm shaft into the central axis of the screw (fig.5).
6. Put the whole sleeve along with the fixing ring through the screw, then move the fixing
ring clockwise so that it being fastened tightly (fig.6).
7. Put the plastic juice tray through the sleeve and make it on the suitable position (fig.7).
8. Insert the plastic screw into the hole of the sleeve, then move it clockwise until it is
properly fastened. Then place the plastic cover onto the sleeve (fig.8).
Now the appliance is ready for juicing.
Summary of Contents for MG-2050R
Page 2: ...1 Περιεχόμενα Contents GR Σελίδες 2 13 EN Pages 14 22 ...
Page 25: ...24 ...


