July 13, 2017
11
Chimney pipe installation
The chimney pipe is a set of single wall or double wall flue pipes
and installed in-between the stove collar and the chimney
thimble. The single wall chimney parts are sold at most
hardware store but these are not approved nor certified. It is
therefore recommended to follow the minimum clearances to
combustible (see page 6). Moreover, there is a series of rules
which can be found in the installation codes for solid fuel
appliance.
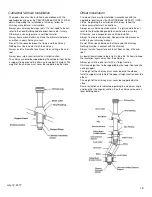
Double wall chimney pipe
The stove was designed and tested with a
single wall
chimney pipe with an heat shield.
However, it is possible
to install a 6 inches (15.2 cm) double wall certified chimney
pipe.
ATTENTION
•
For the minimum clearance between combustible
materials and double wall chimney pipe, see the
manufacturer manual.
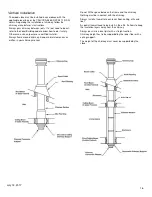
Single wall chimney pipe
Single wall chimney pipe sections must have a 6 inches
diameter which corresponds to the diameter of the flue
collar and they must be made of steel with a minimum
thickness of 22 gauge 0.029 inches (0.85 mm).
to reduce
the clearance of 50% (18’’ to 9’’) it is recommended to
Install a metal heat shield covering straight and elbow
sections with a space of 1 inch (25.4 mm) between the
shield and the pipe.
ATTENTION
•
If an heat shield is not installed, you must move away
the stove to keep an 18 inches (45.7 cm) clearance
between combustibles materials and the chimney pipe.
The horizontal section must have an upward slope of at
least 1/4 inch (6.35 mm) by feet (30 cm) and must not
exceed 36’’ of total horizontal length (91.4 cm).
•
Clearance to combustible (for example plaster board
roof) must be 18 inches (45.7 cm) or more for single wall
chimney pipe.
•
Clearance to combustible must follow the pipe
manufacturer indication’s for approved double wall
chimney pipe,.
ALL PIPE SECTIONS MUST BE CLEAN AND IN GOOD
CONDITION, AND THEY MUST BE APPROVED FOR
CORDWOOD FUEL.
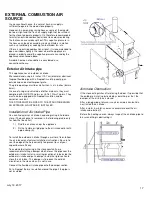
How to set the pipe sections
Make an installation overview of all sections and elbows (if
necessary) to ensure that you meet the clearances and the
horizontal sections inclination. Check if you have all the
necessary parts for the final installation.
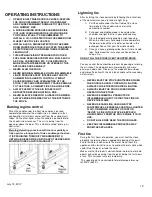
For direct vertical installation, you will need:
•
1 vertical section of 24 inches or more to go above
the warmer oven head;
•
1 telescopic chimney pipe section of the right length
allowing you to connect the last chimney pipe
section to the chimney collar.
Note
Additional sections can be used for higher roof.
For horizontal run installation you will need:
•
1 vertical section of 24 inches or more to go above
the warmer oven head;
•
1 x 90° elbow or 2 x 45°elbows.
•
chimney pipe section(s) of the right length. The
total length of the section(s) must be less then 36’’
inches.
Note
For better draft performance, two 45 degrees
elbows are preferable, with or without straight section
in between.
1. Disassemble everything and restart screwing the pieces
by starting from the stove to the roof chimney collar.
2. Insert the flue pipe entirely into the stove collar up to the
rolled rim
.
3. Screw the pipe on the stove collar with a minimum of 3
screws in the holes provided for this purpose.
ATTENTION
It is mandatory to fix the pipe on the stove
collar and at each joint with a minimum of 3 screws.
4. Install all the next sections up to the roof chimney support
and screw every chimney pipe parts with 3 screws.
DO NOT CONNECT THIS UNIT TO A CHIMNEY FLUE
SERVING ANOTHER APPLIANCE.
CONNECTOR PIPES SHOULD NEVER PASS THROUGH
THE CEILING, THROUGH A WALL, IN A CLOSET, IN AN
ATTIC OR OTHER ENCLOSED AREAS THAT COULD
CAUSE HEAT BUILD UP. IF YOU NEED TO PASS
THROUGH COMBUSTIBLE MATERIALS, MAKE SURE
THAT YOUR INSTALLATION COMPLIES WITH
CAN/CSA-B365.


